Showing posts with label Burial Clothing. Show all posts

Sunday, March 12, 2017

Violet Gown

 
Good evening beautiful people!

Wow talk about drama trying to get this pattern up! The card reader in my PC decided it would be a great time to not read cards! I had to get Mr Mamma to open it up and sort it out for me. Thankfully, so far so good. Fingers crossed we have no further issues. I guess when you use a computer daily it's bound to have some issues eventually, especially after 2 years!

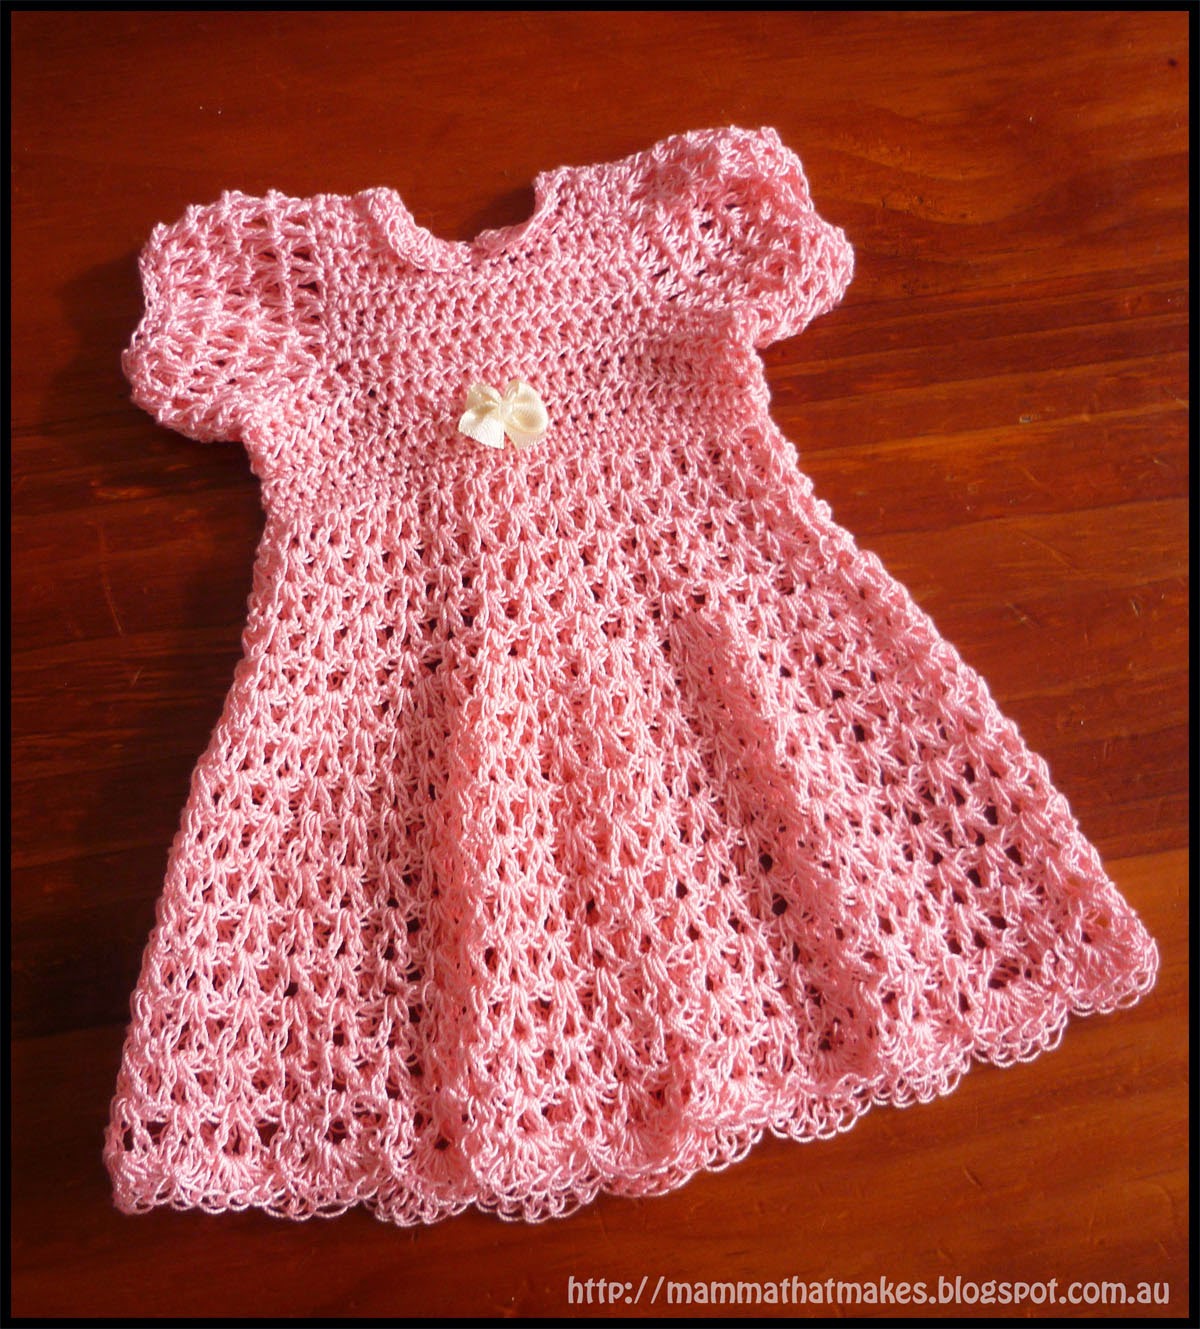
So without further ado, here is the Violet gown! Lovely ripples paired with picots make this dress an absolute stunner. I love that it is soft and delicate but also packs a little more UMPH in the visuals. It's a very quick dress too with easy repetitions. Sized as it it'll fir 26-28 Weeks gestation and is fully open at the back. I hope you love making this one as much as I did!


Violet Gown

Supplies:
3.5mm hook
4ply Fingering weight yarn
Buttons for closure (2-3)

Special Stitches:
Picot: ch3, slst into the 3rd chain from hook.

Sized To Fit:
26-28 Weeks Gestation.

Start with main colour.

1: Ch36, dc in the 3rd chain from hook and each across. - 34dc

2: Ch3, turn, 2dc in the next stitch, *dc in the next stitch, 2dc in the next stitch*, repeat across. -51dc

3: ch3, turn, dc in the next stitch, 2dc in the next stitch, *dc in the next 2 stitches, 2dc in the next stitch*, repeat across. -68dc

4: Ch3, turn, dc in the next 11 stitches, skip the next 14 stitches, ch4, dc in the next 16 stitches, ch4, skip the next 14 stitches, dc in the last 12 stitches. -40dc, 8ch

Change to contrasting colour.

5: Ch1, turn, sc in each stitch and chain across. -48sc

6: Ch1, turn, 2sc in the next stitch, *sc in the next stitch, 2sc in the next stitch*, repeat across. -72sc

Change to main colour.

7: Ch3, turn, dc in the next 4 stitches, skip the next 2 stitches, dc in the next 4 stitches, *ch2, dc in the next 4 stitches, skip the next 2 stitches, dc in the next 4 stitches*, repeat across until there are 7 stitches left, skip the next 2 stitches, dc in the next 2 stitches, 2dc in the next stitch, dc in the last stitch.

8: Ch3, turn, dc in the next stitch, 2dc in the next stitch, dc in the next 2 stitches, skip the next 2 stitches, *dc in the next 4 stitches, ch2, dc in the next 4 stitches, skip 2*, repeat across until there are 4 stitches left, dc in the next 2 stitches, 2dc in the next stitch, dc in the last stitch.

9: Ch3, turn, dc in the next stitch, 2dc in the next stitch, dc in the next stitch, *skip the next 2 stitches, dc in the next 4 stitches, ch2, dc in the next 4 stitches*, repeat across until there are 7 stitches left, skip the next 2 stitches, dc in the next 2 stitches, 2dc in the next stitch, dc in the last 2 stitches.

10-11: Repeat rows 8-9

12: Ch3, turn, dc in the next stitch, 2dc in the next stitch, dc in the next 2 stitches, *skip the next 2 stitches, dc in the next 3 stitches, 2dc in the next stitch, ch2, 2dc in the next stitch, dc in the next 3 stitches*, repeat across until there are 6 stitches left, skip the next 2 stitches, dc in the next 2 stitches, 2dc in the next stitch, dc in the last stitch.

13: Ch3, turn, dc in the next stitch 2dc in the next stitch, dc in the next stitch, *skip the next 2 stitches, dc in the next 5 stitches, ch2, dc in the next 5 stitches*, repeat across until there are 7 stitches left, skip the next 2 stitches, dc in the next 2 stitches, 2dc in the next stitch, dc in the last 2 stitches.

14: Ch3, turn, dc in the next stitch, 2dc in the next stitch, dc in the next 2 stitches, *skip the next 2 stitches, dc in the next 5 stitches, ch2, dc in the next 5 stitches* repeat across until there are 6 stitches left, skip the next 2 stitches, dc in the next 2 stitches, 2dc in the next stitch, dc in the last stitch.

15-18: Repeat rows 13-14 twice.

Change to contrasting colour.

19: Complete this row crocheting in the back loops only of the stitches. Ch2, turn,*hdc in the next 2 stitches, dc in the next 4 stitches, hdc in the next 2 stitches, sc in the next stitch, sc in the ch2 gap, sc in the next stitch* repeat across, sc in the last 2 stitches.

20: ch2, turn, hdc in each stitch across,

21: ch1, turn, sc in the next stitch, *picot, sc in the next 2 stitches*, repeat across, sc in the last stitch. End off, weave in ends.

Sleeves:
1: With main colour, join yarn to any unworked stitch on the sleeve, ch2, hdc evenly around the arm hole for 26 stitches, join to the first hdc.

2: Ch2, hdc in each stitch around, join to the first hdc.

Change to contrasting colour

3: Ch1, *sc in the next 2 stitches, picot*, repeat around, join to the first sc.

End off and weave in all tails.

Attach buttons to the back of the dress, or ties if that's what you like.


Monday, June 27, 2016

Shylo Jacket - Free Prem Crochet Pattern


Hello lovlies!

Wow, I know, I know, its been MONTHS!

I've been so flat out. The kids have kept me super busy, and I've started teaching at the local community house. Not to mention my new journey into Norwex, a bunch of fundraisers and some awesome community events I've been involved in! Crazy insane is putting it lightly.

I am however, super excited to bring you a new pattern. So glad to have the time to actually work on this. I have so so many ideas, so being able to grab one and turn it from idea into item has been a nice change.


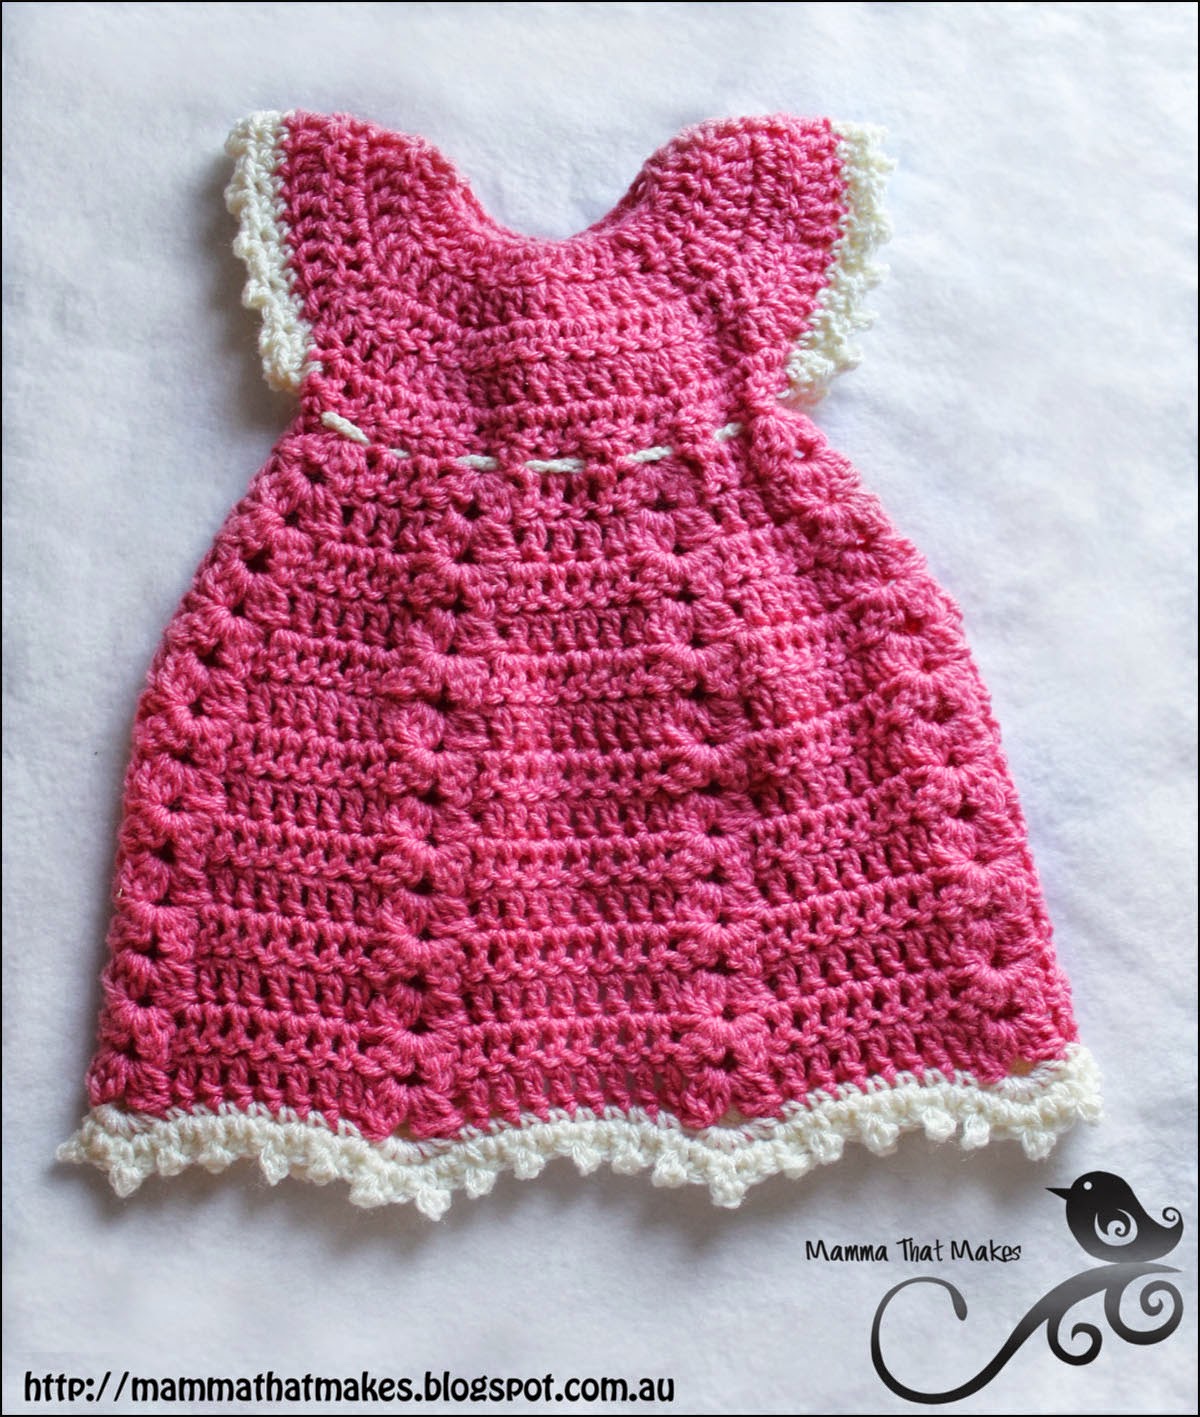
This little jacket is a dream to work up. It uses the V Puff stitch, and if you haven't tried this one yet, it's a lot of fun. Instructions on making a puff are below. It will fit a bub of 28-30 weeks and takes no time at all to make. I've done mine in pink, but I think it would really work in any colour and for either gender.

Also, big apologises for the photos. I've been reduced to the phone on my camera, my card reader on the PC has decided to stop working and I'm waiting to get a replacement.


Shylo Jacket

Size: 28-30 Weeks gestation
Hook: 3.5mm
Yarn: Bella Baby Layette (Discontinued) DK/8 ply in a main and contrasting colour
Extra Supplies: 2 buttons, 2 stitch markers

Puff [yo, insert hook into st, draw up loop with some slack in the stitch] 3 times in the same stitch, making sure all sts are the same size; yo and draw through all 7 loops on hook.

1. ch45, hdc in the 2nd chain from hook and the next 2 chains, *2hdc in the next stitch, hdc in the next 3 stitches*, repeat across. (55)

2. ch2, turn, *hdc in the next 4 stitches, 2hdc in the next stitch*, repeat across. (66)

3. ch2, turn, *hdc in the next 5 stitches, 2hdc in the next stitch*, repeat across. (77)

4-5. ch2, turn, hdc in each stitch across. (77)

6. ch2, turn, hdc in the first 10 stitches, ch2, skip 16 stitches, hdc in the next 25 stitches, ch2, skip 16 stitches, hdc in the last 10 stitches. (45 stitches, 4 chains)

7. ch2, turn, hdc in each stitch and chain across. (49)

8-10, ch2, turn, hdc in each stitch across. (49)

11. ch2, turn, hdc in the first 3 stitches, *skip 2 stitches, (puff, ch2, puff)in the next stitch, ch1*, repeat 14 more times, skip 1 stitch, hdc in the last 3 stitches.

12. ch1, turn, sc in the first 3 stitches, *sc in the ch1 space, 2sc in the ch2 space*, repeat across, sc in the last 3 stitches. (49)

13-16. Repeat rows 11-12

17. ch1, turn, sc across. End off yarn and weave in tails.

Sleeves.
1. Join main colour to any unworked stitch on the sleeve hole (preferably near the pitt area) and ch2, hdc 20 times evenly around the arm hole, join.

2-3. ch2, hdc in each stitch around, join.

4-5. ch1, sc in each stitch around, join. End off yarn.

Repeat 1-5 for second sleeve.

Place your stitch markers in the positions you want your buttons to be in.

READ ALL OF THIS SECTION BEFORE STARTING IT:
Join main colour to the bottom left corner of the jacket, ch1, sc evenly up the front opening of the jacket, around the neck hole and back down the right hand side of the jacket to the corner.

NOTE::: When you reach the point where your next stitch is opposite a stitch marker, you need to make button holes. To do this SC into the stitch, chain 3 (or more, or less, depending on your button size) and sc back into the same stitch to create a loop, then continue on as above. You will make 2 loops in total. My original buttons needed a ch3, but the ones I finally went with (flowers pictured) needed a ch6. Just play with it to see how many you will need.

End off main colour and weave in ends.

With contrasting yarn: sc around each sleeve and the bottom of the jacket.

Attach buttons. Weave in all ends.

FINISHED MEASUREMENTS
Bottom 15cm across
Sleeves 6.5cm wide
Shoulder to bottom 16.5cm long
Armpit to bottom 10cm long

Wednesday, July 15, 2015

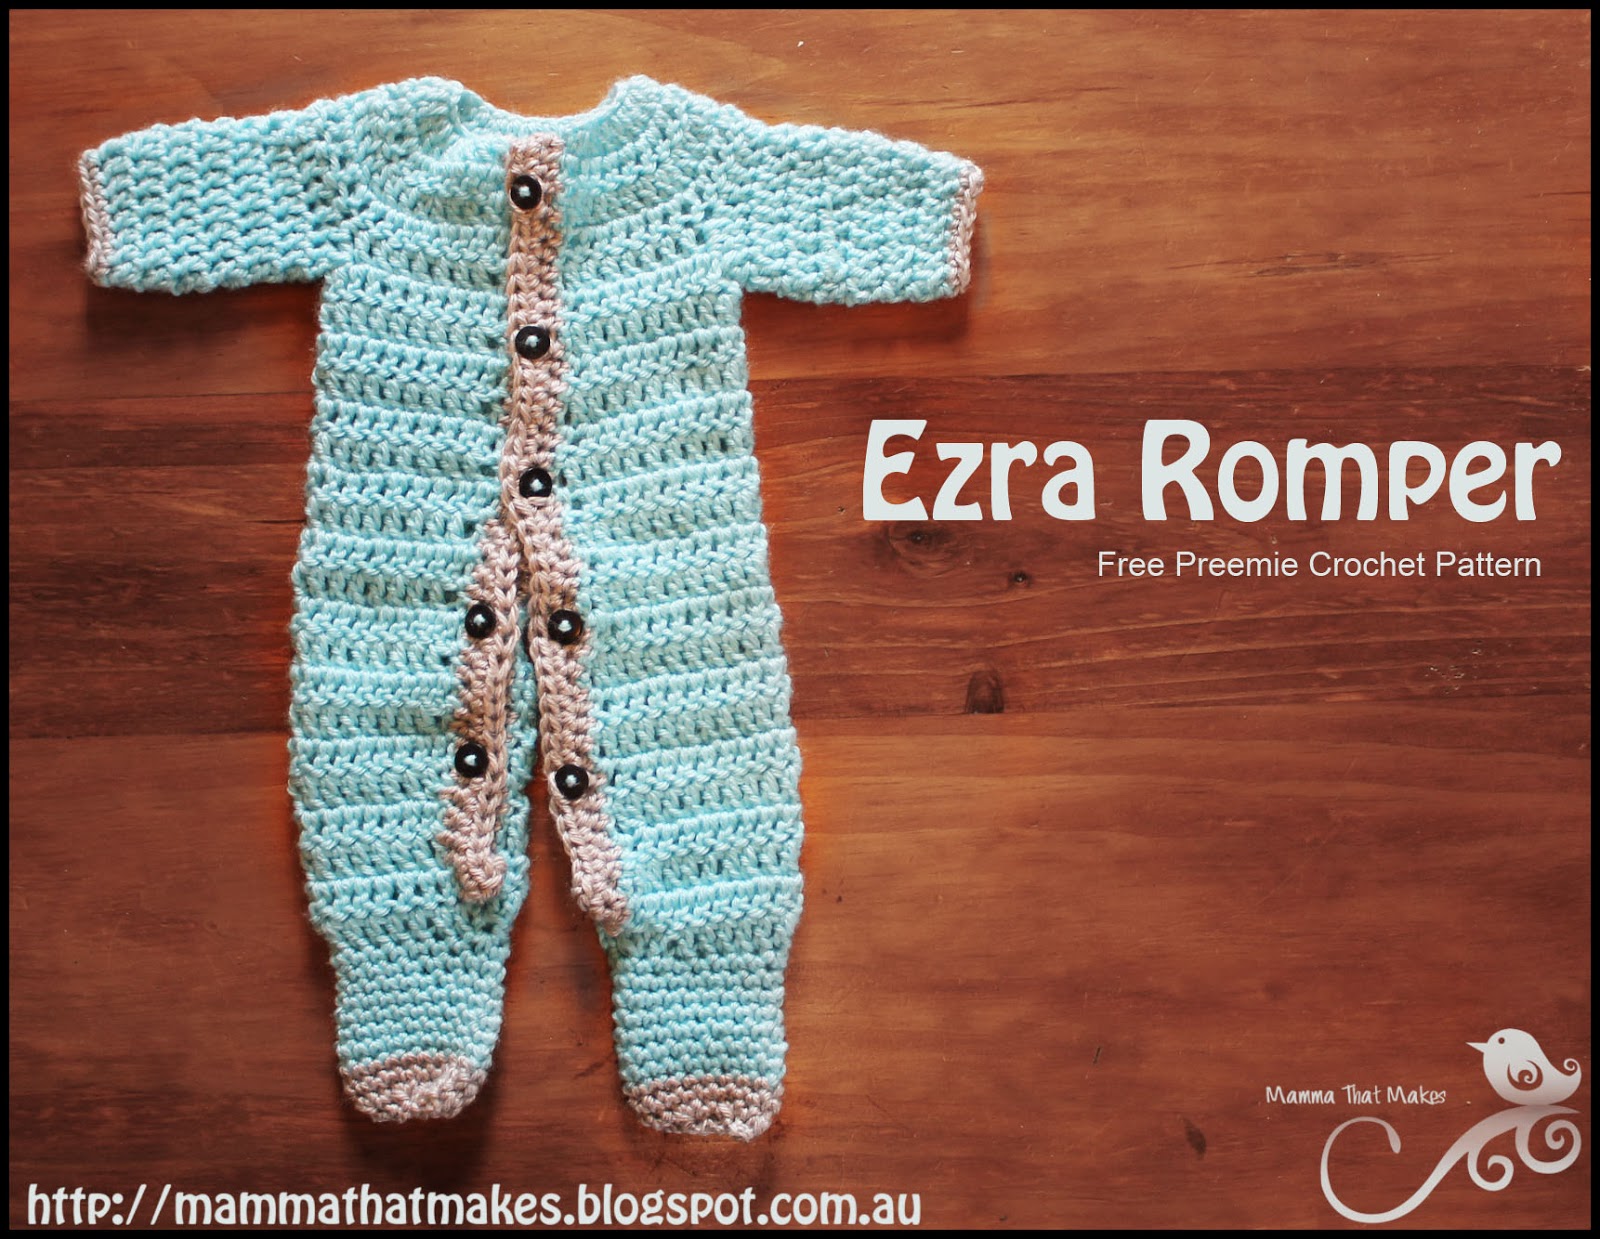
Ezra Romper - Free Crochet Pattern


Hello beautiful people!

This weeks pattern, if Im totally honest here, took me longer then I expected to work up. I think in total I ripped it out at various stages about 15 times before deciding it was how I wanted it. Im not sure why, because the end pattern is pretty straight forward and simple enough to follow. In fact, it would be easy for an advanced beginner to follow along too which is great news for everyone!

I asked last month via my Facebook Page for any suggestions for more boy items. I know I have a handful, but they are still sorely lacking in the world of prem patterns. An open at the front full one piece romper was requested a few times, and so that was my first stop. This romper will fit 32-34 weeks (3.5-4.5lb) but changing the yarn and hook to something thinner will get you smaller rompers. I haven't had a chance to try this fully yet, but dk/8ply with a 4 or 4.5 should get you around the 30 weeks gestation mark.

You'll notice that I have some more yarn variety coming in now. I have been lucky enough to get some fantastic yarn from America over and boy am I having some fun playing with it. So you can definitely expect some more worsted weight patterns. I also have a rather large ball of crochet thread too, that Im itching to turn into a gown.

So I hope you like this pattern, and I hope you like the ones to come :)


You will need
5mm hook
Worsted weight yarn in a main and contrasting colour (I used Red Heart Soft baby Steps in Aqua and Elephant) You will need the best part of a ball of your main colour.
7 buttons for closing

1: ch28, in the 2nd chain from hook dc, *2dc in the next stitch, dc in the next stitch* , repeat across,(39)

2: ch3, turn, dc in each stitch across (39)

3: ch3, turn, *dc in the first 2 stitches, 2dc in the next stitch*, repeat across (52)

4: ch3, turn, dc across

5: ch3, turn, dc in the first 8 stitches, skip 9 stitches, ch3, dc in the next 17 stitches, ch3, skip 9 stitches, dc in the last 9 stitches. (40, including chains)

6: ch3, turn, dc in each stitch and chain across (40)

7-15: ch3, turn, dc across (40)

16: ch3, turn, 2dc in the first stitch, dc in the next 18 stitches, 2dc in the next stitch. Leave the rest of the stitches un-worked. (22)

17-20: ch3, turn, dc in each stitch across

21: ch3, turn, dc2tg, dc in the next 18 stitches, dc2tg (20)

22-24: ch3, turn, dc in each stitch across

25: turn, join to the 1st dc of the last row, ch3, dc2tg, dc in the next 8 stitches, dc2tg, dc in the next 8 stitches, join. (18)

26: ch1, sc2tg, sc in the next 5 stitches, sc2tg (7)

27: ch1 turn, sc2tg, sc in the next 3 stitches, sc2tg (5)

28: ch1, turn, sc2tg, sc in the next stitch, sc2tg, don't turn.

29: ch1, sc in the ends of rows 26, 27 and 28, sc in the next 9 stitches, sc in the 3 ends of rows 26, 27 and 28, sc in the last 3 stitches, join to the first sc. (18)

30-35: ch1, sc in each stitch around, join

 End off

Join yarn to the 21st stitch (first un-worked st) on row 15 and ch3

36: ch3, turn, 2dc in the first stitch, dc in the next 18 stitches, 2dc in the next stitch. (22)

37-39: ch3, turn, dc in each stitch across

40: ch3, turn, dc2tg, dc in the next 18 stitches, dc2tg (20)

41-43: ch3, turn, dc in each stitch across

44: turn, join to the 1st dc of the last row, ch3, turn, dc2tg, dc in the next 8 stitches, dc2tg, dc in the next 8 stitches, join. (18).

45: ch1, turn, sc2tg, sc in the next 5 stitches, sc2tg (7)

46: ch1 turn, sc2tg, sc in the next 3 stitches, sc2tg (5)

47: ch1, turn, sc2tg, sc in the next stitch, sc2tg, don't turn.

48: ch1, sc in the first 3 stitches, sc in the ends of rows 26, 27 and 28, sc in the next 9 stitches, sc in the 3 ends of rows 26, 27 and 28, join to the first sc. (18)

49-54: ch1, sc in each stitch around, join

End off

Sleeves.

55: Join yarn with a slst to any stitch on the sleeve and ch3. Evenly dc around the sleeve hole 18 times, join.

56- 59 ch3, dc in each stitch around, join. (18)

60: ch3, dc2tg, dc in the next 7 stitches, dc2tg, dc in the next 7 stitches, join. (16)

61: ch3, dc in each stitch around, join. End off.

Repeat rounds 55-61 for the second sleeve


Edging and Finishing

Sleeves

Join contrasting colour to any stitch on the sleeve, ch1, sc around, join. End off and weave in ends.
Repeat for second sleeve

Feet

Join yarn to a stitch on the rear side of the foot and ch1

1: sc in each stitch around, join. (18)
2: ch1, sc in each stitch around, join
3: ch1, *sc, sc2tg*, repeat around, join. (12)
End off leaving a long tail. Hold the toe section flat and sew the gap closed with the tail.
Repeat for second foot.

Body

Join yarn to the right side of romper at the neck and ch2, hdc evenly down the body of the romper to the join in the leg, hdc in the join, hdc up the other side of the leg to the crotch, when you get to the crotch area find the 2 stitches that separate the legs, (hdc, dc, trc) in the first one, (trc, dc, hdc) in the next one, then continue on in hdc down the next leg, to the leg join, one hdc in the next leg join then up the leg and body to the neck line but not around the neck.


ch2, turn, hdc in each stitch right around until you get back to the neck where you started the previous round. Finish off.

Weave in all ends and sew buttons into place.


Wednesday, April 1, 2015

Sophia Gown - Free Crochet Pattern


Good morning lovlies,

I am happy to share with you today this months preemie pattern. This one, I actually started last year and I picked it up and put it down again many times, trying to figure out where I wanted to go with it. I'm so glad it is finally done! Such a sweet and delicate little gown. The Sophia gown comes in 2 sizes, but I will be adding a third once I've had a chance to test it fully. If you want to make this in NEWBORN (full term) size then go with worsted weight yarn and a 5.5mm or 6mm hook and you should be right. I'll edit once I've finished mine but so far so good!


Now this one looks a little long winded but it is NOT complicated. I've wrote it out using less shorthand then I usually would, as I know a few beginners that would like to tackle this. If you are struggling to remember what section you are at, try printing the pattern and highlighting the parts as you do it. Once you see the repeats you should be fine.


Tłumaczenie polsko poniżej.


TO MAKE 32-34 WEEKS
4.5mm hook
DK weight yarn in main and contrasting colours.

TO MAKE 18-20 WEEKS
2.5mm hook
4ply (fingering or even sock) yarn in main and contrasting colours

The smaller dress with the stripes, colour changes happen on rows 5 and 10.

Optional: Button for closure

Special Stitches: 3dc cluster - yarn over, insert hook into stitch, pull yarn through (3 loops on hook), yarn over, pull through 2 loops (2 on hook),  yarn over, insert hook into same stitch, pull yarn through (4 on hook), yarn over, pull through 2 loops (3 on hook), yarn over, insert hook into same stitch, pull yarn through (5 on hook), yarn over, pull through 2 loops (4 on hook), yarn over, pull through all stitches. Cluster made.

NOTE: No stitches are made in the top of the clusters, these are skipped on every row.

1: ch30, dc in the 3rd ch from hook, 2dc in the next ch, *dc in the next ch, 2dc in the next ch* Repeat across (42)
2: ch2, turn, *dc in the first 2 stitches, 2dc in the next stitch* Repeat across (56)
3: ch2, turn, *dc in the first 3 stitches, 2dc in the next stitch* Repeat across (70)
4: ch2, turn, *dc in the first 4 stitches, 2dc in the next stitch* Repeat across (84)
5: ch2, turn, dc in the first 11 stitches, skip the next 19 stitches, dc in the next 24 stitches, skip the next 19 stitches, dc in the last 11 stitches. (46)
6: ch1, turn, sc across (46)

7: ch2, turn, dc in the first 6 stitches, sk1, (cluster, ch2, cluster) in the next stitch, sk1, dc in the next 3 stitches, sk1, (cluster, ch2, cluster) in the next stitch, sk1, dc in the next 3 stitches, sk1, (cluster, ch2, cluster) in the next stitch, sk1, dc in the next 4 stitches, sk1, (cluster, ch2, cluster), sk1, dc in the next 3 stitches, sk1, (cluster, ch2, cluster) in the next stitch, sk1, dc in the next 3 stitches, sk1, (cluster, ch2, cluster), sk1, dc in the last 6 stitches. (28dc's, 6 sets of clusters)

8: ch2, turn, dc in the first 6 stitches,  (cluster, ch2, cluster) in the ch2 space, dc 3, (cluster, ch2, cluster) in the next ch2 space, dc 3,  (cluster, ch2, cluster) in the next ch2 space, dc 4,  (cluster, ch2, cluster) in the next ch2 space, dc 3, (cluster, ch2, cluster) in the next ch2 space, dc 3, (cluster, ch2, cluster) in the next ch2 space, dc in the last 6 stitches. (28dc's, 6 sets of clusters)

9: ch2, turn, dc in the first 6 stitches,  (cluster, ch2, cluster) in the next ch2 space, 2dc in the next stitch, dc in the next stitch, 2dc in the next stitch, (cluster, ch2, cluster) in the next ch2 space, 2dc in the next stitch, dc in the next stitch, 2dc in the next stitch, (cluster, ch2, cluster) in the next ch2 space, 2dc in the next stitch, dc in the next 2 stitches, 2dc in the next stitch, (cluster, ch2, cluster) in the next ch2 space, 2dc in the next stitch, dc in the next stitch, 2dc in the next stitch, (cluster, ch2, cluster) in the next ch2 space, 2dc in the next stitch, dc in the next stitch, 2dc in the next stitch, (cluster, ch2, cluster) in the next ch2 space, dc in the last 6 stitches. (38dc's 6 sets of clusters)

10: ch2, turn, dc in the first 6 stitches, (cluster, ch2, cluster) in the next ch2 space, dc 5, (cluster, ch2, cluster) in the next ch2 space, dc 5, (cluster, ch2, cluster) in the next ch2 space, dc 6, (cluster, ch2, cluster) in the next ch2 space, dc 5, (cluster, ch2, cluster) in the next ch2 space, dc 5, (cluster, ch2, cluster) in the next ch2 space, dc in the last 6 stitches. (38dc's 6 sets of clusters)

11: ch2, turn, dc in the first 6 stitches, (cluster, ch2, cluster) in the ch2 space, 2dc in the next stitch, dc in the next 3 stitches, 2dc in the next stitch, (cluster, ch2, cluster) in the  ch2 space, 2dc in the next stitch, dc in the next 3 stitches, 2dc in the next stitch, (cluster, ch2, cluster) in the ch2 space, 2dc in the next stitch, dc in the next 4 stitches, 2dc in the next stitch, (cluster, ch2, cluster) in the ch2 space, 2dc in the next stitch, dc in the next 3 stitches, 2dc in the next stitch, (cluster, ch2, cluster) in the ch2 space, 2dc in the next stitch, dc in the next 3 stitches, 2dc in the next stitch, (cluster, ch2, cluster) in the ch2 space, dc in the last 6 stitches. (48dc's 6 sets of clusters)

12: ch2, turn, dc in the first 6 stitches, (cluster, ch2, cluster) in the ch2 space, dc 7, (cluster, ch2, cluster) in the ch2 space, dc 7, (cluster, ch2, cluster) in the ch 2 space, dc 7, (cluster, ch2, cluster) in the ch2 space, dc 8, (cluster, ch2, cluster) in the ch2 space, dc 7, (cluster, ch2, cluster)  in the ch2 space, dc 7,  (cluster, ch2, cluster) in the ch2 space, dc in the last 6 stitches. (48dc's 6 sets of clusters)

13-21: Repeat row 12

End off main colour and join contrasting

22: ch1, turn, sc in the first 6 stitches, 5sc in the ch2 gap, sc 7, 5sc in the ch2 gap, sc 7, 5sc in the ch2 gap, sc 8, 5sc in the ch2 gap, sc 7, 5sc in the ch2 gap, sc 7, 5sc in the ch2 gap, sc in the last 6 stitches. (74 sc's)

23: ch1, turn, *sc in the first stitch, (sc, picot) in the next stitch* repeat across. End off.

Sleeve Edging

1: Join contrasting yarn to any stitch in the armhole and ch1, sc evenly around the entire armhole for 24 stitches, join.

2: ch1, *sc in the first stitch, (sc, picot) in the next stitch* repeat round, join. End off.

Weave in all ends.

Closure options. You can use a button for closing. You can make chains for ties (purple/cream dress) and you can also make a longer chain that weaves in and out (I did this on round 6 of the pink dress) of stitches and ties at the back. You could also use ribbon.


Tłumaczenie polsko poniżej.

Sukieneczka Sophia

Materiały:
18-22 tygodnie ciąży:
  • szydełko 2,5
  • włóczka 4ply w dwóch kolorach, głównym i kontrastującym
    • włóczka 4ply - 350-450m/100g
32-34 tygodnie ciąży:
  • szydełko 4,5
  • włóczka DK weight w dwóch kolorach, głównym i kontrastującym
    • włóczka DK weight - 200-250m/100g
guziki opcjonalnie

Ściegi specjalne:
  • pęczek z trzech słupków - narzuć na szydełko, wsadź szydełko w oczko, i przeciągnij włóczkę (3 pętelki na szydełku), narzuć na szydełko, przeciągnij przez 2 pętelki (2 pętelki zostały na szydełku),  narzuć na szydełko, wsadź szydełko w to samo oczko, przeciągnij włóczkę (4 pętelki na szydełku), narzuć na szydełko, przeciągnij przez 2 pętelki (3 pętelki na szydełku), narzuć na szydełko, wsadź szydełko w to samo oczko, przeciągnij włóczkę (5 pętelek na szydełku), narzuć na szydełko, przeciągnij przez 2 pętelki (4 pętelki na szydełku), narzuć na szydełko, przeciągnij przez wszystkie pętelki z szydełka. Pęczek gotowy :)

Uwaga:
  • Na pęczku nie robimy żadnego sciegu. Pęczki są opuszczane w kazdym rzędzie.

Rząd 1: 30 oczek łańcuszka, 1x słupek w trzecim oczku od szydełka, 2x słupek w następnym oczku, *1x słupek w następnym oczku, 2x słupek w następnym oczku* Powtarzać do końca (42)

Rząd 2: 2 oczka łańcuszka na odwrócenie rzędu, odwrócić, *1x słupek w pierwszych 2 , 2x słupek w następnym* Powtarzać do końca (56)

Rząd 3: 2 oczka łańcuszka, odwrócić, *1x słupek w pierwszych 3, 2x słupek w następnym* Powtarzać do końca (70)

Rząd 4: 2 oczka łańcuszka, odwrócić, *1x słupek w pierwszych 4, 2x słupek w następnym* Powtarzać do końca (84)

Rząd 5: 2 oczka łańcuszka, odwrócić, 1x słupek w 11 oczkach, opuść następne 19 oczek, 1x słupek w następnych 24 oczkach, opuść następne 19 oczek, 1x słupek w ostatnich 11 oczkach. (46)

Rząd 6: 1 oczko łańcuszka, odwrócić, półsłupki do końca (46)
Rząd 7: 2 oczka łańcuszka, 1x słupek w pierwszych 6 oczkach, opuść 1 oczko, (pęczek, 2 oczka łańcuszka, pęczek) w następnym oczku, opuść 1 oczko, 1x słupek w następnych 3 oczkach, opuść 1 oczko, (pęczek, 2 oczka łańcuszka, pęczek) w następnym oczku, opuść 1 oczko, 1x słupek w następnych 3 oczkach, opuść 1 oczko, (pęczek, 2 oczka łańcuszka, pęczek) w następnym oczku, opuść 1 oczko, 1x słupek w następnych 4 oczkach, opuść 1 oczko, (pęczek, 2 oczka łańcuszka, pęczek) w następnym oczku, opuść 1 oczko, 1x słupek w następnych 3 oczkach, opuść 1 oczko, (pęczek, 2 oczka łańcuszka, pęczek) w następnym oczku, opuść 1 oczko, 1x słupek w następnych 3 oczkach, opuść 1 oczko, (pęczek, 2 oczka łańcuszka, pęczek) w następnym oczku, opuść 1 oczko, 1x słupek w ostatnich 6 oczkach. (28 słupków, 6 grup pęczków)

Rząd 8: 2 oczka łańcuszka, odwrócić, 1x słupek w pierwszych 6 oczkach, (pęczek, 2 oczka łańcuszka, pęczek) w przerwie utworzonej z 2 oczek łańcuszka, 1x słupek w następnych 3 oczkach, (pęczek, 2 oczka łańcuszka, pęczek) w przerwie utworzonej z 2 oczek łańcuszka, 1x słupek w następnych 3 oczkach,  (pęczek, 2 oczka łańcuszka, pęczek) w przerwie utworzonej z 2 oczek łańcuszka, 1x słupek w następnych 4 oczkach,  (pęczek, 2 oczka łańcuszka, pęczek) w przerwie utworzonej z 2 oczek łańcuszka, 1x słupek w następnych 3 oczkach, (pęczek, 2 oczka łańcuszka, pęczek) w przerwie utworzonej z 2 oczek łańcuszka, 1x słupek w następnych 3 oczkach, (pęczek, 2 oczka łańcuszka, pęczek) w przerwie utworzonej z 2 oczek łańcuszka, 1x słupek w ostatnich 6 oczkach. (28 słupków, 6 grup pęczków)

Rząd 9: 2 oczka łańcuszka,odwrócić, 1x słupek w pierwszych 6 oczkach,  (pęczek, 2 oczka łańcuszka, pęczek) w przerwie utworzonej z 2 oczek łańcuszka, 2x słupek w następnym oczku, 1x słupek w następnym oczku, 2x słupek w następnym oczku, (pęczek, 2 oczka łańcuszka, pęczek) w przerwie utworzonej z 2 oczek łańcuszka, 2x słupek w następnym oczku, 1x słupek w następnym oczku, 2x słupek w następnym oczku, (pęczek, 2 oczka łańcuszka, pęczek) w przerwie utworzonej z 2 oczek łańcuszka, 2x słupek w następnym oczku, 1x słupek w następnych 2 oczkach, 2x słupek w następnym oczku, (pęczek, 2 oczka łańcuszka, pęczek) w przerwie utworzonej z 2 oczek łańcuszka, 2x słupek w następnym oczku, 1x słupek w następnym oczku, 2x słupek w następnym oczku, (pęczek, 2 oczka łańcuszka, pęczek) w przerwie utworzonej z 2 oczek łańcuszka, 2x słupek w następnym oczku, 1x słupek w następnym oczku, 2x słupek w następnym oczku, (pęczek, 2 oczka łańcuszka, pęczek) w przerwie utworzonej z 2 oczek łańcuszka, 1x słupek w ostatnich 6 oczkach. (38 słupków, 6 grup pęczków)

Rząd 10: 2 oczka łańcuszka, odwrócić, 1x słupek w pierwszych 6 oczkach, (pęczek, 2 oczka łańcuszka, pęczek) w przerwie utworzonej z 2 oczek łańcuszka, 1x słupek w 5 następnych oczkach, (pęczek, 2 oczka łańcuszka, pęczek) w przerwie utworzonej z 2 oczek łańcuszka, 1x słupek w 5 następnych oczkach, (pęczek, 2 oczka łańcuszka, pęczek) w przerwie utworzonej z 2 oczek łańcuszka, 1x słupek w 6 następnych oczkach, (pęczek, 2 oczka łańcuszka, pęczek) w przerwie utworzonej z 2 oczek łańcuszka, 1x słupek w 5 następnych oczkach, (pęczek, 2 oczka łańcuszka, pęczek) w przerwie utworzonej z 2 oczek łańcuszka, 1x słupek w 5 następnych oczkach, (pęczek, 2 oczka łańcuszka, pęczek) w przerwie utworzonej z 2 oczek łańcuszka, 1x słupek w ostatnich 6 oczkach. (38 słupków, 6 grup pęczków)

Rząd 11: 2 oczka łańcuszka, odwrócić, 1x słupek w pierwszych 6 oczkach, (pęczek, 2 oczka łańcuszka, pęczek) w przerwie utworzonej z 2 oczek łańcuszka, 2x słupek w następnym oczku, 1x słupek w następnych 3 oczkach, 2x słupek w następnym oczku, (pęczek, 2 oczka łańcuszka, pęczek) w przerwie utworzonej z 2 oczek łańcuszka, 2x słupek w następnym oczku, 1x słupek w następnych 3 oczkach, 2x słupek w następnym oczku, (pęczek, 2 oczka łańcuszka, pęczek) w przerwie utworzonej z 2 oczek łańcuszka, 2x słupek w następnym oczku, 1x słupek w następnych 4 oczkach, 2x słupek w następnym oczku, (pęczek, 2 oczka łańcuszka, pęczek) w przerwie utworzonej z 2 oczek łańcuszka, 2x słupek w następnym oczku, 1x słupek w następnych 3 oczkach, 2x słupek w następnym oczku, (pęczek, 2 oczka łańcuszka, pęczek) w przerwie utworzonej z 2 oczek łańcuszka, 2x słupek w następnym oczku, 1x słupek w następnych 3 oczkach, 2x słupek w następnym oczku, (pęczek, 2 oczka łańcuszka, pęczek) w przerwie utworzonej z 2 oczek łańcuszka, 1x słupek w ostatnich 6 oczkach. (48 słupków, 6 grup pęczków)

Rząd 12: 2 oczka łańcuszka, odwrócić, 1x słupek w pierwszych 6 oczkach, (pęczek, 2 oczka łańcuszka, pęczek) w przerwie utworzonej z 2 oczek łańcuszka, 1x słupek w 7 następnych oczkach, (pęczek, 2 oczka łańcuszka, pęczek) w przerwie utworzonej z 2 oczek łańcuszka, 1x słupek w 7 następnych oczkach, (pęczek, 2 oczka łańcuszka, pęczek) w przerwie utworzonej z 2 oczek łańcuszka, 1x słupek w 8 następnych oczkach, (pęczek, 2 oczka łańcuszka, pęczek) w przerwie utworzonej z 2 oczek łańcuszka, 1x słupek w 7 następnych oczkach, (pęczek, 2 oczka łańcuszka, pęczek) w przerwie utworzonej z 2 oczek łańcuszka, 1x słupek w 7 następnych oczkach,  (pęczek, 2 oczka łańcuszka, pęczek) w przerwie utworzonej z 2 oczek łańcuszka, 1x słupek w ostatnich 6 oczkach. (48 słupków, 6 grup pęczków)

Rzędy13-21: Powtarzać rząd 12

Zakończ kolor główny i dołącz kontrastujący.

Rząd 22: 1 oczko łańcuszka, odwrócić, 1x półsłupek w pierwszych 6 oczkach, 5x półsłupek w przerwie utworzonej z 2 oczek łańcuszka, 1x półsłupek w kolejnych 7 oczkach, 5x półsłupek w przerwie utworzonej z 2 oczek łańcuszka, 1x półsłupek w kolejnych 7 oczkach, 5x półsłupek w przerwie utworzonej z 2 oczek łańcuszka, 1x półsłupek w kolejnych 8 oczkach, 5x półsłupek w przerwie utworzonej z 2 oczek łańcuszka, 1x półsłupek w kolejnych 7 oczkach, 5x półsłupek w przerwie utworzonej z 2 oczek łańcuszka, 1x półsłupek w kolejnych 7 oczkach, 5x półsłupek w przerwie utworzonej z 2 oczek łańcuszka, 1x półsłupek w ostatnich oczkach. (74 półsłupków)

Rząd 23: 1 oczko łańcuszka, odwrócić, *1x półsłupek, (półsłupek, pikotek) w kolejnym oczku* powtarzać do końca. Zakończyć.

Zakończenie rękawków

Rząd 1: Dołącz włóczkę w kontrastującym kolorze do dowolnego oczka. 1 oczko łańcuszka, półsłupek równomiernie dookoła całego rękawka do uzyskania 24 półsłupków, połącz.

Rząd 2: 1 oczko łańcuszka, *1x półsłupek, (półsłupek, pikotek) w kolejnym oczku* powtarzaj dookoła, połącz. Zakończ.

Opcje zapięcia:
  1. Możesz użyć guziczkow. Możesz zrobić sznureczek z łańcuszków do zawiązania (purpurowo/kremowa sukieneczka)
  2. Możesz również zrobić dłuższy sznureczek, przeciągnąć go pomiędzy oczkami i zawiązać z tyłu. (Zrobiłam tak w 6 rzędzie różowej sukienki)
  3. Możesz również użyć wstążeczki.

Wednesday, February 25, 2015

Ribbed Prem Jacket - Free Crochet Pattern


Good morning lovlies.

Phew it sure has been a busy week in the mamma household. A lot of creating and crafting and outings. The Angels for the forgotten's annual craft challenge starts in a few short months, and so I've been gearing up for that and making a head start on patterns and ideas. If you are in Australia and looking for a great organisation to support with handmade items, these guys are just fantastic. Ive been sending items there for over a year now and the work they do with the little they have is nothing short of amazing. There are SOOO many things you can do too, it isn't just limited to crochet/knit.

Im also extremely excited to say that I have some international yarns on the way in the mail to play with and I can't wait to test them out. Its a very rare thing to get worsted weight yarns here in Aus and especially hard in the area of Tasmania I'm in. I hope to do some newborn sized things with them, but I am especially hoping to get some cocoon patterns up :)


Today's pattern is for a sweet little jacket with a collar and ribbed edging. As you can see it works great for both boys and girls. I've included more images and measurements then I usually do to try and give you guys better instructions. I hope it helps. You can expect more images being added to past patterns as well :) This pattern will require front and back post double crochets and if you are unfamiliar with them, there is an excellent YouTube video on them here (granted, the video is for hdc's but the method for going around the posts is the same for all fp/bp stitches)

The pink jacket made as instructed will fit a baby of around 26 weeks gestation. The blue jacket was made using a 3mm hook instead of a 3.5 and is slightly smaller (24 weeks gestation)

Notes:
trc = Triple Crochet. Yarn over twice, insert hook into stitch, yarn over and draw hook through sticth (4 loops on hook), yarn over, pull through 2 loops, yarn over, pull through 2 loops, yarn over pull through last 2 loops.

You will need
dk/8ply/light worsted weight yarn in a main and contrasting colour
3.5mm (E) hook
1 button
needle for sewing

Front panels
1. Ch7, sc in the second ch from hook and each across. (6)
2. Ch2, turn, dc across. (6)
3-5. Ch2, turn, dc across.  (6)


6. Ch2, turn, 2dc in the first stitch, dc in the last 5 stitches. (7)
7. Ch2, turn, dc in the first 6 stitches, 2dc in the last stitch.  (8)
8. Ch2, turn, 2dc in the first stitch, dc in the last 7 stitches. (9)


9-11. Ch2, turn, dc in each stitch across. (9)
End off, weave in tails. My panel is 13cm long, 4cm wide at the top and 6cm wide at the bottom.


Repeat to make a second panel.

Back panel
1. Ch21, sc in the 2nd chain from hook and each across. (20)
2-5. Ch2, turn, dc across.
6. Ch1, turn, slst in the 1st stitch,  dc in the next 18 stitches. (18)
7-9.ch2, turn, dc across.
10. Ch2, turn, dc in the first 7 stitches, sc in the next 4 stitches, dc in the last 7 stitches.
11. Ch3, trc in the first 6 stitches, dc, sc in the next 4 stitches, dc, trc in the last 6 stitches.
End off


Lay the front pieces onto the back piece and Sew the shoulder seams together first.


 Next sew the side seams from the bottom up for 4 rows. Turn jacket in the right way so seams are inside.


Sleeves
1. Join yarn to any stitch in the arm hole near the centre underarm and ch2, evenly dc around the entire opening for 24 dcs. Join.


2. Ch2, dc around, join. (24)
3. Ch2, dc2tg, dc in the next 20 stitches, dc2tg. (22)
4-6. Ch2, dc in each stitch around, join.
End main colour.
Change to contrasting colour and hdc in each stitch around. (22)


Main cuff 
With jacket opening facing up and bottom edge away, join contrasting yarn to left hand corner.


1.Ch2, hdc in each stitch along the bottom of the jacket, when you get to the next corner stop.


2. Ch2, turn, dc in the 1st stitch, *fpdc around the next stitch, bpdc around the next stitch* repeat  across, to the last stitch and dc in the last stitch.

3. Ch2, turn, dc in the 1st,  fpdc around each bpdc from the previous round, and bpdc around each fpdc from the previous round, dc in the last stitch. It will depend on your stitch count as to if you start with fpdc or bpdc.

4. Repeat row 3.
End off


Rejoin as shown


5. Ch3, dc evenly up the side until you are level with the bottom of the sleeves,


 sc evenly around the neck area, until you are level with the bottom of the other sleeve,


 change back to dcs and dc evenly till you reach the bottom.


6. Ch2, turn, dc in each dc stitch, when you reach the sc's from the previous round *2sc in the 1st stitch, sc in next stitch*, repeat for all sc stitches, when you get to the last section of dc's from the previous row dc in each remain stitch.

7. Ch2, turn, dc in each stitch around. Finish off and weave in all tails.

Attach button.

Finished measurements

Saturday, January 31, 2015

Brianna Romper


Good morning everyone and welcome to 2015!

Wow this month has been insane crazy! On January 7th we welcomed a new addition to the family with the safe arrival of our boy Jackson. He is super sweet and smooshy and adorable and I could sit forever gazing into his deep eyes. Fair to say I am very much in love, as are daddy and the girls. We've had a bit of a rough ride with an extended hospital stay and I've been quite ill. Throw in the girls going back to school next week and woah busy times!


I am however pleased to be able to get January's pattern up, even if it is on the last day of the month. PHEW Made it!
I havn't second tested this one, so if there are any mistakes apologies in advance and I'll sort them if they come up.

This little romper is super sweet and a joy to make. It will fit a bub of 24 weeks gestation. I havn't tried it in DK weight yet, but I suspect of you used it, it would be closer to perhaps 30 weeks. Made with 4ply, it is very light and has beautiful drape. I used Dianella by Panda which is a 100% bamboo yarn, Oh have I told you how much I LOVE bamboo yarn? MMMMM!

I know a lot of you have requested more specific instructions on some patterns (particularly more images and stitch count) so I will go back through them all when I have some time and update.
For those of you who don't Follow me on Facebook this year I won't be adding one pattern a week. With a new babba it is unrealistic to put that much pressure on myself, so I am hoping one prem and one non prem pattern a month, but we will see how we roll. As always, have a gentle day <3


You will need:

4ply/fingering weight yarn in a main and contrasting colour. I used Dianella by Panda for the pink.
3mm hook
sewing needle
2 buttons

With pink yarn

1: ch36, in the 2nd chain from hook dc, *2dc in the next stitch, dc in the next stitch*, repeat across (52)

2: ch3, turn, dc in each stitch across (52)

3: ch3, turn, *dc in the first 2 stitches, 2dc in the next stitch*, repeat across (69)

4: ch3, turn, dc across

Change to white yarn

5: ch1, turn, sc in the first 10 stitches, skip 12 stitches, ch3, sc in the next 25 stitches, ch3, skip 12 stitches, sc in the last 10 stitches. (51, including chains)

Change to pink yarn

6-7: ch3, turn, dc in each stitch and chain across

Change to white yarn

8: ch1, turn, sc in each stitch across

Change to pink yarn

9-12: ch3, turn, dc in each stitch across

13: ch3, turn, dc in each stitch across, join to the 1st dc.

14-15: ch3, turn, dc in each stitch around, join.

16: ch3, turn, dc in the first 25 stitches, skip the rest and join to the 1st dc. One leg created. (25)

17-20: ch3, dc in each stitch around, join.

21: ch3, *dc in the first 2 stitches, dc2tg*, repeat around, join. (19)

22-23: ch3, dc in each stitch around, join.

Change to white yarn

24: ch1, sc in each stitch around, join.

25: ch3, dc in each stitch around, join.

Finish off.


Second leg:

26: Join pink yarn to the 1st unused stitch on round 16, ch3, dc in the same stitch, and in the next 24 stitches, join.

Repeat from 17-25 to complete the second leg.


Sleeves

1: Join white yarn to the first unused stitch of round 4, ch1, and sc in the same stitch, sc in the next 11 stitches (12)

2: ch1, turn, (sc, ch4, sc) in each of the 12 stitches across. End off.


Repeat for the second sleeve.


Flower for front of romper

With white yarn

1: ch2, hdc 7 times in the first chain, join.

2: ch1, (sc, ch4, sc) in each of the 7 stitches around, join. Sew a button in the middle of the flower, then attach the flower to the front of the romper.


Attach 2 buttons to the back of the romper for closing.


Saturday, November 29, 2014

Ariel Cardi - Free Micro Preemie Crochet Pattern


Good afternoon lovlies,

This weeks pattern comes as a request from the CCP crafters group. It is a very small and dainty jacket/cardi for 16-18 weeks. I will have a hat and booties up to match it in the future. I know bubba's of this size more often then not don't wear clothing and instead use wraps/cocoons ect, but it is incredibly important that there IS clothing options available for those who do need them, and as it stands now, there is such a lack of items to fit the 16-20 week range. Hopefully I can bridge that gap some with a few items for people to make and donate.


Supplies
2.00mm hook
Fingering / 4 ply (I used Moda Vera Gelato)


1: chain 31, hdc in the second chain from hook and each across (30)

2: ch2, turn, 2dc in the first stitch, dc in the next stitch, repeat across. (45)

3: ch2, turn, 2hdc in the first stitch, hdc in the next 2 stitches, repeat across (60)

4: ch2, turn, dc in the first 13 stitches, ch5, skip 8, dc in the next 18 stitches, ch5, skip 8, dc in the last 13 stitches. (44dc's, 10ch's)

5: ch2, turn, dc in each stitch and chain across (54)

6-11: ch2, turn, dc in each stitch across

End off and weave in tails.

Sleeves
1: Join yarn to one of the chain stitches on the arm hole (will be the underarm section) and ch2, dc evenly around the armhole 19 times, join. (19)

2-3: ch2, dc in each stitch around, join. (19)

4: ch2, dc2tg, dc in the remaining 17 stitches, join. (18)

5: ch2, dc in each stitch around, join. (18)

6: ch2, hdc2tg, hdc in each remaining stitch, join. (17)
End off and weave in ends.

Repeat 1-6 for second sleeve.

Add a button and weave in all ends and you are done!


DUTCH TRANSLATION - met dank aan Karin

Wol:
Scheepjes Colour Crafter met haaknaald 3 of 3.5 of Soft van Zeeman met haaknaald 2.5 of 3 in zachte kleurtjes Of haakkatoen geschikt voor haaknaald 2 dan wordt het een stuk kleiner maar die maatjes zijn soms ook nodig. Je kunt dit vestje ook met verschillende kleuren haken

Haak 31 lossen
Rij 1:
Haak 1 half stokje in de 2e losse vanaf je haaknaald en elke overige losse. (30) Haak 2 lossen en keer je werk.

Rij 2:
*Haak 2 stokjes in de 1e steek, 1 stokje in de volgende steek*, herhaal tussen *-* tot het einde (45) Haak 2 lossen en keer je werk.

Rij 3:
* Haak 2 halve stokjes in de 1e steek, half 1 stokje in volgende 2 steken* herhaal tussen *-*tot het einde (60) Haak 2 lossen en keer je werk.

Rij 4:
Haak 1 stokje in de eerste 13 steken, haak 5 lossen, sla 8 steken over, haak 1 stokje in de volgende 18 steken, haak 5 lossen, sla 8 steken over, haak 1 stokje in de laatste 13 steken (44 stokjes, 10 lossen) Haak 2 lossen en keer je werk.

Rij 5:
Haak 1 stokje in elke steek (ook 1 stokje in de 10 losse uit rij 4) (54) Haak 2 lossen en keer je werk.

Rij 6-11:
Haak in elke steek 1 stokje, kant je werk af en werk de draadjes weg.

Mouwen:

Rij 1:

Hecht je garen aan in 1 van de losse steken bij het armsgat (het mooist is aan de onderkant), haak 2 lossen, maak 19 stokjes verdeeld rond het armsgat, haak vast met een halve vaste in de beginlosse (19) Haak 2 lossen en keer je werk.

Rij 2-3:
Haak 1 stokje in elke steek, haak vast met een halve vaste in de beginlosse (19) Haak 2 lossen en keer je werk.

Rij 4:
Haak 2 stokjes samen, haak 1 stokje in de resterende 17 steken, haak vast met halve vaste (18) Haak 2 lossen en keer je werk.

Rij 5:
Haak 1 stokje in elke steek, haak vast met halve vaste (18) Haak 2 lossen en keer je werk.

Rij 6:
Haak 2 halve stokjes samen, haak vast met halve vaste (17)

Kant je werk af en werk draadjes weg.

Herhaal rij 1-6 voor 2e mouw.

Naai een mooi klein knoopje op het vestje en klaar is je vestje.

Saturday, November 22, 2014

Micro Micro Diaper Pattern


Good morning beautiful people,

Today's pattern is for a very small diaper. This month our CCP crafters group have been working on diapers, pants and keepsakes, and one of the challenges we had was finding a range of diaper patterns in multiple sizes, especially the very small. So of course, I set out to rectify that. This diaper fits on my 16 week doll quite snugly. I know sometimes not all babies of this size would actually be able to wear such an item, but it is comforting to know that the option is there should someone need it. They are very quick to whip up. I'll have some more diaper patterns over the coming weeks.

You will need:
3ply yarn (Light Fingering)
2.5m hook
1 safety pin for securing, or ribbon or a small button.

1: ch32, hdc in the second chain from hook and in the 29 chains, 3hdc in the last chain, do not turn, instead working on the opposite side of the chains you just used, hdc in each of the next 29 chains, 2hdc in the last chain and join.

2: slst in the first 7 stitches, ch2, hdc in the next 16 stitches

3-4: ch2, turn, hdc in each stitch across

5: ch2, turn, hdc2tg, hdc in the next 12 stitches, hdc2tg

6: ch2, turn, hdc2tg, hdc in the next 10 stitches, hdc2tg

7: ch2, turn, hdc2tg, hdc in the next 8 stitches, hdc2tg

8: ch2, turn, hdc2tg, hdc in the next 6 stitches, hdc2tg

9: ch2, turn, hdc2tg, hdc in the next 4 stitches, hdc2tg

10-12: ch2, turn, hdc in each stitch across (6)

13: ch2, turn, 2hdc in each stitch across (12)

14: ch2, turn, hdc in each stitch across

15: ch2, turn, 2hdc in the first stitch, hdc in the next 10 stitches, 2hdc in the last stitch (14)

16: ch2, turn, 2hdc in the first stitch, hdc in the next 12 stitches, 2hdc in the last stitch (16)

17: ch1, but do not turn, sc evenly around the entire diaper, being sure to do 3 sc's in the corners, join when you get back to the ch1. Weave in ends.

If you want to use a tie closure, weave it evenly in and out of the stitches in the middle of the waist band.


Saturday, June 7, 2014

Wendy Thread Gown - Free Pattern


Good morning everyone!
Wow it has been super crazy around here this week! A lot of finishing and designing and organising and a wee bit of relaxing as well.

Today's pattern is a lovely little gown made from thread. A huge thankyou to Lisa from Crochet Quackers who sent in the thread for me to play with.
The thread I am using today is DMC Babylo, which is a 3ply size 10 cotton thread. It is incredibly light. I used the best part of a 50g ball for the dress, and I am hoping I'll have enough left from the ball for a matching hat.
Working with thread can be a little challenging, and it does take a bit more time then a thicker yarn, but the results are so wonderful that it is definitely worth the effort.
This gown is designed to fit a bub of 26 weeks gestation, however you could upsize it using thicker yarn/larger hooks. I intend on testing it with some 5ply sports weight down the track, so I will let you know how that goes once I have done it.


Supplies:
3ply crochet thread (size10)
2mm hook
2.5mm hook
3mm hook
Small button
Small bow

With a 2mm hook and thread

1: ch65, hdc in the 2nd chain from hook and each across - (64)
2: ch2, turn, hdc in each stitch across - (64)\
3-5: Repeat row 2
6: ch2, turn, hdc 12
7-9: ch2, turn, hdc 12. End off.
Lay the piece with the 12hdc rows on the right,count off 10 stitches from row 5 and join yarn in the 11th.
10: ch2, hdc in the next 16 stitches - (16hdc)
10-13: ch2, turn, hdc in each stitch across - (16)
14: ch2, turn, hdc in the first 4 stitches - (4)
15-20: ch2, turn, hdc across - (4) End off leaving a long tail.
Rejoin the yarn on the 1st stitch of row 13
21: ch2, hdc in the first 4 stitches - (4)
22-27: ch2, turn, hdc across - (4) End off leaving a long tail.
Lay the piece with the hdc rows from 6-9 on the left. Join the yarn to the top of the first stitch from row 5 (furthest stitch on the right hand side)
28: ch2, hdc in the same stitch and in the next15 stitches - (16)
29-31: ch2, turn, hdc across - (16)

Sew the sleeve sections together as pictured below


Turn your piece upside down so you have the bottom of the bodice at the top and join your yarn to the corner (will be the same chains we started with)
32: ch2, hdc in each stitch across (64)
33: ch3, turn, *skip 1 stitch, (dc, ch1, dc) in the next stitch, repeat across, dc in the last stitch
34-37: ch3, turn, (dc, ch1, dc) in each ch1 space across, dc in the top of the ch3 at the end
38: ch3, turn, *(dc, ch1, dc) in the first 2 ch1 spaces, (dc, ch1, dc) in the space BETWEEN the ch1 just used and the next ch1 space* (this makes our increase), repeat across, dc in the top of the ch3 at the end.
39-40: ch3, turn, (dc, ch1, dc) in each ch1 space across, dc in the top of the ch3 at the end
Change to a 2.5mm hook
41-44: ch3, turn, (dc, ch1, dc) in each ch1 space across, dc in the top of the ch3 at the end
Change to a 3.00mm hook
45-47: ch3, turn, (dc, ch1, dc) in each ch1 space across, dc in the top of the ch3 at the end
48: ch3, turn, 2dc in the same stitch, *sl st into the next ch1 space, 5dc into the next ch1 space* repeat across, 3dc in the last ch1 space, dc in the top of the ch3.
End off and weave in ends.

Sleeves:
Join yarn to any stitch on the arm opening
1: ch1, sc evenly around the entire arm hole (36)
2: ch4, dc in the same stitch, *skip 1, (dc, ch1, dc) in the next stitch* repeat around, join to the 3rd chain from the starting chain.
3-6: sl st into the ch1 space, ch4, dc in the same space, (dc, ch1, dc) in each ch1 space around, join to the 3rd chain in the starting chain.
7: ch1, sc in each ch1 space around, join.
8: ch1, sc in each stitch around, join.
End off and weave in ends.
Repeat for second sleeve.

Collar:
1: Join yarn to any corner of the neck opening and sc evenly around the entire neckline (for me that was 52 stitches)
Mark off the front 11 stitches of the neck as shown below.

2: ch1, turn, sc until you get to the stitch before the first marker, skip 2 stitches, dc 10 times in the next stitch, using the front loop only, skip 2 stitches, sl st into the front loop of the next stitch, skip 2 stitches, dc 10 times into the front loop of the next stitch, skip 2 stitches, sc in all remaining stitches.
End off and weave in ends.
If your collar sits up a little you can iron it down, press it, or using the same yarn tack it into place.

Add a button to the back of the gown and the small bow to the front.
You may like to also run a ribbon around the bottom of the bodice if you prefer that to a bow.

Laid flat this gown measures approx. 22cm from the shoulder to the hem, and 12.5cm across the bottom of the bodice before the skirt section when laid flat.