Ive been meaning to do more angel designs for a while now so here is one I worked on yesterday. It originally started as a gown but the body of the dress wasn't flaring the way I wanted it to so it ended up becoming a top, which mean I needed pants, and well that lead to a full set.
As always this is for NON PROFIT use. Im aware that people have been using my patterns for money making, including stealing them for selling on etsy. Have some respect!
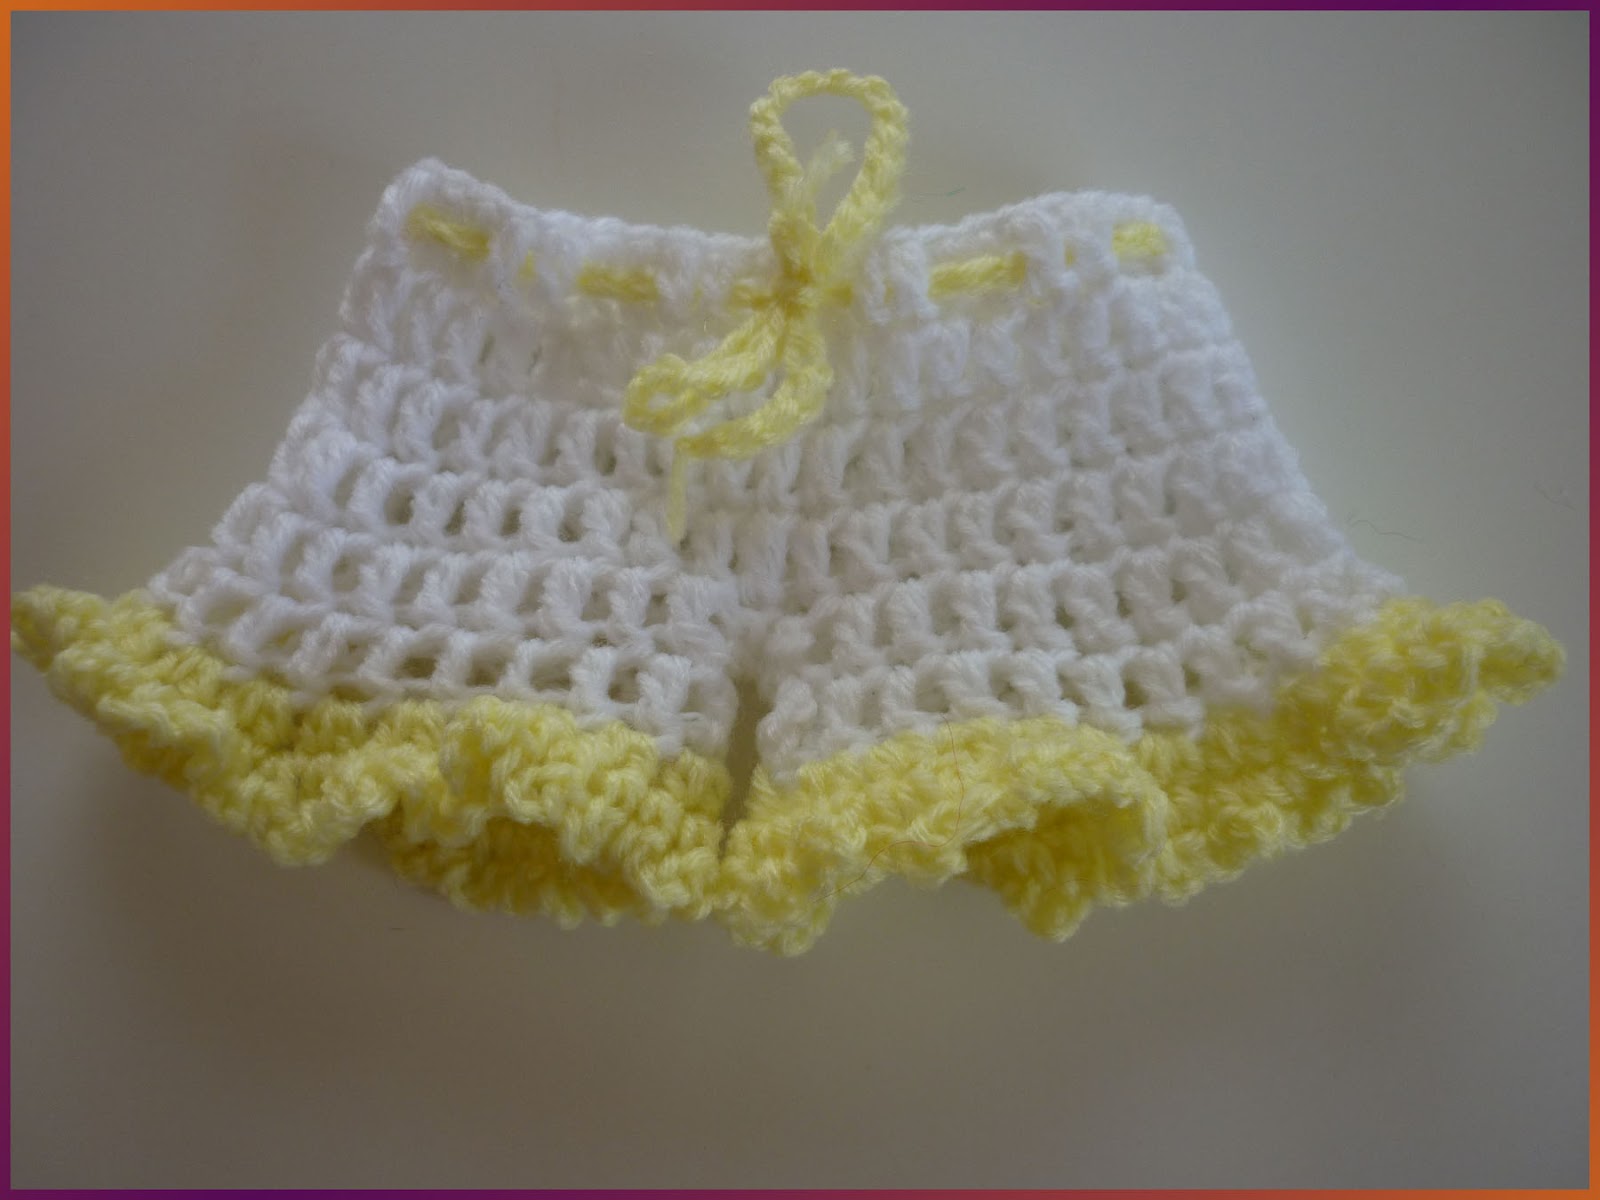
Ok, onto the set! This set has a button at the back top, a pair of bloomers with a tie waist, a bonnet that ties under the chin and a pair of booties that open at the heel for ease of putting on. Mine fit a doll thats about the size of a 22-24 week gestation baby but you can use larger/smaller yarn/hooks to change the size. No gauge is given, I don't know how to work that out and really, for angel babies all sizes are needed.
This is
UNTESTED! If you find massive errors please let me know. If you come up one stitch extra or one short, just roll with it. Honestly noone is going to be fussed too much about a stray stitch :)
You Will Need
3mm hook
4ply baby yarn (Mine is 14wpi) in main and contrasting colours. You wont need much, I barely dented a 100g ball.
1 button for back closure
To
double crochet 2 together, Yarn
over, insert hook in first stitch, yarn over and pull up a loop, yarn
over and pull through two loops on hook. Yarn over and insert into
second stitch, yarn over and pull up a loop, yarn over and pull
through two loops on hook. Yarn over and pull through all three loops
on hook.
(Bracketed
instructions are to be done in the same stitch)
US CROCHET TERMS ARE USED!
Top
ch 32
1. dc in 3rd
ch from hook, 4 dc, (dc, c1, dc), 5dc, (dc, ch1, dc), 5dc, (dc, ch1,
dc), 5dc, (dc, ch1,
dc), dc to the last ch.
ch2, turn.
2. 7dc, (dc, ch1, dc in
the ch1 space), *7dc, (dc, ch1, dc in the ch1 space)*,
Repeat from * * twice
more, 6dc. ch2 turn.
3. 7dc, (dc, ch1, dc in
the ch1 space), *9dc, (dc, ch1, dc in the ch1
space)*,Repeat from * *
twice more , 7dc, 2dc in last st.
4. ch2, turn. 10dc, 1dc
in the first dc space, ch8, sl st to the next ch1 space, ch1, 11dc, 1dc
in the ch1 space, ch8, sl st to the next ch1 space, ch1, 8dc. You have just
created your arm holes. See photo below.
5. ch1, turn, 4dc,
dc2tg, 2dc, dc2tg 5 times, 4dc, dc2tg, 4dc, dc2tg 5 times, 2dc, dc2tg, 5dc, dc. (35)
Change colour here. (End white, Join Yellow)
6. ch2, *sk2, (5dc)* Repeat from * to * to end.
7. ch5, turn. Sc into
the 3rd dc from the 5dc cluster below. *Ch5, sk4, sc (will
be the middle stitch of each 5dc cluster)* Repeat to end of row. Dc
in last st
8. ch 2, sk2, (5dc in
next ch), *sk 5 (5dc in next ch)* Repeat to end, sk2 and dc in the
last st.
9. repeat row 7
10. ch 2, (5dc in 3rd
chain of first ch5 group), *sk 5 (5dc in next ch)* Repeat to end, sk2
and dc in the last st. Finish and weave in ends.
Adding Sleeves
1. Join yarn anywhere on
the bottom of the sleeve. Ch1, sc in the same spot, hdc in each
stitch and space around, sl st to first hdc to join the row. I ended
up with 25hdc, you may have more or less depending on where you place
your stitches, count is not importaint.
2. *ch3, sc in the next
st* repeat around and sl st to the first ch of ch3.
Repeat 1 and 2 for the
second sleeve.
Bloomers
1. ch40, careful not to
twist, join to first ch.
2. ch3, dc in each ch
around, sl st to 3rd ch to join.
3-5. repeat row 2
6. ch3, dc 19. skip the
rest of the stitches and join back to the top of your chain 3. This
will create the first leg hole.
7. ch3, dc in each st
around, sl st to top of ch3 to join. Finish, weave ends
8. join yarn in the
first st you skipped to make the first leg (photos) ch3, dc in the
next 20st and join to the top of the ch3. This creates the second
leg.
9. ch3, dc in each st
around, sl st to top of ch3 to join. Finish, of leaving a long tail
to sew the gap in the crutch together.
10. Join contrasting
colour and ch1. Hdc in the same space and 2hdc in each stitch around.
11. *ch3, sc in the next
st* Finish and weave in ends
Repeat rounds 10 and 11
on the second leg
chain 80 to make a tie
for the bloomers. Weave the tie in and out of every second dc on the first row, bow to tie.
Bonnet
chain 31
1. dc in 2nd
ch from hook and each across
2 – 8. ch3, turn, dc
in each st across
finish and weave ends.
Join Contrasting colour
9. ch3, dc in the same
stitch, 2dc in each st across.
10. *ch3, sc in the next
st* to end Finish and weave in ends
Ties. Chain 55, tie
off. Fold in half and thread the loop through the corner of the hood
pull the rest of the cord through the loop to secure. Repeat for the
other side.
Booties
Make 2
1. Ch3, 10dc in the first
ch, sl st join
2. ch2, hdc same stitch, *hdc in the next 2 stitches, (2hdc)* Repeat from * around
3. ch2, hdc round
4. repeat round 3.
5. ch2 10hdc
6. ch2 turn, 10hdc
7. ch2, turn, 3hdc, hdc2tg
twice, hdc next 3
8. ch2, turn, hdc2,
hdc2tg twice, hdc next 2
Join yellow to top of booties, see image below.
9. ch3, dc evenly around the bootie.
10. ch3, turn, dc in each dc
11. *ch3, sc in the next st* to end Finish and weave in ends
ch50, thread cord in
and out between dc on the 2nd yellow row
tie at back.
Please add photos, Id love to see this in other colours.