Showing posts with label Romper. Show all posts

Thursday, March 22, 2018

Button Me Up Romper - Newborn Crochet Pattern


Hello beautiful people!

We're almost at the end of March, which means a new newborn sized pattern. YAY!

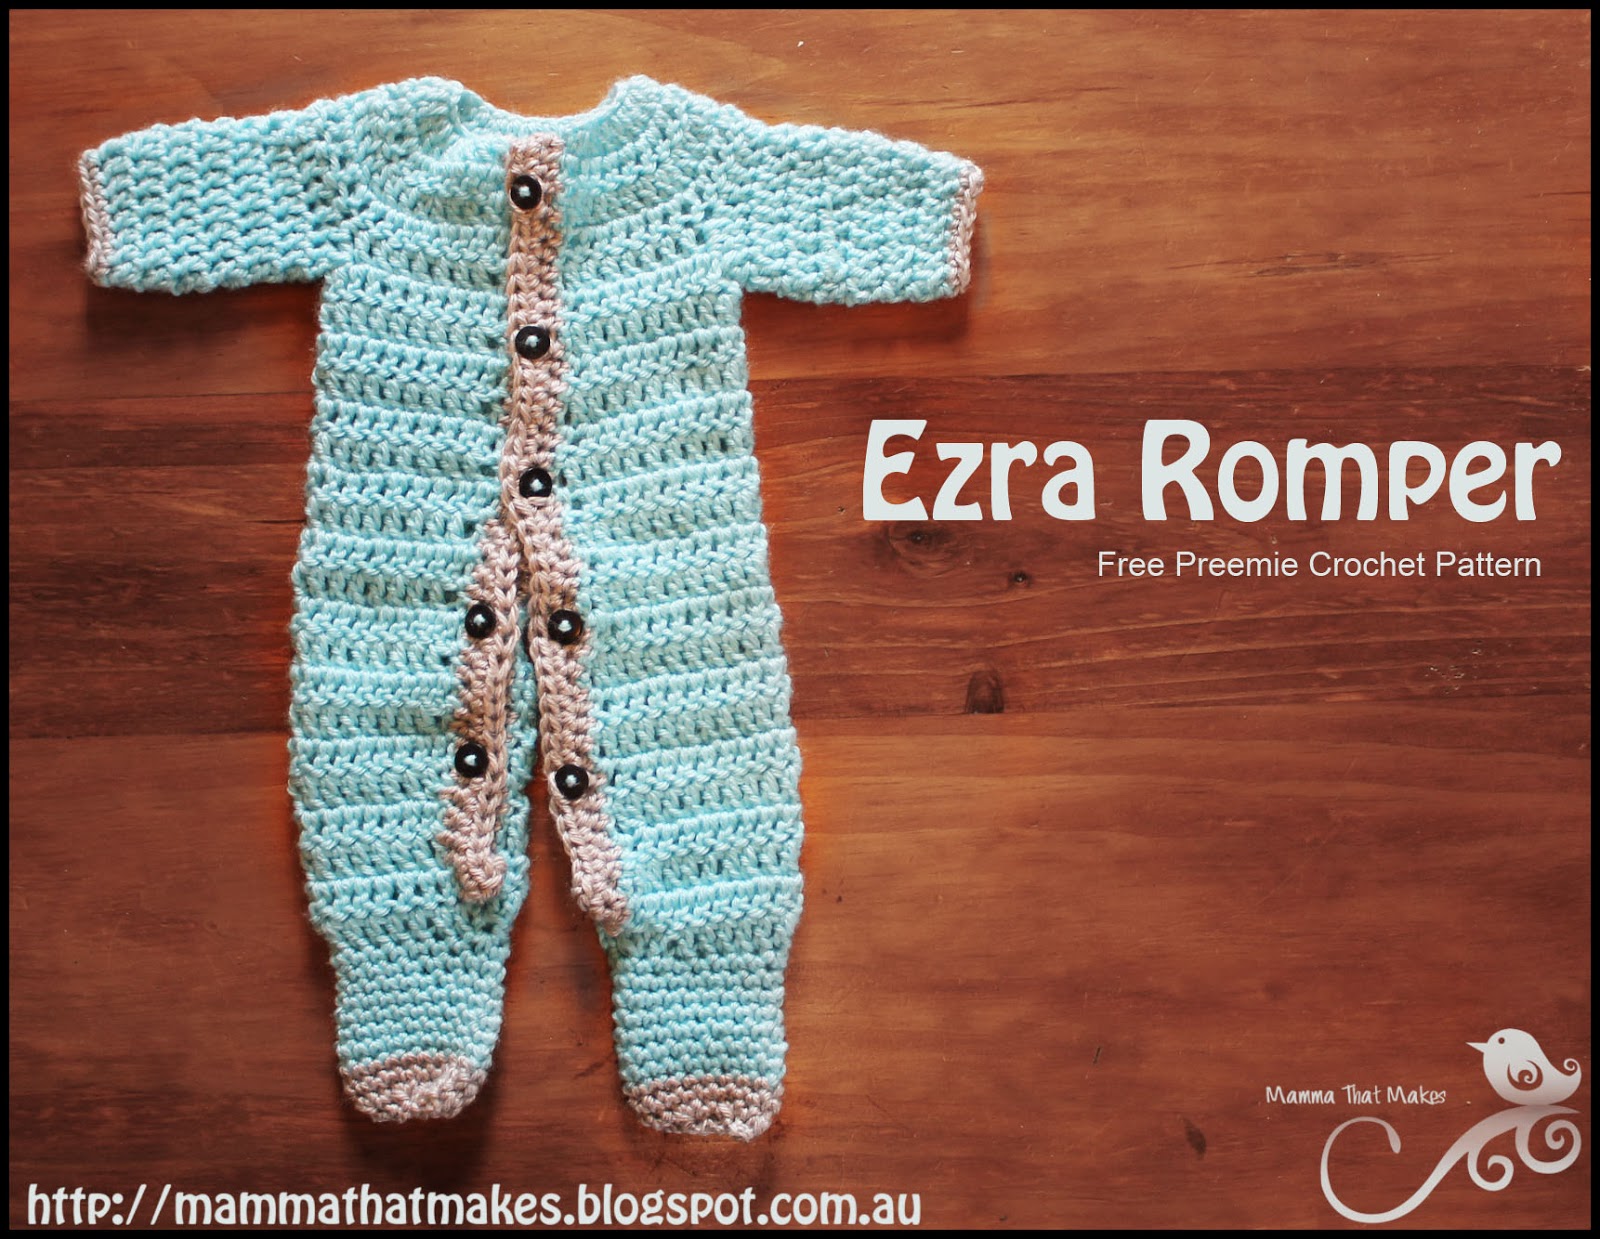
Today I have something a little different for you. I'm always looking for clever ways to make classics, and this just so happens to be one of those. This romper is side opening! It's one piece, and the back wraps around bubs sides, and buttons to the front of the piece!

Now, how you choose to do the wrap is your choice! I went with the side flaps under the front, and the buttons are sewn to the side flaps. However, you could just as easily sew the buttons to the front, and have the side flaps come up and over the front panel and close that way. Totally up to you which way you go.

The other thing about this pattern is that it uses Worsted Weight yarn! I know, it's not something I do a lot. I just don't have access to a steady stream of this weight of yarn. But I do love it for newborn projects, because boy do they work up FAST!

Today I've used Red Heart Super Saver Solids for the romper, but any Worsted weight yarn would be fine.

This romper is made in one piece, with the exception of the straps, so no joining here, there and everywhere! I've left mine plain, because I haven't yet decided on a recipient, but there are a lot of options for decorations. You could add a pocket. Sew on a flower. Embroider or top stitch an animal or even add some ruffles to the legs!

My doll is wearing a modern cloth nappy, which is quite bulky, so you can see how easily it fits over diapers.


Ok, let's get to it!!

You Will Need:
5mm Hook
Worsted Weight/Aran/10ply Yarn in a main and a contrasting colour.
6 matching buttons

Sized To Fit:
0-3 Months (Newborn)

1: Ch32, dc in the 3rd chain from hook and each across. - 30

2-8: Ch3, turn, dc in each stitch across. - 30

9: Ch1, turn, slip stitch in the first 3 stitches, dc in the next 24 stitches, leave the last 3 stitches unworked. - 24

10: Ch3, turn, dc2tg twice, dc in the next 16 stitches, dc2tg twice. - 20

11: Ch3, turn, dc2tg twice, dc in the next 12 stitches, dc2tg twice. - 16

12: Ch3, turn, dc2tg twice, dc in the next 8 stitches, dc2tg twice. - 12

13-20: Ch3, turn, dc in each stitch across. - 12

21: Ch3, turn, 2dc in the first stitch, dc in the next 10 stitches, 2dc in the last stitch. - 14

22: Ch3, turn, 2dc in the first stitch, dc in the next 12 stitches, 2dc in the last stitch. - 16

23: Ch3, turn, 2dc in the first stitch, dc in the next 14 stitches, 2dc in the last stitch. - 18

24: Ch3, turn, 2dc in the first stitch, dc in the next 16 stitches, 2dc in the last stitch. - 20

25-32: Ch3, turn, sc in each stitch across. -20 End off yarn.

Adding Straps

On the back section of the romper (the edge with the starting chains), count in 9 stitches and join yarn.

1: Ch2, hdc in the same stitch, hdc in the next 2 stitches. - 3
2-16: Ch2, turn, hdc in each stitch across. - 3 End off.

Turn the piece over and count in to the 9th stitch on the other side of the back section and attach yarn. Repeat as for first strap.

Trim:

1: With contrasting colour join to the first stitch on row 32, ch1, sc across (20), continue to sc around the entire piece (working in row ends on the strap and main piece sides), straps included. When you reach corners, make 2sc in them to help with turning, join to the first hdc.

2: Ch1, fpsc around the first stitch, bpsc around the next stitch, *fpsc around the next stitch, .bpsc around the next stitch* repeat around. Join to the first sc.

Alternative Finish: 2: Reverse SC (crab stitch) around.

Attach buttons! You won't need button holes, the buttons should just slot through the stitches.


Wednesday, July 15, 2015

Ezra Romper - Free Crochet Pattern


Hello beautiful people!

This weeks pattern, if Im totally honest here, took me longer then I expected to work up. I think in total I ripped it out at various stages about 15 times before deciding it was how I wanted it. Im not sure why, because the end pattern is pretty straight forward and simple enough to follow. In fact, it would be easy for an advanced beginner to follow along too which is great news for everyone!

I asked last month via my Facebook Page for any suggestions for more boy items. I know I have a handful, but they are still sorely lacking in the world of prem patterns. An open at the front full one piece romper was requested a few times, and so that was my first stop. This romper will fit 32-34 weeks (3.5-4.5lb) but changing the yarn and hook to something thinner will get you smaller rompers. I haven't had a chance to try this fully yet, but dk/8ply with a 4 or 4.5 should get you around the 30 weeks gestation mark.

You'll notice that I have some more yarn variety coming in now. I have been lucky enough to get some fantastic yarn from America over and boy am I having some fun playing with it. So you can definitely expect some more worsted weight patterns. I also have a rather large ball of crochet thread too, that Im itching to turn into a gown.

So I hope you like this pattern, and I hope you like the ones to come :)


You will need
5mm hook
Worsted weight yarn in a main and contrasting colour (I used Red Heart Soft baby Steps in Aqua and Elephant) You will need the best part of a ball of your main colour.
7 buttons for closing

1: ch28, in the 2nd chain from hook dc, *2dc in the next stitch, dc in the next stitch* , repeat across,(39)

2: ch3, turn, dc in each stitch across (39)

3: ch3, turn, *dc in the first 2 stitches, 2dc in the next stitch*, repeat across (52)

4: ch3, turn, dc across

5: ch3, turn, dc in the first 8 stitches, skip 9 stitches, ch3, dc in the next 17 stitches, ch3, skip 9 stitches, dc in the last 9 stitches. (40, including chains)

6: ch3, turn, dc in each stitch and chain across (40)

7-15: ch3, turn, dc across (40)

16: ch3, turn, 2dc in the first stitch, dc in the next 18 stitches, 2dc in the next stitch. Leave the rest of the stitches un-worked. (22)

17-20: ch3, turn, dc in each stitch across

21: ch3, turn, dc2tg, dc in the next 18 stitches, dc2tg (20)

22-24: ch3, turn, dc in each stitch across

25: turn, join to the 1st dc of the last row, ch3, dc2tg, dc in the next 8 stitches, dc2tg, dc in the next 8 stitches, join. (18)

26: ch1, sc2tg, sc in the next 5 stitches, sc2tg (7)

27: ch1 turn, sc2tg, sc in the next 3 stitches, sc2tg (5)

28: ch1, turn, sc2tg, sc in the next stitch, sc2tg, don't turn.

29: ch1, sc in the ends of rows 26, 27 and 28, sc in the next 9 stitches, sc in the 3 ends of rows 26, 27 and 28, sc in the last 3 stitches, join to the first sc. (18)

30-35: ch1, sc in each stitch around, join

 End off

Join yarn to the 21st stitch (first un-worked st) on row 15 and ch3

36: ch3, turn, 2dc in the first stitch, dc in the next 18 stitches, 2dc in the next stitch. (22)

37-39: ch3, turn, dc in each stitch across

40: ch3, turn, dc2tg, dc in the next 18 stitches, dc2tg (20)

41-43: ch3, turn, dc in each stitch across

44: turn, join to the 1st dc of the last row, ch3, turn, dc2tg, dc in the next 8 stitches, dc2tg, dc in the next 8 stitches, join. (18).

45: ch1, turn, sc2tg, sc in the next 5 stitches, sc2tg (7)

46: ch1 turn, sc2tg, sc in the next 3 stitches, sc2tg (5)

47: ch1, turn, sc2tg, sc in the next stitch, sc2tg, don't turn.

48: ch1, sc in the first 3 stitches, sc in the ends of rows 26, 27 and 28, sc in the next 9 stitches, sc in the 3 ends of rows 26, 27 and 28, join to the first sc. (18)

49-54: ch1, sc in each stitch around, join

End off

Sleeves.

55: Join yarn with a slst to any stitch on the sleeve and ch3. Evenly dc around the sleeve hole 18 times, join.

56- 59 ch3, dc in each stitch around, join. (18)

60: ch3, dc2tg, dc in the next 7 stitches, dc2tg, dc in the next 7 stitches, join. (16)

61: ch3, dc in each stitch around, join. End off.

Repeat rounds 55-61 for the second sleeve


Edging and Finishing

Sleeves

Join contrasting colour to any stitch on the sleeve, ch1, sc around, join. End off and weave in ends.
Repeat for second sleeve

Feet

Join yarn to a stitch on the rear side of the foot and ch1

1: sc in each stitch around, join. (18)
2: ch1, sc in each stitch around, join
3: ch1, *sc, sc2tg*, repeat around, join. (12)
End off leaving a long tail. Hold the toe section flat and sew the gap closed with the tail.
Repeat for second foot.

Body

Join yarn to the right side of romper at the neck and ch2, hdc evenly down the body of the romper to the join in the leg, hdc in the join, hdc up the other side of the leg to the crotch, when you get to the crotch area find the 2 stitches that separate the legs, (hdc, dc, trc) in the first one, (trc, dc, hdc) in the next one, then continue on in hdc down the next leg, to the leg join, one hdc in the next leg join then up the leg and body to the neck line but not around the neck.


ch2, turn, hdc in each stitch right around until you get back to the neck where you started the previous round. Finish off.

Weave in all ends and sew buttons into place.


Saturday, January 31, 2015

Brianna Romper


Good morning everyone and welcome to 2015!

Wow this month has been insane crazy! On January 7th we welcomed a new addition to the family with the safe arrival of our boy Jackson. He is super sweet and smooshy and adorable and I could sit forever gazing into his deep eyes. Fair to say I am very much in love, as are daddy and the girls. We've had a bit of a rough ride with an extended hospital stay and I've been quite ill. Throw in the girls going back to school next week and woah busy times!


I am however pleased to be able to get January's pattern up, even if it is on the last day of the month. PHEW Made it!
I havn't second tested this one, so if there are any mistakes apologies in advance and I'll sort them if they come up.

This little romper is super sweet and a joy to make. It will fit a bub of 24 weeks gestation. I havn't tried it in DK weight yet, but I suspect of you used it, it would be closer to perhaps 30 weeks. Made with 4ply, it is very light and has beautiful drape. I used Dianella by Panda which is a 100% bamboo yarn, Oh have I told you how much I LOVE bamboo yarn? MMMMM!

I know a lot of you have requested more specific instructions on some patterns (particularly more images and stitch count) so I will go back through them all when I have some time and update.
For those of you who don't Follow me on Facebook this year I won't be adding one pattern a week. With a new babba it is unrealistic to put that much pressure on myself, so I am hoping one prem and one non prem pattern a month, but we will see how we roll. As always, have a gentle day <3


You will need:

4ply/fingering weight yarn in a main and contrasting colour. I used Dianella by Panda for the pink.
3mm hook
sewing needle
2 buttons

With pink yarn

1: ch36, in the 2nd chain from hook dc, *2dc in the next stitch, dc in the next stitch*, repeat across (52)

2: ch3, turn, dc in each stitch across (52)

3: ch3, turn, *dc in the first 2 stitches, 2dc in the next stitch*, repeat across (69)

4: ch3, turn, dc across

Change to white yarn

5: ch1, turn, sc in the first 10 stitches, skip 12 stitches, ch3, sc in the next 25 stitches, ch3, skip 12 stitches, sc in the last 10 stitches. (51, including chains)

Change to pink yarn

6-7: ch3, turn, dc in each stitch and chain across

Change to white yarn

8: ch1, turn, sc in each stitch across

Change to pink yarn

9-12: ch3, turn, dc in each stitch across

13: ch3, turn, dc in each stitch across, join to the 1st dc.

14-15: ch3, turn, dc in each stitch around, join.

16: ch3, turn, dc in the first 25 stitches, skip the rest and join to the 1st dc. One leg created. (25)

17-20: ch3, dc in each stitch around, join.

21: ch3, *dc in the first 2 stitches, dc2tg*, repeat around, join. (19)

22-23: ch3, dc in each stitch around, join.

Change to white yarn

24: ch1, sc in each stitch around, join.

25: ch3, dc in each stitch around, join.

Finish off.


Second leg:

26: Join pink yarn to the 1st unused stitch on round 16, ch3, dc in the same stitch, and in the next 24 stitches, join.

Repeat from 17-25 to complete the second leg.


Sleeves

1: Join white yarn to the first unused stitch of round 4, ch1, and sc in the same stitch, sc in the next 11 stitches (12)

2: ch1, turn, (sc, ch4, sc) in each of the 12 stitches across. End off.


Repeat for the second sleeve.


Flower for front of romper

With white yarn

1: ch2, hdc 7 times in the first chain, join.

2: ch1, (sc, ch4, sc) in each of the 7 stitches around, join. Sew a button in the middle of the flower, then attach the flower to the front of the romper.


Attach 2 buttons to the back of the romper for closing.