Tuesday, May 22, 2012

Crayon Roll Tutorial


Hey howdy hey! I think this is my first sewing tutorial. YAY for me!

Now the crayon roll is not a new idea, I've seen them before. I wanted to do my own and so here it is. I started making these because I'm using up leftover material and sending them to Angelsfortheforgotten which will go into their bags for kids going into crisis or foster care. Yes once again its another charity pattern. What can I say, I just enjoy helping!

This really is easy to make, and if you were to set up a bit of a production line you could easily make a few in an hour. As always, do what you will with these patterns just don't copy the images and text and pretend it came from your brain, that's a no-no ok. I think these would do well at school fetes and boot sales as well as fundraising!

For this tutorial you will need:
Some material. I have some cotton blends.
50cm of ribbon
a measuring tape or ruler
some cardboard or paper if you want a pattern.
pins
cotton
a marker
crayons
and a sewing machine.


First some measurements. I'm using Ben10 crayons that are thick and chunky and excellent for smaller hands. They need pockets that are 3cm wide to fit in snugly.

My template is a simple square that measures 22cm x 17cm This includes seam allowance.
On my template, you can see I've marked off the spaces for the crayons. I put a mark at 11cm, then counted on each side 3cm gaps.


The material! You need to cut 3 pieces of material out for one roll. I use 2 colours, however you can use multiple. I have one for the pocket and one for the back and front. Cut out your three pieces!


Fold your front pocket piece in half, and pin it to the backing piece. Right sides up and so the fold is at the top!


Using a fabric marker (if you have one, or you can be a slaphappy like me and just use one of the kids markers) put some small dots on the bottom of the pocket material so you know where your lines need to be sewn.


Now its simply a matter of feeding the material through your sewing machine to create straight lines, starting at the bottom and going right to the top of the backing piece of material. You should up with 7 stitched lines.


I know I know, I could have picked a better cotton, but its all I had. Trim the cotton dags off.

Cut a piece of ribbon to 50cm. Fold it in half. Stitch the fold end to the material as shown below.


I put mine on the right side, but really you can put it on either. Just make sure that the ties are facing inwards.

Now place the 3rd piece of material on top of the pocket piece, right sides facing. Make sure to tuck the ribbon in so you do not sew over the free ends. Pin it down and sew around the edges, making sure to leave a gap about 3 inches wide so you can turn it.


Reach in and grab the ribbon and pull it through the gap, this will help you turn the whole thing in the right way.


Now you have this annoying little gap to deal with. Most people would go ahead and hand sew that closed. Alas, like I've stated before, my hand sewing skills are horrid bad shocking disastrous! So starting in the bottom left hand corner, I top stitch very very close to the edge up the left side, across the top and down the right side. This gives it a nice edge and closes that pesky gap for me!

Give it a quick iron to make sure its all sitting flat and all you have left to do is fill it with crayons!

And to prove that even I make muff-ups and these things don't just work out amazingly, here is my first one. Which is a little short, and has top stitching all the way around. I guess we all learn from trial and error huh!


Sunday, May 20, 2012

Keepsake Pocket - Free Pattern


Today's pattern has been in the works for a while. Ive been doing some experimenting with sewing machines and crochet. It seems this works surprisingly well, providing the material is on top, otherwise the yarn catches on the foot. The basics of this are simple enough. Its just a granny square. I did not create the granny square, I just turned it into something else! I have no pics for the steps to make a granny square, but if you need step by step instructions I highly recommend http://www.purlbee.com/granny-square-project/
The idea behind this one was something to hold maybe a lock of hair or a hospital tag, something along those lines, but really you could keep anything in them.

Ok so onto the pattern!
I used a 6mm hook and dk weight cotton but really you can use any combination for this.

ch4, sl st to the first chain to form a loop.

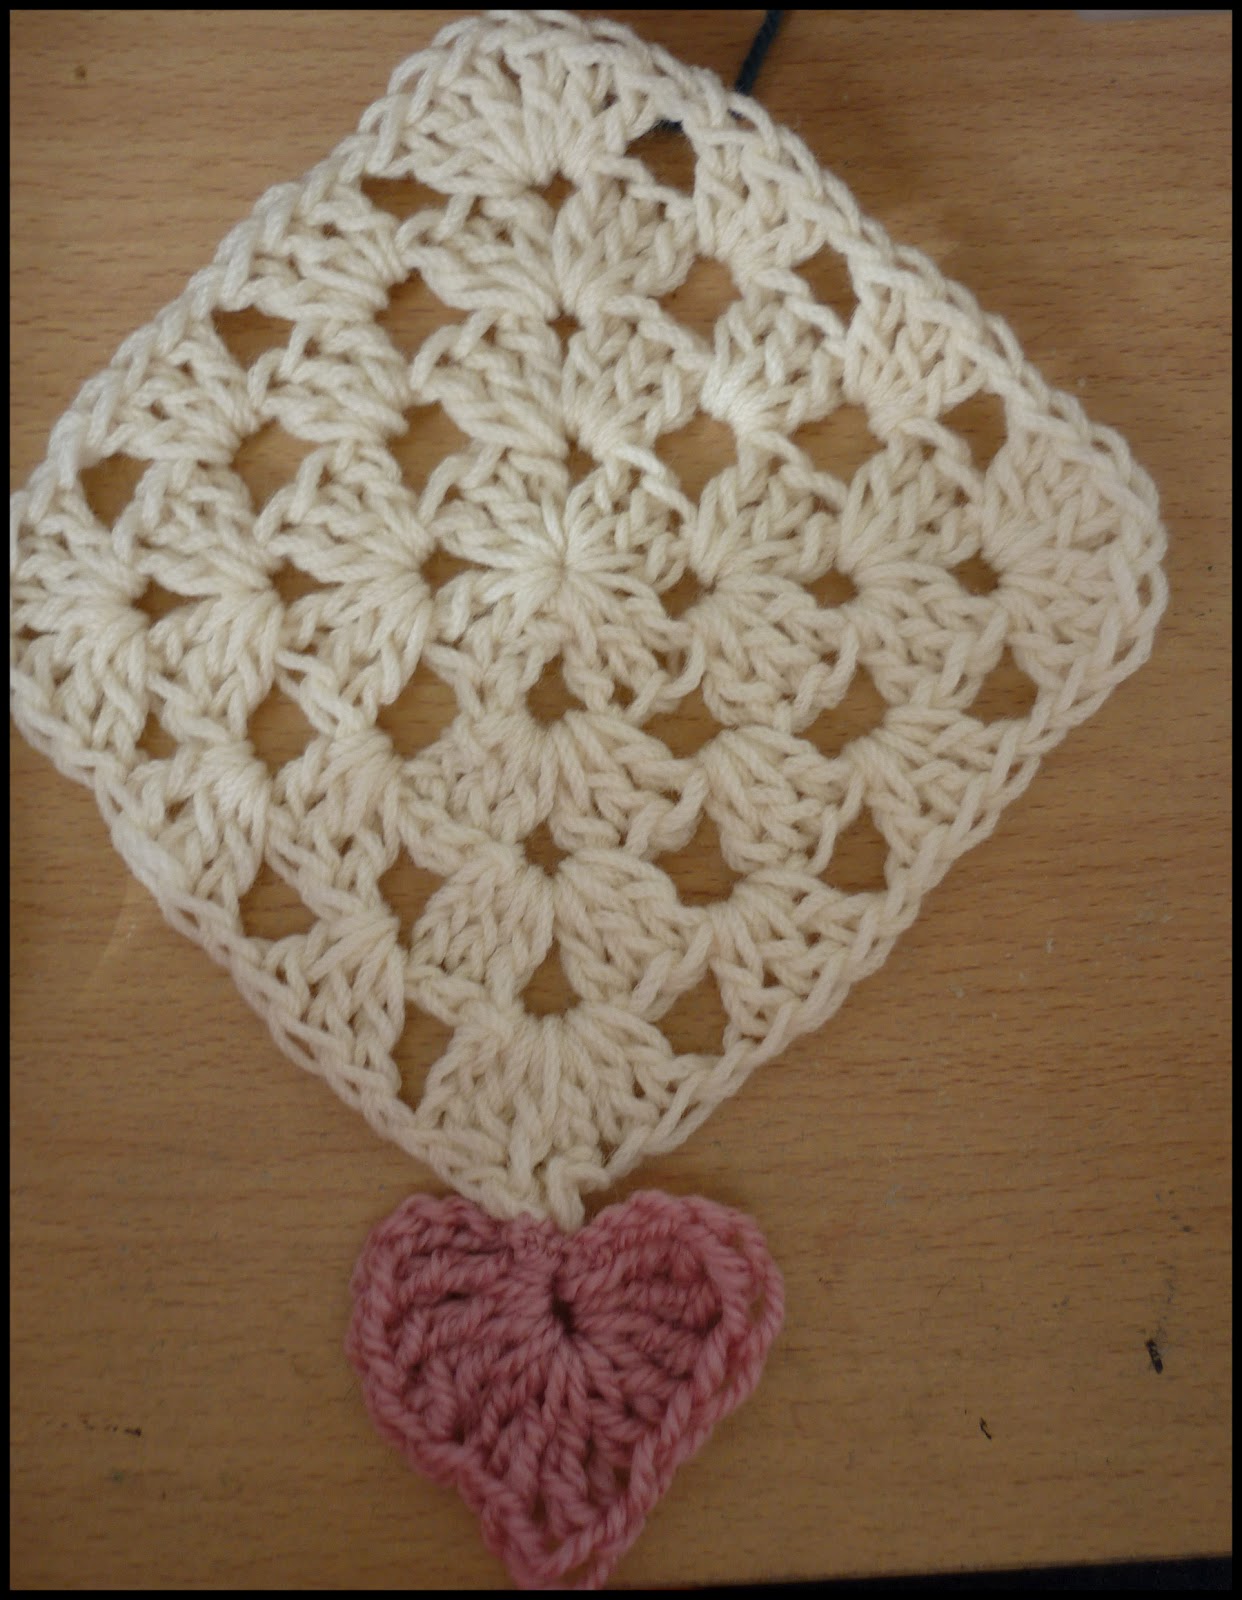
1. ch4, *dc 3 times, ch1* repeat from * to * 3 times. Join to the ch4. You should have something that looks like this.


2. ch3, in the same gap, 2dc, ch1, 3dc (this creates your first corner) skip over the dc's and into the ch1 gap * ch1, 3dc, ch1, 3dc* Repeat from * to * to complete the last 2 corners. You should have something that looks like this.


3. sl st until you get to the next ch1 gap.  ch3, 2dc, ch1, 3dc in the first gap, *ch1, skip to the next gap, 3dc in the gap, ch1, in the next gap create a corner by making 3dc, ch1, 3dc* Repeat from * to * 2 more times. sl st to join


4. sl st until you get to the next ch1 gap.  ch3, 2dc, ch1, 3dc in the first gap, *ch1, skip to the next gap, 3dc in the gap, skip to the next gap, 3dc in the gap, ch1, in the next gap create a corner by making 3dc, ch1, 3dc* Repeat from * to * 2 more times. sl st to join


Now I stopped here to make a smaller pocket. Its about 5x5 inches. If you want a larger one just add more rounds, all you need to remember is in the corner gaps do (3dc, ch1, 3dc) and 3dc in each side gap, of course all with ch1's in between.


Now before ending off with the colour you are using, in the corner that you end on in that gap chain 4 and sl st back into the same st to make a loop. Check to see if the button you will use will fit through the gap, if not add another chain. You can now end off this colour.


Attach the heart colour to the loop with a slip stitch. Now we'll make the heart.

Chain 4


triple crochet  (TC) 3 times


DC two times


TC, ch1, TC


DC two times


TC 3 times


ch3 and sl st into the circle


Finish off leaving a 3 inch tail. Thread the tail onto a needle and slip it through the opposite side of the heart and pull to close the gap.


TADAAAAAAAAAA


Ok so now we put away the yarn and pull out the sewing machine. You can also hand stitch the lining in if you choose to. I just really REALLY suck at hand sewing so I always default to the machine.

Ok so you need to cut a square of material that is about a cm / quarter of an inch smaller once hemmed then your granny square. I fold the edges of mine under, pin it into place and sew the hem as I'm stitching it to the granny, but you can certainty hem the material first. 


Sew around all 4 sides so it is attached well to the granny square.Ive just used some lightweight poplin but any material will work. If you use fleece or felt that doesn't fray you wont even need to hem the edges!

Once thats done, you need to sew the bottom together. Start by threading some yarn and join the 2 middle points together


Pull the bottom point up so it sits over the 2 side pieces and stitch both sides down. I just did a simple whip stitch.


Then sew a button into the centre


Thats it, Your done! Now mine is a little off centre, and thats probably because I didn't block my square. For the next one I will.

The other beaut thing about this pattern is you can do it with ANY square! Use some with pretty flower centers, change the yarn, make them bigger, the possibilities are endless!