


Hello wonderful people!
I hope everyone is doing well. Ive been on holiday on the east coast of Tasmania, my gosh, it was very beautiful and inspiring. I am however, glad to be home and back to my crochet.
I have a super fun pattern for you all today, one that Ive had in my mind for some time now and never really got to working on until this week. Introducing, the super versatile romper! Be it a boy or a girl, this romper works for both. As an article of clothing, a summer cover-up or even as a photography prop.
I have a bunch of fun variations posted which will come in over the next few weeks, but for now, here is the basic pattern.
The sizing is based off a baby in 000 (in Aus sizes, which is equivalent to a 0-3 month)
You could easily adjust this by upping the hook and yarn sizes, just remember that larger babies have longer torsos so you will need to add some extra rounds after R17 to compensate for this.
Worsted weight yarn is not readily available in Australia (Anyone want to post some down? hehe) so I can't test with this, but I would hazard a guess that worsted and a 6mm with some extra rows *should* get you around the 3-6month mark.
Ch2 at the start of the rounds/rows does NOT count in the stitch count.
You will need:
dk weight yarn in a main and contrasting colour
5mm hook
4 buttons
R1: ch20
R2: dc in the 3rd chain from hook and each across (18)
R3: ch2, turn, dc across (18)
R4: ch2, turn, 2dc in the first stitch, dc in the next 16 stitches, 2dc in the last stitch (20)
R5: ch2, turn, dc in each stitch across (20)
R6: ch2, turn, 2dc in the first stitch, dc in the next 18 stitches, 2dc in the last stitch (22)
R7: ch2, turn, 2dc in the first stitch, dc in the next 20 stitches, 2dc in the last stitch (24)
R8: ch2, turn, dc in each stitch across (24)
R9: chain 24,, turn, skip all 24 stitches and join to the very last stitch. From here we will work in a round.
R10: ch2, dc in each stitch and chain around, join (48)
R11-17: ch2, dc in each stitch around, join
R18: ch2, dc in the next 24 stitches (24)
R19: ch2, turn, dc2tg, dc in the next 20 stitches, dc2tg (22)
R20: ch2, turn, dc in the first stitch, dc2tg twice, dc in the next 12 stitches, dc2tg twice, dc in the last stitch (18)
R21: ch2, dc, dc2tg three times, dc in the next 4 stitches, dc2tg three times, dc in the last stitch(12)
R22: ch2, turn, dc in the first stitch, dc2tg, dc in the next 6 stitches, dc2tg, dc in the last stitch (10)
R23: ch2, turn, dc, dc2tg, dc, dc2tg, dc, dc2tg, dc (7)
R24: ch1, turn, sc across. End off, weave in ends.
R25: With the back of the piece facing you, Join yarn to the first unworked st from round 17, ch2, dc in the same st and the next 23 stitches (24)
R26: ch2, turn, dc2tg, dc in the next 20 stitches, dc2tg (22)
R27: ch2, turn, dc, dc2tg, dc in the next 16 stitches, dc2tg , dc (20)
R28: ch2, turn, dc, dc2tg twice, dc 10, dc2tg twice, dc (16)
R29: ch2, dc, dc2tg three times, dc twice, dc2tg three times, dc (10)
R30: ch2, turn, dc, dc2tg four times, dc (6)
R31-32: ch2, turn, dc across (6)
ch2, turn, 2dc in the first st, dc in the next 4 stitches, 2dc in the last st (8) End off.
With a contrasting colour sc evenly around all edges (both the bottom opening and the top)
Weave in all ends.
Straps
R1: ch25, dc in 3rd ch from hook and each across (23)
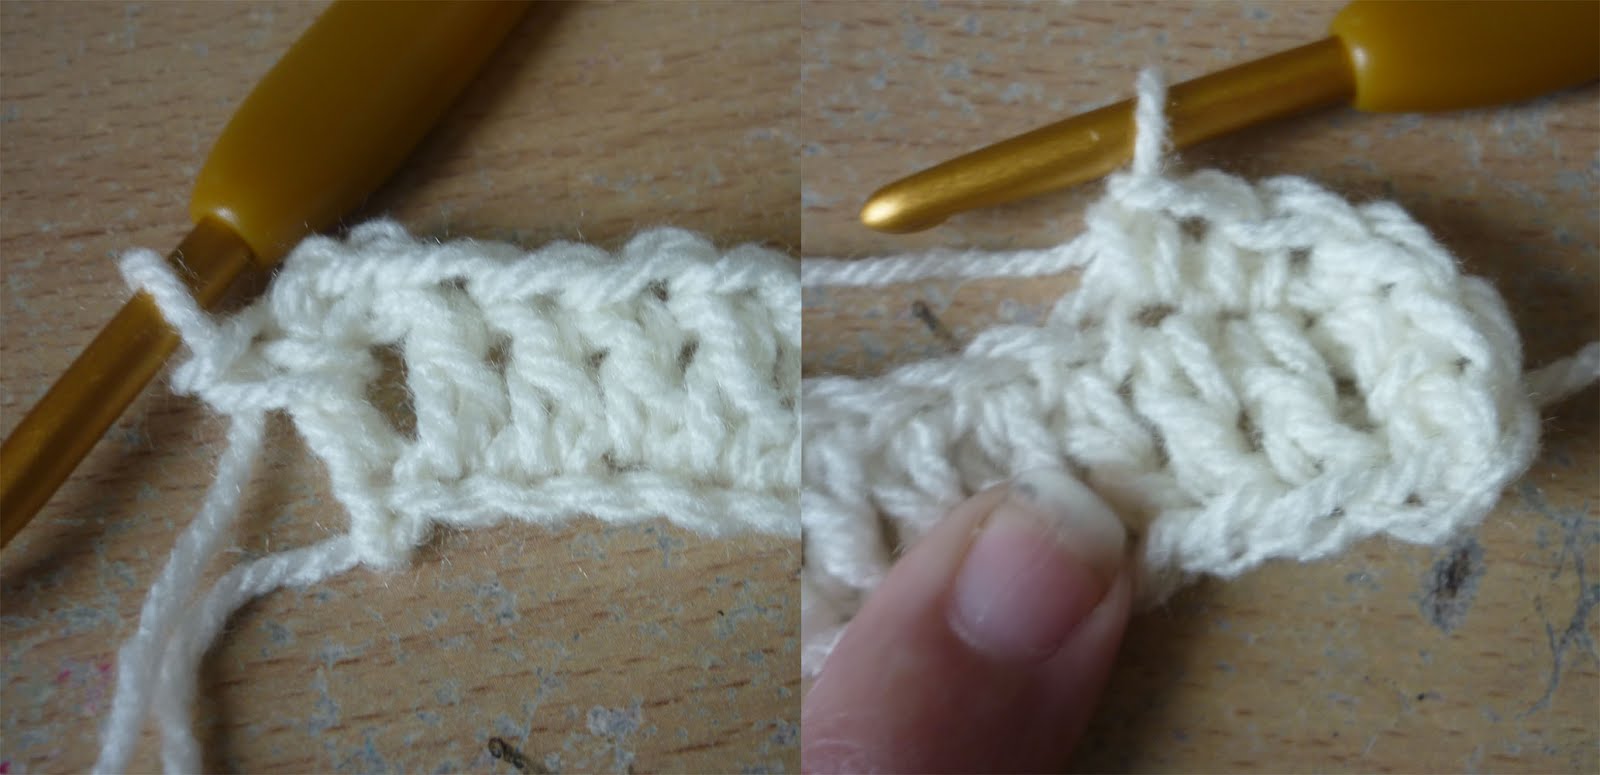
R2: ch1, sc in the end (side) of the last dc stitch, then on the opposite side of the chains to the dc you just made, sc in each across (see pic below), at the end do another sc in the side of the dc and then sc back across the dc’s from R1. Join with a sl st, end off and weave in tails.
Sew straps to the back of the bodysuit.
Add buttons, 2 for the bottom and 2 for the straps.
Thank you
ReplyDeleteI like this easy to read pattern. I find so many that are have too much information or too little. I am happy with my results. The strap instructions did confuse me a bit. I interpreted the "side of the stitch" to be the "back loop". It seemed to turn out nicely so I went with it. Thanks again for this pattern. Hoping my sister will like this for her new baby girl.
DeleteHi.
ReplyDeleteI love this pattern!
I was trying to find an email address for you, but couldn't, so I'll contact you here :) I have a Danish crochet blog, where I post translated patterns. I always reference the designer with a link, so it's win-win free marketing for you - and lovely patterns for my readers :) Would you allow me to translate this pattern and post on my blog - with a clear reference and link to your site?
Kind regards
Louise
www.garngrammatik.dk
Hi, I am in love with this pattern but I have a slight problem and I was wondering if you could help me.
ReplyDeleteI finished all of my rows and I worked exactly by your instructions but at the end when you look at the romper it looks like it shifted to the left side so even if I straighten it then the bottom part looks weird. The same thing happened to my friend. I don't know how to fix this.
I hope you can help.
Thanks Sheila
That could be the join method. Do you crochet into the same stitch as the chain for each row start, or into the next one?
Deleteyes I crochet into the same stitch as the chain for each row start
DeleteHrm so do I so it shouldn't be a problem. I'll have another look at the pattern and see if I can figure it out.
Deleteohhh thanks a lot. I am trying now to add an extra dc at the end of each row.
DeleteI joined into the dc not the ch st......remember the ch st doesnt count as a st and we dont count it....thats why we dc into its same space at the beginning of each round.
DeleteI faced the same issue so at row 18, I first did 4 slip stitches and then the ch2. That solved it.
DeleteWhenever I get to R18 the entire thing becomes crooked and by the time I reach R25, there are only 20 stitches left, not 23
ReplyDeleteCheck to see that you have not included the chain 2 in the country of dcs.
Delete*count of dcs
DeleteI love this I just made my first one for a baby shower gift hope she likes it
ReplyDeleteDo you make buttonholes or are you just pushing them through between the DC's?
ReplyDelete