Good afternoon all
It has been a crazy few weeks here in the Mamma household. One that has led to some very tough choices and decisions being made.
Yesterday I announced that I would no longer be selling finished products. For a year now, I have been making and selling photography props and hats. Mainly to help cover the cost of postage for all the preemie items.
This meant I had less and less time to spend actually designing which is what I love to do the most.
So it is a little sad that I wont be running the store anymore, and I really do enjoy making props, but first and foremost is the designing aspect, being able to supply you all with patterns that I know will help families across the globe is more humbling and means much more to me then any amount of sales ever will.
I have also been asked a LOT lately for larger sized patterns, and that is again, certainly something I want to play with. I want to remind everyone once again that I am more then happy to take requests for patterns! Just send me an email or leave a comment below and I'll see what I can do.
The Facebook pages will go back to how they originally were, so you can find all pattern and release info at MammaThatMakes on Facebook.
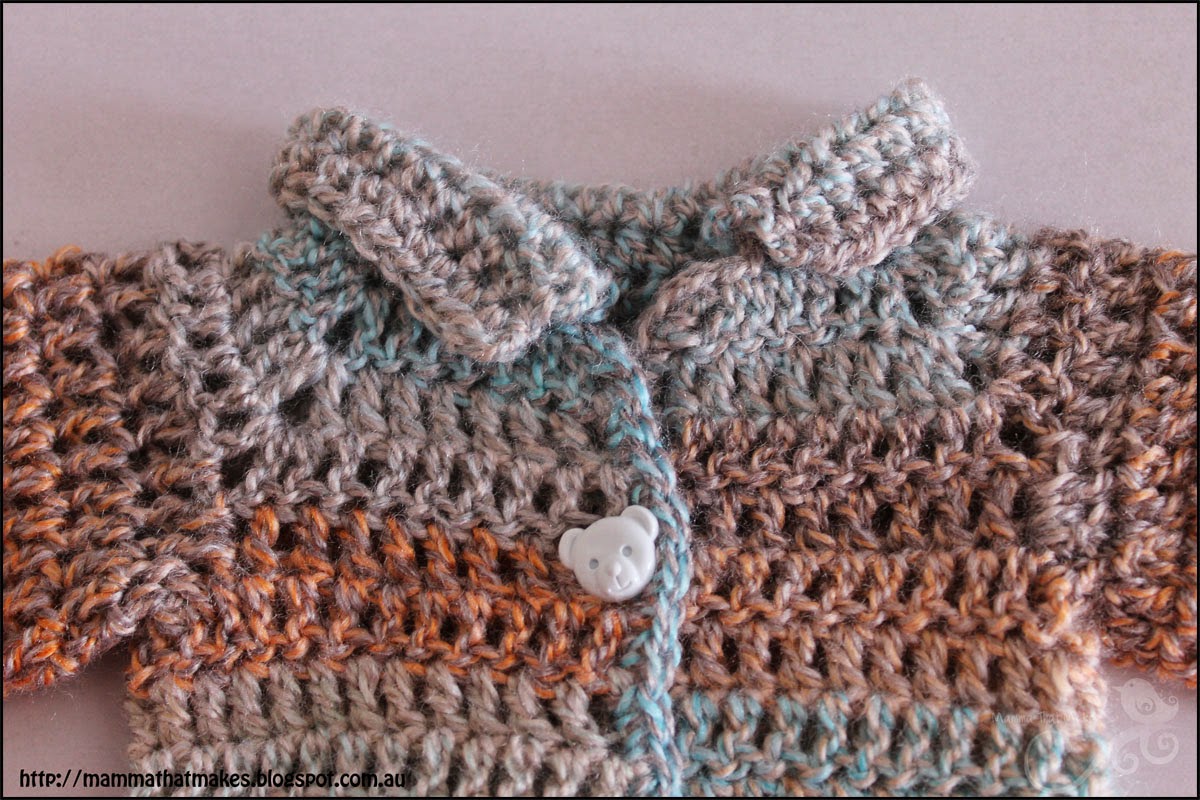
Anyhows! Today's pattern is for a little jacket that will fit 24-26 weeks gestation. It would work for both genders, but I used the blue/orange/brown variegated from Patons Fantasia range, which by the way, feels amazing! Its very simple to make and quite easy to adjust.
I am making a second one, with stripes :)
3.75mm hook
4ply (fingering weight) yarn. I used Patons Fantasia.
2-3 buttons
1: ch40, dc in the 3rd ch from hook, dc in the next 5 chs, (dc, ch1, dc) in the next ch, dc in the next 5 chs, (dc, ch1, dc) in the next ch, dc in the next 12 chs, (dc, ch1, dc) in the next ch, dc in the next 5 chs, (dc, ch1, dc) in the next ch, dc in the last 6 chs.
2: ch2, turn, dc in the first 7 sts, (dc, ch1, dc) in the ch1 space, dc in the next 7 sts, (dc, ch1, dc) in the ch1 space, dc in the next 14 sts, (dc, ch1, dc) in the next ch1 gap, dc in the next 7 sts, (dc, ch1, dc) in the next ch1 space, dc in the last 7 sts.
3: ch2, turn, dc in the first 8 sts, (dc, ch1, dc) in the ch1 space, dc in the next 9 sts, (dc, ch1, dc) in the ch1 space, dc in the next 16 sts, (dc, ch1, dc) in the ch1 space, dc in the next 9 sts, (dc, ch1, dc) in the ch1 space, dc in the last 8 sts.
4: ch2, turn, dc in the first 9 sts, dc in the ch1 space, ch3, sk all dc’s to the next ch1 space and dc in that, dc in the next 18 sts, dc in the ch1 space, ch3, sk the next lot of dc’s and dc in the next ch1 space, dc in the last 9 sts.
5: ch2, turn, dc in the first 10 sts, dc 4 times in the ch3 space, dc in the next 20 sts, dc 4 times in the next ch3 space, dc in the last 10 sts.
6-11: ch2, turn, dc in each st across.
12: ch1, turn, sc across the all sts, in the very last st do 2sc, sc evenly up the side of the jacket, sc once in the top corner of the jacket, sl st in the next 2 sts (will be row1) ch2, hdc in the same st and in the next 33 sts (you should have 2 unworked sts left), ch2, turn, hdc back across all 34 hdcs, ch2, turn, hdc again along all 34 hdc’s, sl st down the side of the collar, sl st in the unworked sts and sc once in the corner, sc evenly down the side and 2sc into the last corner, sl st to join.
Fold down collar.
Sleeves
1: Join yarn to any st on the sleeve hole and ch2, dc evenly around (21sts for me), join.
2-8: ch2, dc around, join
9-10: ch1, sc in each st around, join.
End off yarn.
Repeat for second sleeve.
Attach buttons as desired


No comments:
Post a Comment