Friday, November 30, 2012

CatNip CatFish - Free Crochet Pattern


Hello again!

Well today's pattern is something a little new for me. Last night my local RSPCA posted on their Facebook that they were in need of donations of toys, food ect for the holiday season. I figured Id make a box full of cat toys and deliver the present all wrapped up from Cleo and Chloe (our kitties that came from there) Even furry friends need presents! Well of course, that means patterns! So Ill have a few cat toys up over the next few days.

I also have a few new Barbie patterns to get up, which I should have done by the end of next week.


While I have your attention: Please, Pets are NOT good gifts! So many pets end up at shelters across the globe after being unwanted gifts given for Christmas. Also remember that the very best place to find your furever friend is at a shelter, give some love to a pet who has none.


I promise, this will be the fastest cat toy you will ever make, they are so simple :) Why not whip up a few for your cats, and a few more for your local shelter.

CatNip CatFish

4.5mm hook
2 strands of DK weight yarn held together
small amount of stuffing
catnip

R1: ch2, sc 6 in the fist chain, do not join, place marker
R2: sc, 2sc in the next, repeat around (9)
R3: 2sc in the next stitch, sc in the next 2 stitches (12)
R4-R6: sc in each stitch around
R7: sc2tg, repeat around (6)

Stop here and stuff your fish

R8: ch1, squeeze the open end together and sc the end together with 3 sc (3)
R9: ch1, turn, 2sc in each stitch (6)
R10: ch3, dc 3 times in the first st, sk1, sl st, sk1, dc 3 times in the last stitch, ch3 and sl st into the same st. Finish off and weave in ends.

Tuesday, November 27, 2012

Hooded Cape and Capelet for Barbie - Free Pattern


Hello again lovlies!

Ahh, bet you didn't think Id be back this soon with another pattern! Made one of these snap decisions last night that I really wanted to make a new wardrobe of Barbie clothes for the girls for Christmas, which means I need to come up with a lot of new fun ideas! This is great news for you guys, because it means... dun dun duuuuuuun MORE PATTERNS!


Today's pattern is for a hooded cape or capelet depending on the length you want. So super cute and a great way to use up some of them fun fibres!


For the red cape I used a chenille yarn with glittery flecks through it, for the blue I used white funfur. There are so many fun yarns on the market these days that you could make a heap of capes and they would all look different! So, lets get crocheting!

Supplies:
DK weight (8ply) yarn in your main colour
Small amount of fun fibre in a contrasting colour (or you could use a plain yarn)
3.00mm hook
A small button for closing (or you can use ties, instructions for both at the end)

Starting with the hood:

dk weight yarn and a 3mm hook

R1: Chain 28, dc in the 3rd chain from hook and each across (26)
R2-5: ch3, turn, dc in each stitch across (26)

NOTE: If your Barbie has a LOT of hair that you need to fit into the cape, I recommend starting with 34 chains instead of 28 for a little extra space.

End off leaving a long tail. Fold the piece in half longwise and sew up one side (see picture below) Weave in ends.


Join yarn to the bottom corner of the hood, We're going to work along the bottom of the hood, so the stitches will go in the end of the rows rather then in actual stitches.

R6: ch1, dc in the same space, dc in each of the next 9 end of row spaces (see image for more details) (10dc)


R7: ch3, turn, dc in each st across (10)

R8: ch3, turn, 2dc in each st across (20)

R9: ch3, turn, *2dc, dc* repeat across (30)

R10-17 ch3, turn, dc in each stitch across (30) (do only 3-4 rows for capelet)

End off main colour and weave in ends.

Join contrasting colour with a sl st to any corner and hdc around the entire cape.


Closing:

You can do this a few ways. I add 2 options to my cape. 1. sew a small button on the inside of the cape, so you can push the button through a stitch on the opposite side to hold it closed. 2. chain 50. Use the chain as a cord and weave it in and out around the base of the hood, tie in a bow.

Thats it peeps, I told you it was easy.


Monday, November 26, 2012

Barbie Mermaid Tail - Free crochet pattern


Hey howdy hey my fellow crochet peeps!

So this pattern has been a while in the making, and I figured with Christmas creeping up on us, it was time to get it finished so I could add some to the girls stockings, and perhaps you have a special someone that would adore a mermaid tail for their Barbie too!


Supplies:
1 rubber band that fits snug over the hips of your doll
DK weight yarn
3.5mm hook
1 button

Tail:

R1: Join yarn with a slst, ch1, sc 21 times around the rubber band, place stitch marker

R2: *sc, 2sc in the next stitch* repeat around (31)

R3-R5 sc in each stitch around

R6: *sc,sc,sc2tg* 7 times, sc in the last 3 stitches (24)

R7-8: sc in each stitch around (24)

R9: *sc,sc,sc2tg* repeat around (18)

R10-20: sc in each st around (18)

R21: *sc in the next 7, sc2tg* Repeat once (16)

R22-29: sc in each st around (16)

R30: *sc in the next 6 stitches, sc2tg* Repeat once (14)

R31-R34: sc in each st around

R35: *sc, sc, sc2tg* repeat twice more, sc in the last 2 stitches (11)

R36-R37: sc in each st around (11)

R38: *sc, sc2tg* repeat twice more, sc in the last 2 stitches (8)

R38: sc2tg around (4)
Finish off and weave in ends


Tail-fin
R1: ch15, sc in the 2nd chain from hook, sc in the next 11, sc2tg (13)

R2: ch1, turn, sc2tg, sc in the next 11 (12)

R3: ch1, turn, sc in the next 10, sc2tg (11)

R4: ch1, turn, sc2tg, sc in the next 9 (10)

R5: ch1, turn, sc in the next 9, ch2 (11)

R6: turn, sc twice in the second chain, sc 9 (11)

R7: ch1, turn, sc in the next 10, 2sc in the last st (12)

R8: ch1, turn, 2sc in the next st, sc11 (13)

Finish off leaving a long tail for sewing to end of tail.

Weave the yarn in and out of the end of the tail-fin and pull tight to get a bit of a gather, then sew it to the end of the main tail.

Top
R1: ch19, sc in the 2nd chain from hook and each stitch across (18)

R2-R3: ch1, turn, sc across (18)

R4: ch1, sc in the next 5 stitches, dc in the next 8, sc in the last 5

R5: ch1, turn, sc in the next 5, dc2tg, dc in the next 4, dc2tg, sc in the last 5

Weave in ends and add a button so the top can close at the back.
Now, I use a ball joint Barbie with a removable head (yes, removable head lol!) and her bust looks a little smaller then an older styled barbie. If you find the top too small, add some more chains to start in pairs of 2.

If you are making it for an older child (one that is past the put everything in the mouth stage) then you may like to add some random beads or sequins to give Barbie some extra sparkle!


Friday, November 23, 2012

Cathán Set - Free Crochet Pattern


Details and infos! This set was made for and with yarns provided by the  Maree of the Australian Outback Baby Project, I have to say, she has sent me so many lovely yarns for the project that Ill be sharing a heap of patterns as I work my way through the sea of colours.


Ok now, lets get down to the patterns!


You will need:
1 ball of your main colour in a dk weight yarn. I used white
1 ball of your contrasting colour in a dk weight yarn. I used green
3.5mm hook
Needle for sewing in ends.

Using these supplies your set will fit a baby of 22-24 weeks.

INSTRUCTIONS FOR MAKING A PUFF: *Yarn over, insert hook, Yarn over, pull yarn through, 3 loops on hook* (Pull loops upward, so they are the height of a dc, you want to keep them loose but not too slack) Repeat this twice more, you will have 7 loops on your hook. Yarn over once more and pull through all 7 loops. One puff stitch complete. 


Gown:

Row 1: Chain 32, DC in 4th chain from hook, Dc in next 2 dc, (1dc, ch, 1dc) in next chain, *dc in next 6 ch, (dc, ch, dc) in next chain. Repeat from * two MORE times. Dc in last 4 chs; ch 2 and turn.

Row 2-4: dc in each dc, (dc, ch1, dc) in each ch1 space from the previous round, ch2, turn

Row 5: Sleeve Row: dc in each st to the first ch1 space, skip all stitches and dc in the next ch1 space. One sleeve made. Repeat to create the second sleeve, dc to the end, ch2, turn.

Row 6: ch3, *dc in the next 3 stitches, 2dc in the next stitch* Repeat across, turn (41)

Row 7: Join contrasting colour with a sl st and chain 3 (counts as dc and ch1) *sk2, (puff, ch2, puff) in the next stitch, ch1* Repeat across, dc in the last stitch, turn

Row 8: Join main colour with a sl st,  ch3, *dc in the next ch1 space, 3dc in the next ch2 space* repeat across, dc in the last stitch.

Row 9-10 ch3, turn, dc in each st across

Repeat rows 7-10 once more.

Join contrasting colour with a sl st, sc in each st across. End off and weave in ends

Add either buttons or ties to the back to close.


Beanie:
Round 1: ch3, 12dc in the first chain, join.

Round 2: ch3, dc same, 2dc in each stitch around, join

Round 3: join contrasting colour, ch1, (puff, ch2, puff) in the same stitch as joining *ch1, sk2, (puff, ch2, puff) in the next stitch* Repeat around, joining to top of initial puff.

Round 4: Join main colour to any ch1 space, ch3, dc in the same space *2dc in each ch1 and ch2 space around*

Round 5-7: ch3, dc in each st around, join. End off main colour.

Round 8: Join contrasting colour,  ch1, sc in each stitch around, join and end off. Weave in all ends.
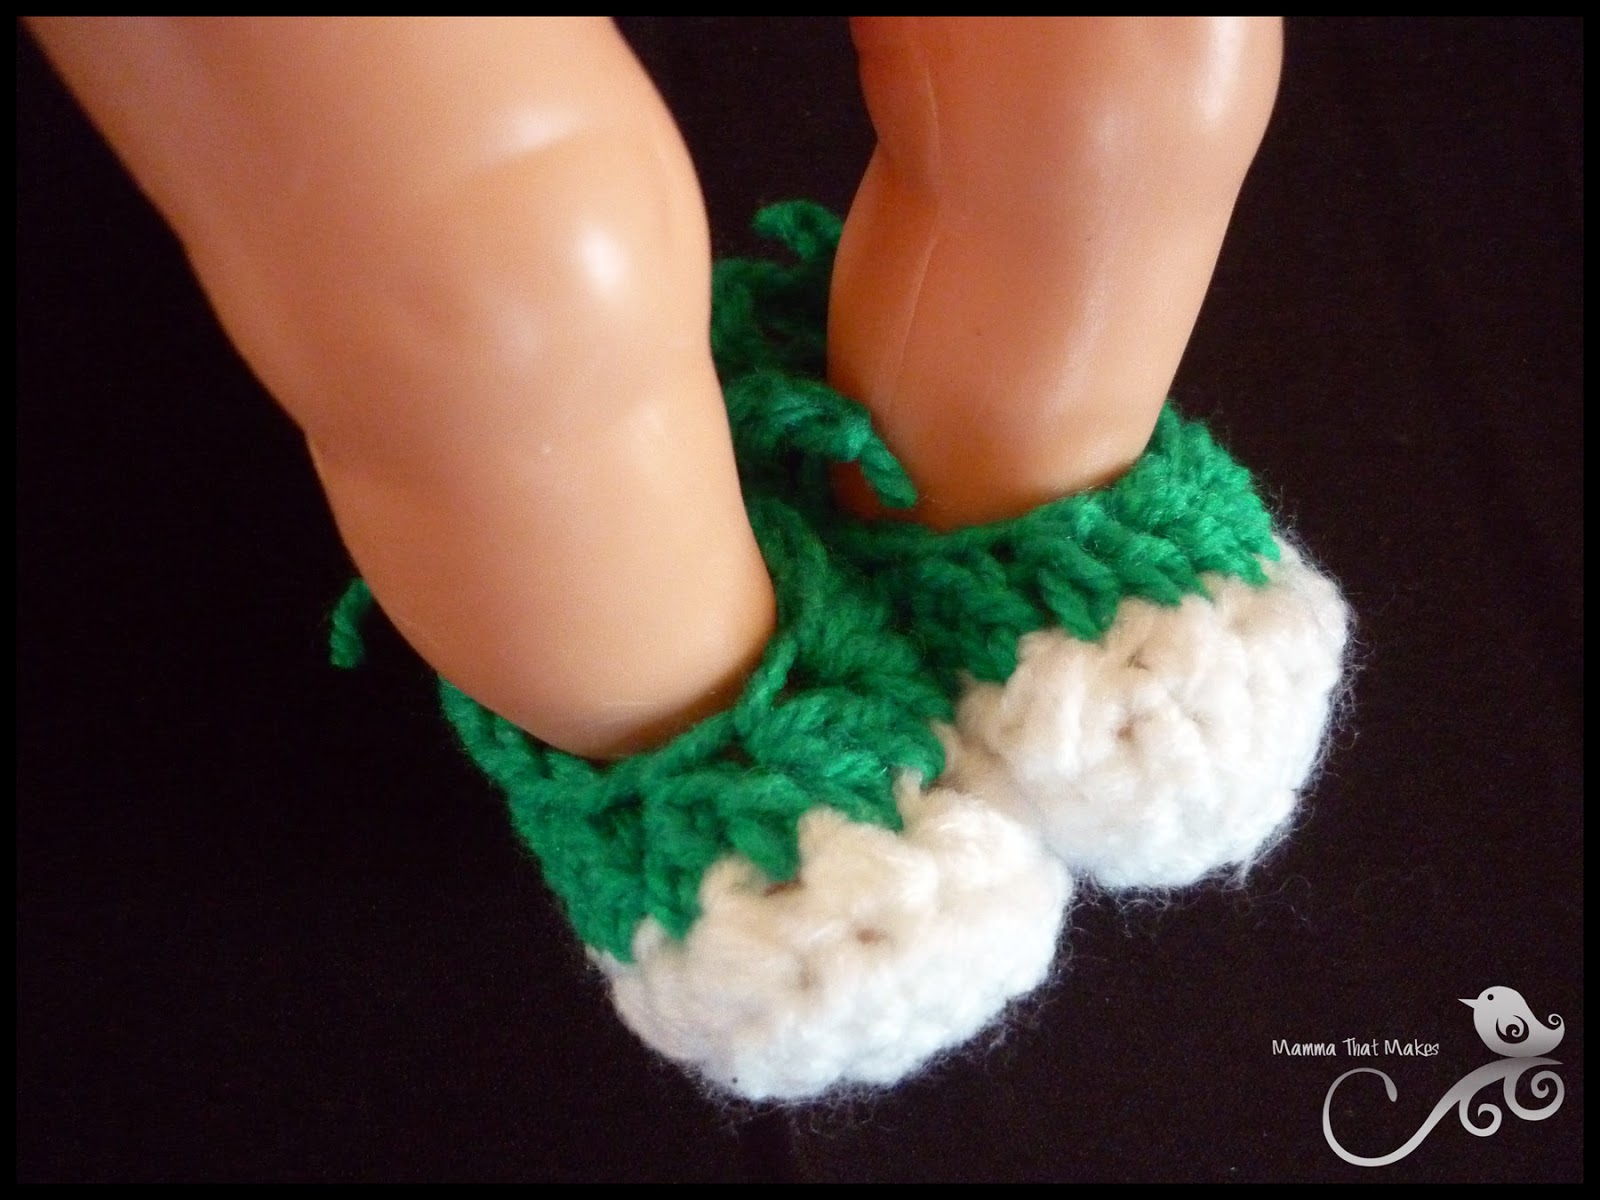


Booties Make 2.
Row 1: ch11, hdc twice in 2nd chain, hdc in the next 8 stitches, hdc 4 times in the end stitch, continuing on the opposite side, hdc in the next 8  stitches, 2hdc in the same stitch you started in, join

Row 2: ch2, TURN, hdc in the next 11 stitches, 2hdc in each of the next 2 stitches, hdc in the remaining 11 stitches, do not join.

Row 3: chain 2, hdc in the next 4 stitches, hdc2together 9 times, hdc in the last 4 stitches. End off main colour.

Row 4: With contrasting colour, ch20, slst to join on one corner of the bootie, ch1, hdc in the same stitch, hdc in the next 3 stitches, dc2together 5 times, hdc in the next 3 stitches, ch2, sl in last stitch, chain 20 to make the remaining tie.

Weave in all ends.