
Hello beautiful people!
This weeks pattern, if Im totally honest here, took me longer then I expected to work up. I think in total I ripped it out at various stages about 15 times before deciding it was how I wanted it. Im not sure why, because the end pattern is pretty straight forward and simple enough to follow. In fact, it would be easy for an advanced beginner to follow along too which is great news for everyone!
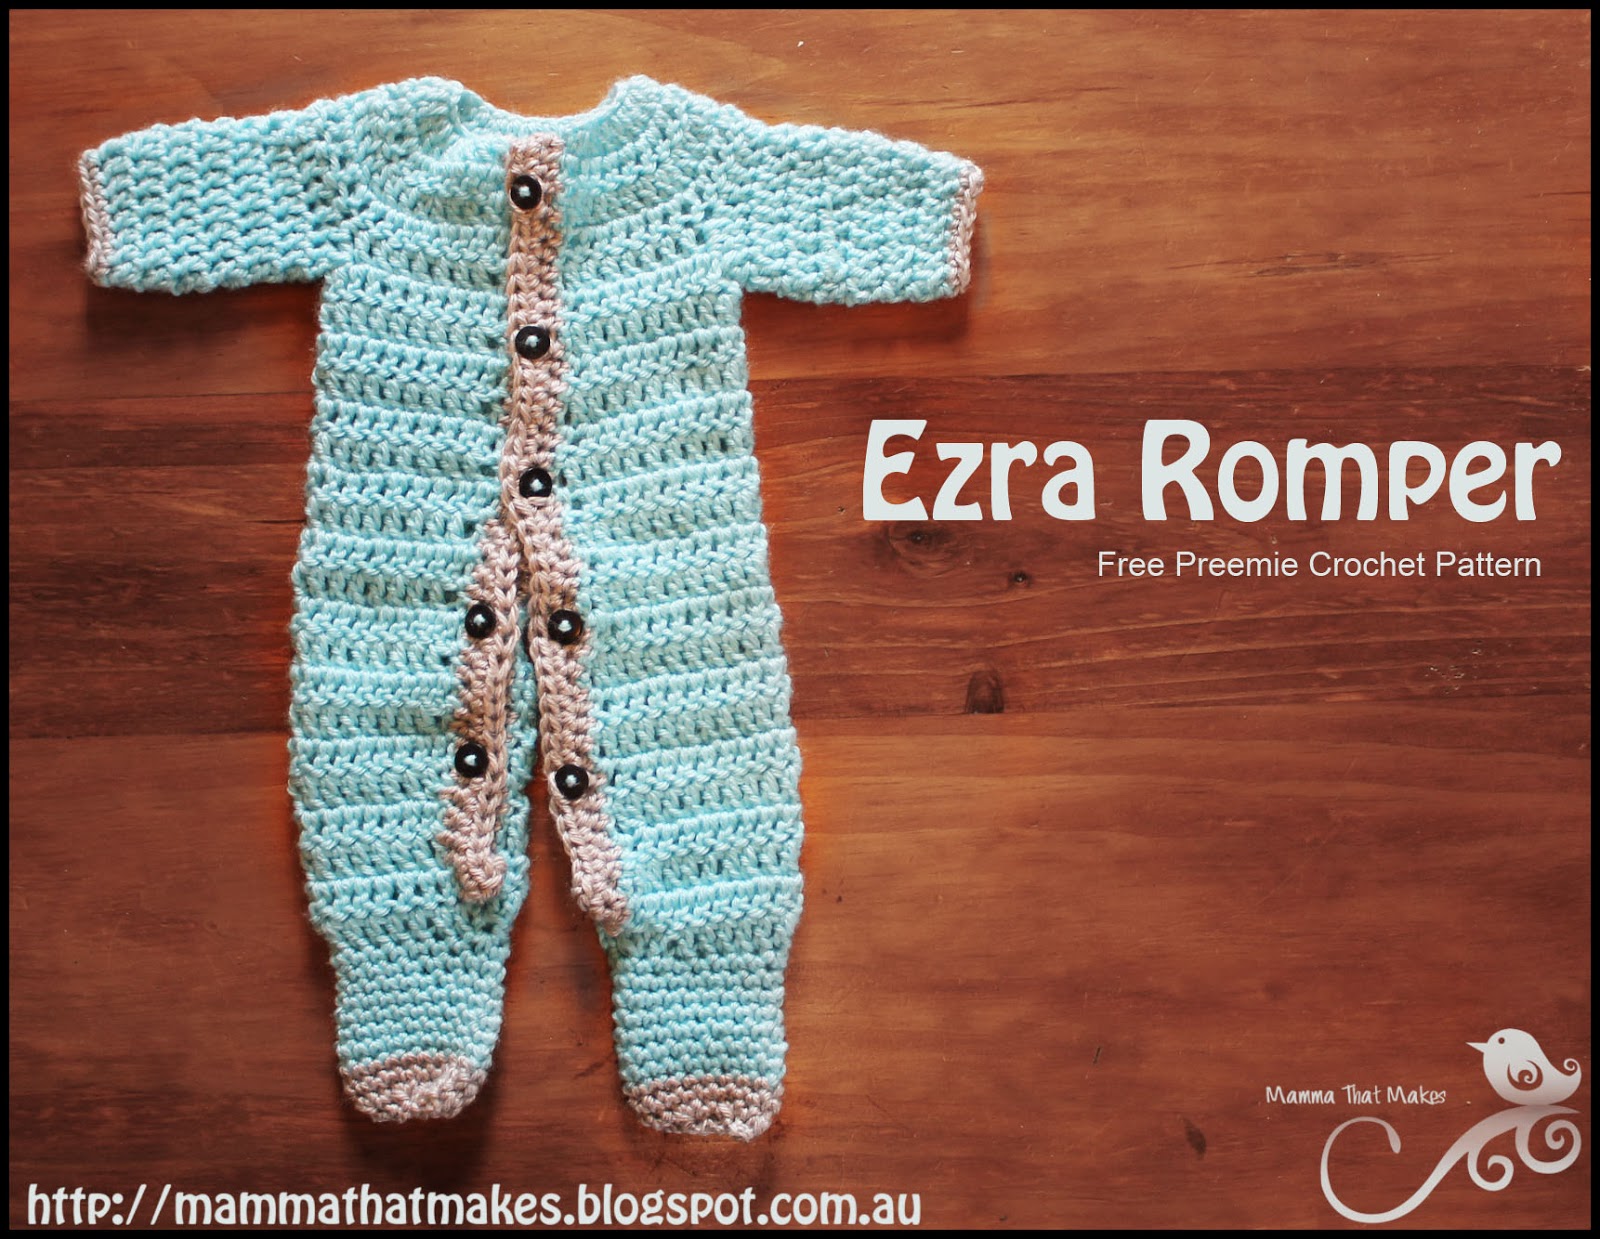
I asked last month via my Facebook Page for any suggestions for more boy items. I know I have a handful, but they are still sorely lacking in the world of prem patterns. An open at the front full one piece romper was requested a few times, and so that was my first stop. This romper will fit 32-34 weeks (3.5-4.5lb) but changing the yarn and hook to something thinner will get you smaller rompers. I haven't had a chance to try this fully yet, but dk/8ply with a 4 or 4.5 should get you around the 30 weeks gestation mark.
You'll notice that I have some more yarn variety coming in now. I have been lucky enough to get some fantastic yarn from America over and boy am I having some fun playing with it. So you can definitely expect some more worsted weight patterns. I also have a rather large ball of crochet thread too, that Im itching to turn into a gown.
So I hope you like this pattern, and I hope you like the ones to come :)

You will need
5mm hook
Worsted weight yarn in a main and contrasting colour (I used Red Heart Soft baby Steps in Aqua and Elephant) You will need the best part of a ball of your main colour.
7 buttons for closing
1: ch28, in the 2nd chain from hook dc, *2dc in the next stitch, dc in the next stitch* , repeat across,(39)
2: ch3, turn, dc in each stitch across (39)
3: ch3, turn, *dc in the first 2 stitches, 2dc in the next stitch*, repeat across (52)
4: ch3, turn, dc across
5: ch3, turn, dc in the first 8 stitches, skip 9 stitches, ch3, dc in the next 17 stitches, ch3, skip 9 stitches, dc in the last 9 stitches. (40, including chains)
6: ch3, turn, dc in each stitch and chain across (40)
7-15: ch3, turn, dc across (40)
16: ch3, turn, 2dc in the first stitch, dc in the next 18 stitches, 2dc in the next stitch. Leave the rest of the stitches un-worked. (22)
17-20: ch3, turn, dc in each stitch across
21: ch3, turn, dc2tg, dc in the next 18 stitches, dc2tg (20)
22-24: ch3, turn, dc in each stitch across
25: turn, join to the 1st dc of the last row, ch3, dc2tg, dc in the next 8 stitches, dc2tg, dc in the next 8 stitches, join. (18)
26: ch1, sc2tg, sc in the next 5 stitches, sc2tg (7)
27: ch1 turn, sc2tg, sc in the next 3 stitches, sc2tg (5)
28: ch1, turn, sc2tg, sc in the next stitch, sc2tg, don't turn.
29: ch1, sc in the ends of rows 26, 27 and 28, sc in the next 9 stitches, sc in the 3 ends of rows 26, 27 and 28, sc in the last 3 stitches, join to the first sc. (18)
30-35: ch1, sc in each stitch around, join
End off
Join yarn to the 21st stitch (first un-worked st) on row 15 and ch3
36: ch3, turn, 2dc in the first stitch, dc in the next 18 stitches, 2dc in the next stitch. (22)
37-39: ch3, turn, dc in each stitch across
40: ch3, turn, dc2tg, dc in the next 18 stitches, dc2tg (20)
41-43: ch3, turn, dc in each stitch across
44: turn, join to the 1st dc of the last row, ch3, turn, dc2tg, dc in the next 8 stitches, dc2tg, dc in the next 8 stitches, join. (18).
37-39: ch3, turn, dc in each stitch across
40: ch3, turn, dc2tg, dc in the next 18 stitches, dc2tg (20)
41-43: ch3, turn, dc in each stitch across
44: turn, join to the 1st dc of the last row, ch3, turn, dc2tg, dc in the next 8 stitches, dc2tg, dc in the next 8 stitches, join. (18).
45: ch1, turn, sc2tg, sc in the next 5 stitches, sc2tg (7)
46: ch1 turn, sc2tg, sc in the next 3 stitches, sc2tg (5)
47: ch1, turn, sc2tg, sc in the next stitch, sc2tg, don't turn.
48: ch1, sc in the first 3 stitches, sc in the ends of rows 26, 27 and 28, sc in the next 9 stitches, sc in the 3 ends of rows 26, 27 and 28, join to the first sc. (18)
49-54: ch1, sc in each stitch around, join
End off
Sleeves.
55: Join yarn with a slst to any stitch on the sleeve and ch3. Evenly dc around the sleeve hole 18 times, join.
56- 59 ch3, dc in each stitch around, join. (18)
60: ch3, dc2tg, dc in the next 7 stitches, dc2tg, dc in the next 7 stitches, join. (16)
61: ch3, dc in each stitch around, join. End off.
Repeat rounds 55-61 for the second sleeve
Edging and Finishing
Sleeves
Join contrasting colour to any stitch on the sleeve, ch1, sc around, join. End off and weave in ends.
Repeat for second sleeve
Feet
Join yarn to a stitch on the rear side of the foot and ch1
1: sc in each stitch around, join. (18)
2: ch1, sc in each stitch around, join
3: ch1, *sc, sc2tg*, repeat around, join. (12)
End off leaving a long tail. Hold the toe section flat and sew the gap closed with the tail.
Repeat for second foot.
Body
Join yarn to the right side of romper at the neck and ch2, hdc evenly down the body of the romper to the join in the leg, hdc in the join, hdc up the other side of the leg to the crotch, when you get to the crotch area find the 2 stitches that separate the legs, (hdc, dc, trc) in the first one, (trc, dc, hdc) in the next one, then continue on in hdc down the next leg, to the leg join, one hdc in the next leg join then up the leg and body to the neck line but not around the neck.


ch2, turn, hdc in each stitch right around until you get back to the neck where you started the previous round. Finish off.
Weave in all ends and sew buttons into place.

Weave in all ends and sew buttons into place.


