Hello lovlies. I hope everyone is having a fine weekend.
I have a new pattern for you all today. I've been working on this on and off for some months. The idea at least. I knew what I wanted but my drafts didn't work and I kept revisiting it. I didn't want to release it until I was happy with it. Well now I am! I sat down this weekend and knew I wanted to get this little beauty finished, photographed and sorted. It is, as most of my patterns are, untested. However I have made it myself 3 times to make sure it works and I have no issues. If you find one please let me know.
This pattern was born from frustration at not being able to find one. I know a lot of people out there use the cradle purse patterns to make angel baby beds, and thats great. I've done it myself and while they do work, I always had this nagging thought, that its just an afterthought using a toy pattern. I wanted something that was made FOR angels, the afterthought can be for play. I'm sure these would delight any little girl and make excellent shower gifts too but primarily, they are designed to gently hold the resting bodies of tiny angels and to give comfort to parents.
Onto the logistics!
Ok so, this cradle is roughly 7 inches in length and 6 inches tall from base to the highest point of the hood. It is designed for the smallest of the small. I promise Ill have larger ones up soon, right now tho lets roll with this.
Anyone that can adjust easily, just add a few extra chains to the start and it will come out larger.
As always, AMERICAN terms for crochet, Ive tried to remember to use both inches and cm throughout for measurements tho.
You will need
DK weight yarn (held doubled, so 2 balls or roll half a ball off so you can use 2 strands) for the cradle
DK weight yarn in contrasting colour for version 1
6.5mm and 6.00mm hook for the cradle
3.00mm hook for the flowers on variation 1
5.00mm hook for ruffles and edges on version 1
Flat colourless or one colour plastic for the base. I've tried a few different things all with success. Firstly, the clear lids from rectangle takeaway containers work wonderfully. Plastic plates (the oval disposable kind) work well too. You can also use plastic lids from ice cream containers once you clean the sticker off and plastic canvas (the kind you cross stitch with) So long as its lightweight and doesn't have bright colours or patterns on it (you'll see that through the yarn) then your good.
Ribbon for version 3
1 meter (40 inches) of lace and 2 satin bows or flowers for version 3
a sewing needle and yarn needle
stitch markers, these are a must. If you have none pins work just as well.
The Base - Make 2
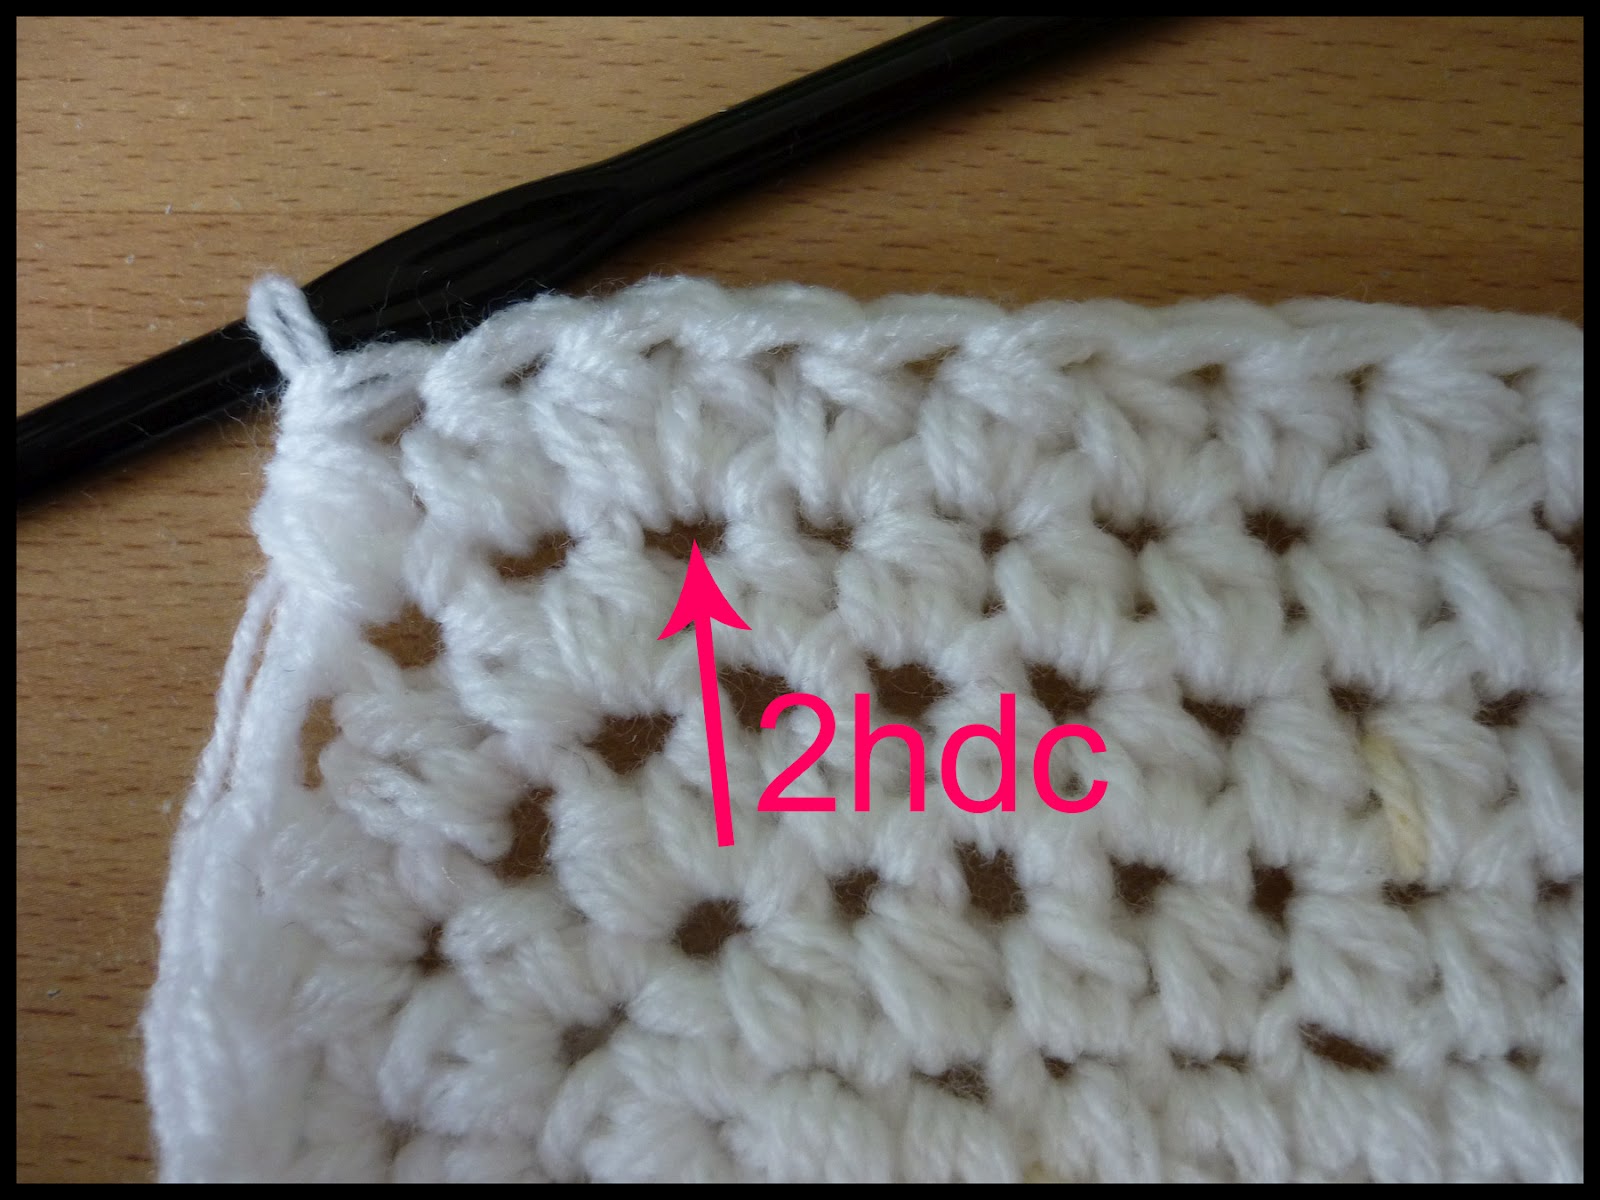
NOTE: 2hd = make 2 hdc in the same stitch
hdc2tg = hdc 2 together.
6.5mm
1. ch10
2. hdc 3 times in the second from hook and the next 7 chains, work 3 hdc into the last ch. Now working on
the other side, hdc in the next 7, hdc in the last (same as starting chain), join
3. ch2, hdc in the same st as chain, 2hdc in the next 2 st, hdc next 7, 2hdc next 3 st, hdc next 8, join
4. ch2, hdc, 2hdc, hdc, 2hdc, hdc, 2hdc, hdc in the next 7 stitched, 2hdc, hdc, 2hdc, hdc, 2hdc, hdc in the next 8 stitches, join
5. ch2, hdc in the next 2, 2hdc, hdc in the next 2, 2hdc, hdc in the next 2, 2hdc, hdc in the next 7, 2hdc, hdc in the next 2, 2hdc, hdc in the next 2, 2hdc, hdc in the next 9, join.
Finish off, weave in ends
You should have this after 3.
Putting the base together.
Cut out your insert slightly smaller then the base size. We are going to sandwich the plastic between the 2 base pieces to make the whole bed alot more sturdy.
Holding the pieces so the plastic is on the inside, join your yarn on any stitch on an end piece, towards the centre. Stitching through both pieces, single crocher the entire way around. I find it helps if I use stitch markers in each corner to hold everything in place while Im doing this round, to stop the plastic sliding out.
The Sides
1. ch2, hdc in the back loops only all around, join
2. Drop to a 6mm hook and from here on out we'll be sc in a continual round, no joins. sc in each st around until the sides measure roughly 2.5-3 inches tall
The Hood
Find the centre of one of the ends and count off eight stitches either side (mark them with stitch markers), sc around until your last stitch is in the 8th st you marked to the left of the centre.
1. ch2, turn, hdc across to the 8th stitch on the opposite side of the centre
2. ch2, turn, hdc in each hdc across (16)
3. ch2, turn, hdc in the next 6, hdc2tg twice, hdc in the last 6 (14)
4. ch2, turn, hdc in the next 4, hdc2tg 3 times, hdc last 4 (11)
5. ch2, turn, hdc, hdc2tg 4 times, hdc in the last 2. finish off leaving a 6 inch tail to sew the top closed
Flip the hood inside out and line up the centre seam. sew it closed and turn the hood back in the right way.
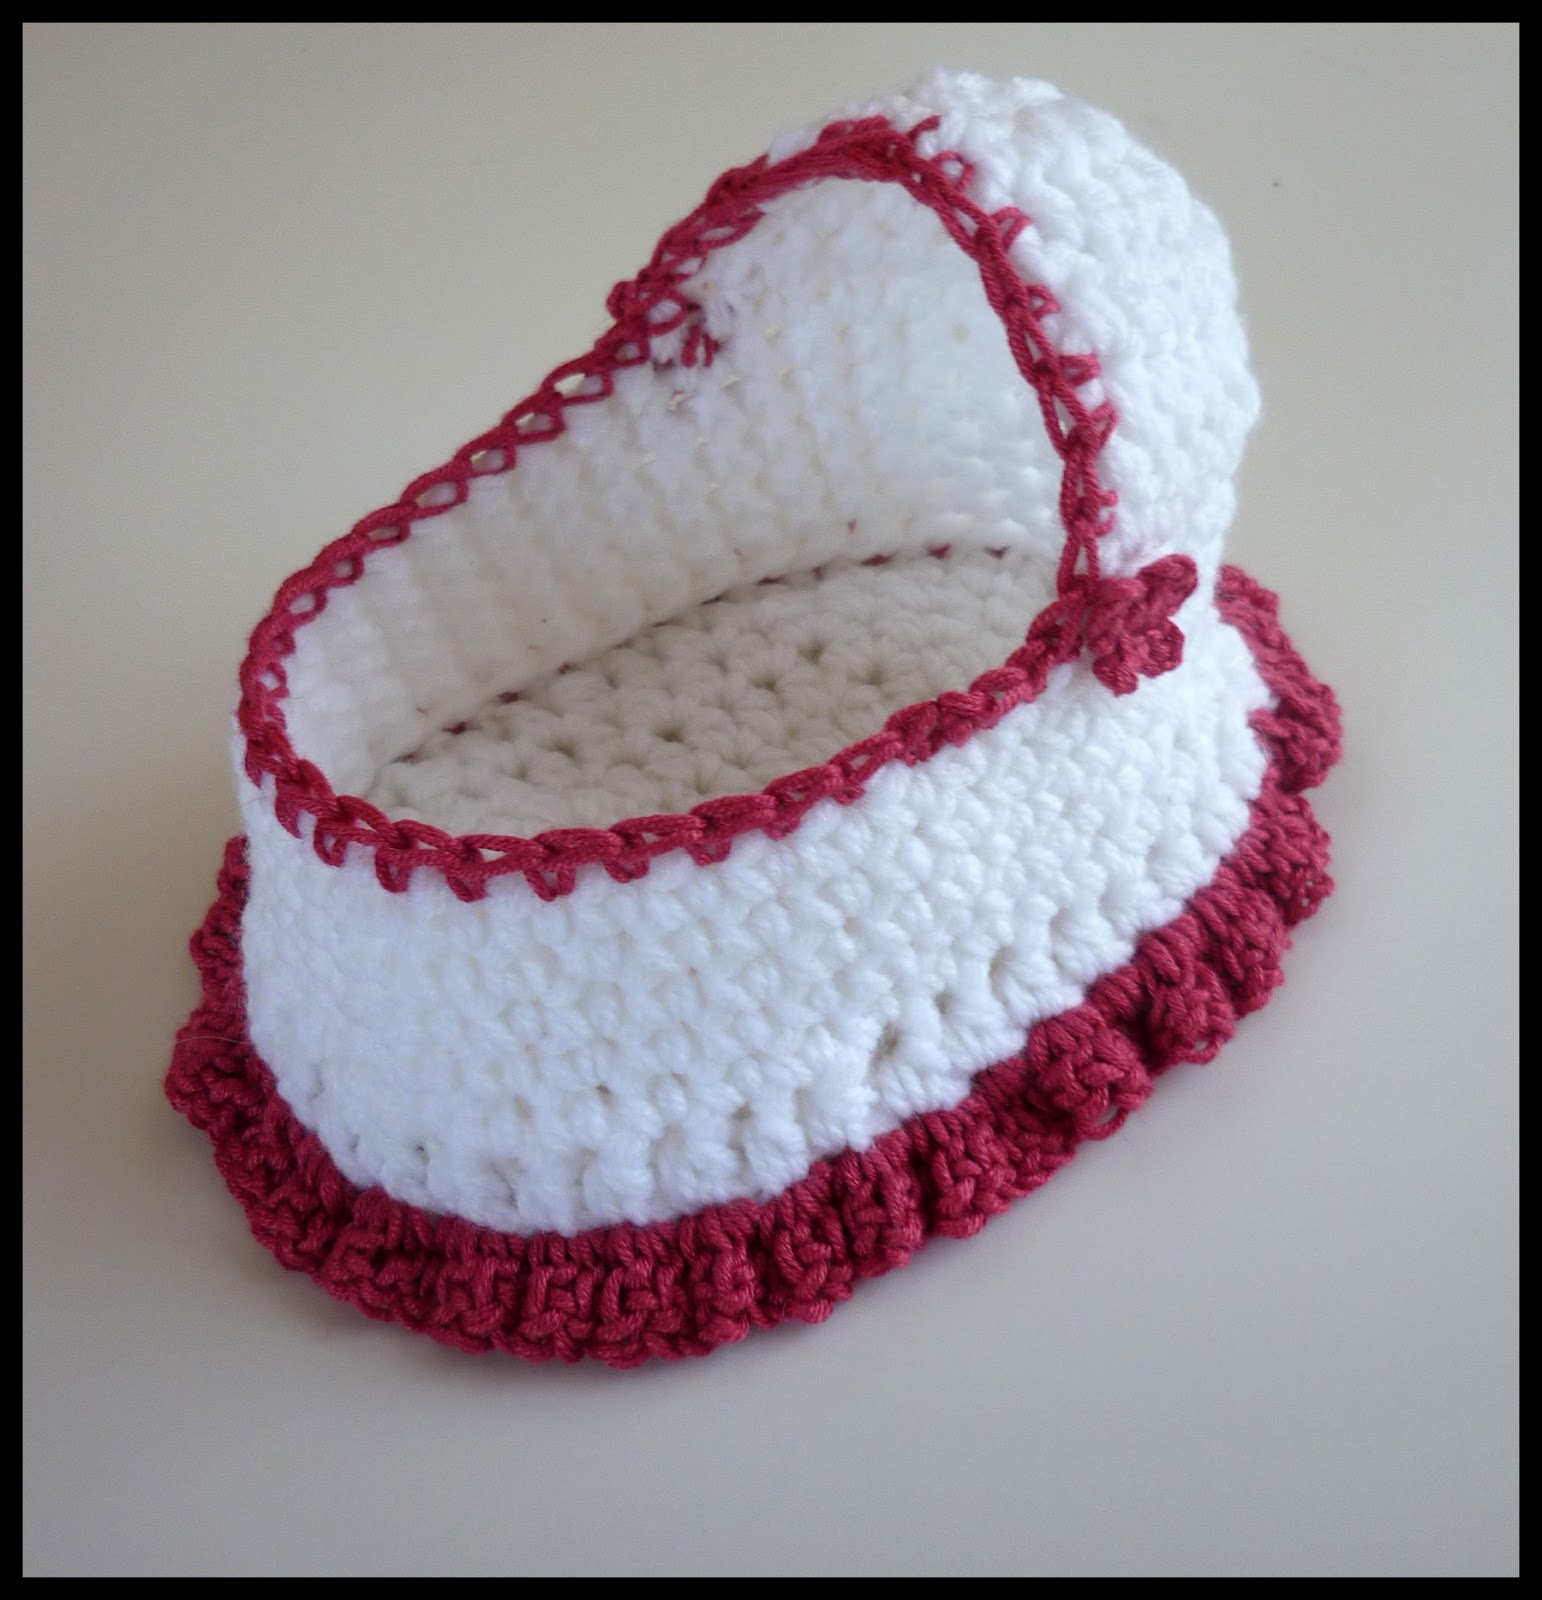
That completes the basic cradle. You can choose to decorate it your own way or you can read on for 3 decoration variations.
Version 1. Ruffles and Flowers
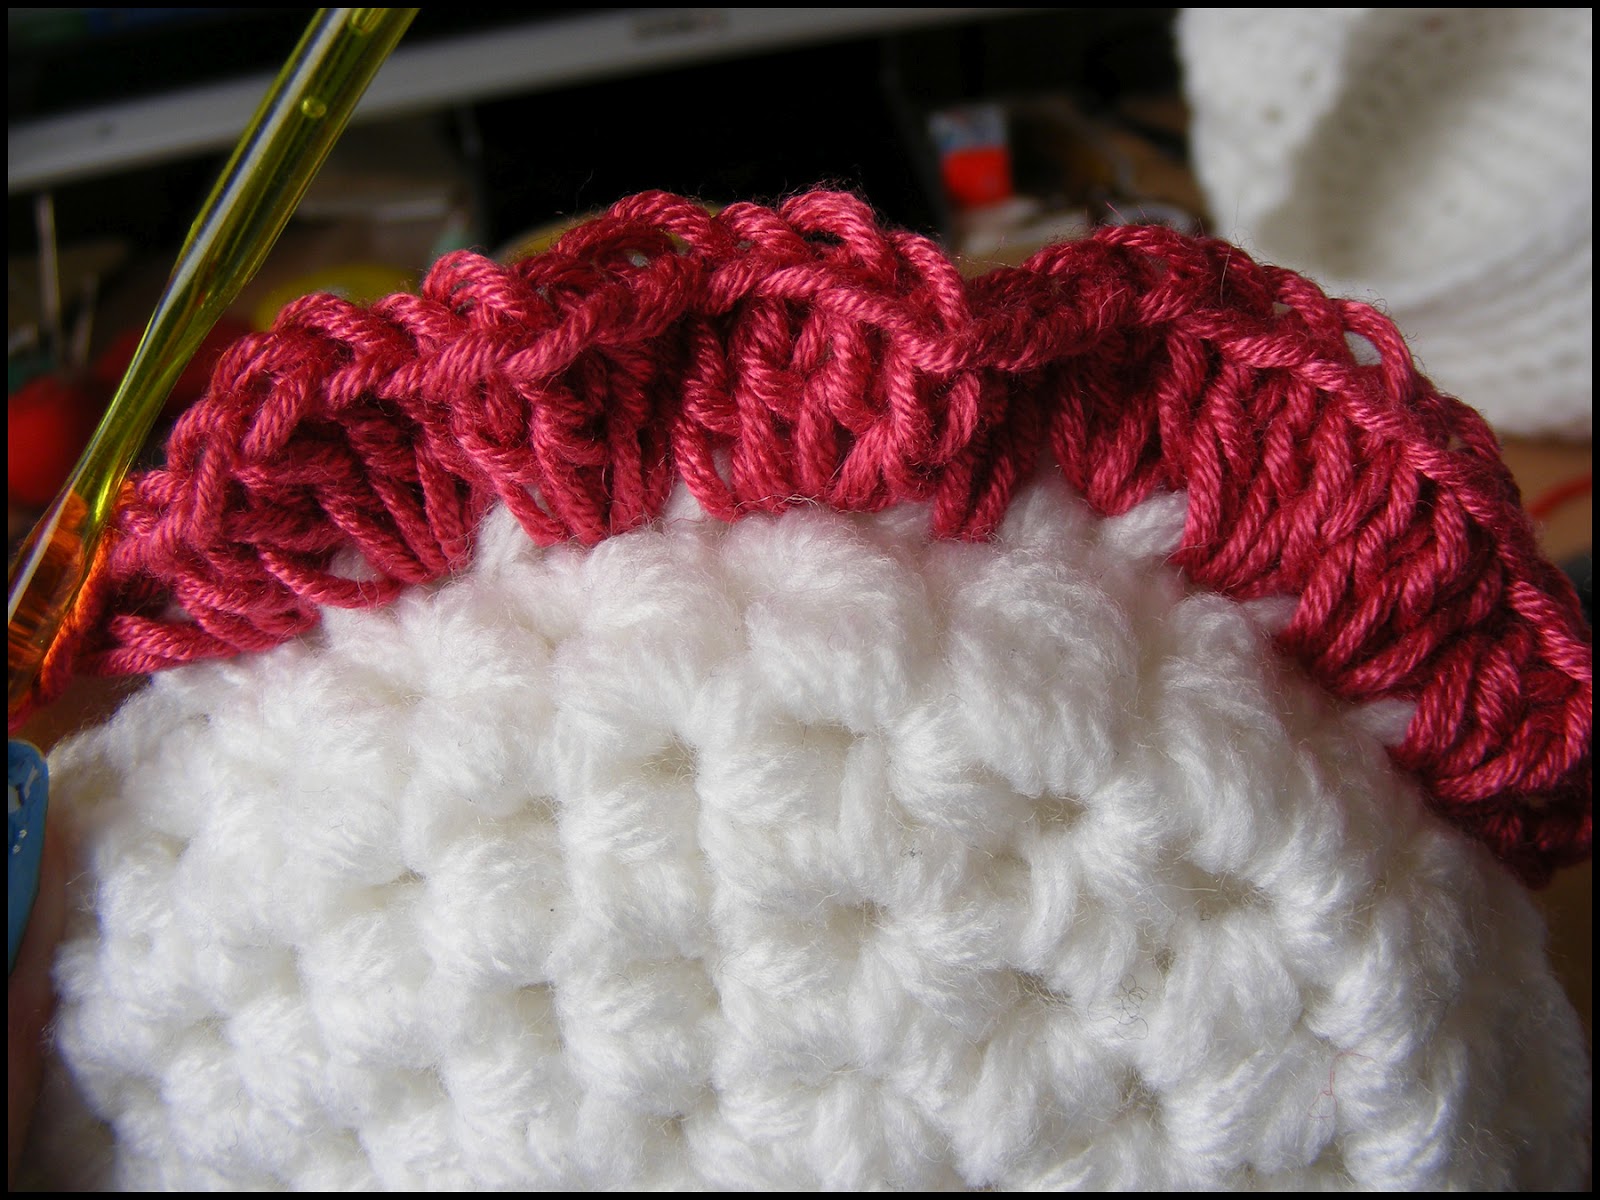
Take a contrasting yarn (Im using Baby Belle Lullabye which is a DK weight yarn in bamboo which has a lovely light drape) and a 5mm hook. We're going to create a ruffle on the bottom of the cradle using the leftover loops from our bacl loop only row. You can see them sticking out. Take your hook and slide it under the stitch and join your yarn with a sl st. ch3, dc three more in the same stitch. Then dc 4 times in every stitch around the bace. When you get back to the start join with a slst to the top of the ch3 we started with. Finish off and weave in ends.
With the same colour join the yarn to the edge of the cradle and sc around the entire opening, being careful to evenly space the stitched when you work your way around the hood section. join to the forst st and finish of, weaving in ends
5 point mini flowers
Using the same yarn and a 3mm hook ch7, slst to the 1st chain. ch5, sl st to the first chain. Repeat 3 more times so you have 5 petal. sl st to the first and leave along tail for sewing to cradle. Attach one to the corner of each side of the hood.
Version 2. Ribbons and Bows
Using thin satin ribbon to crochet with, and leaving a long tail (8 or so inches) join 2 stitches to the left of the front center and single crochet around the entire cradle, careful to space the stitches out over the hood. Crochet around until you are 2 stitches to the right of the front center and finish off leaving a long tail. Using both tail pieces make a bow. Trim the ties.

3. Sewn with lace.
Take a piece of lace or ribbon that is long enough to go around the entire cradle and then with extra for gathering, my piece is about 36 inches or 90cm long and was just long enough, if you prefer more ruffles aim for a meter long. You can also get pre ruffled laces, the kind used for bed dolls is especially good for this. I fold over small sections and sew them down as Im going.
Starting on the side just below the hood corner attach your cotton and sew the lace around the edge, gathering or pleating as you go to create ruffles. Sew a small satin flower or bow to the center of both the hood and the front of the cradle.


Thats it guys. Honestly there are so so many more ways you could decorate these, unfortunately my embellishment box is a bit low on supplies so I just used what I had on hand but I'm sure you can think of alot more. The best part is they can be as simple as you like and still look stunning, and are very gender neutral! Feel free to share your finished ones on Ravelry. I know Ive said it before but adding projects on there means more people will see the pattern, become aware of the need for these items and maybe make some themselves and thats a massive win/win! Massive thanks to Amie and Coco for helping me name it <3