Monday, April 28, 2014

Basic Caps - Spikes and Stripes


Good morning everyone!

I have another super easy, very basic cap for you today! The colour combinations for this one were chosen by my partner. I asked him to rummage in the stash and find some colours he liked and Id figure out something with them. Mmm great taste hun!

So this is hat number 4 on my way to 100 for Angels for the Forgotten's charity challenge. If you want to stitch along you can find more details In this Facebook Group.


This hat uses 4 colours and a combination of stitches, We'll be working with sc, hdc, dc and the hdc spike stitch. If you are NOT familiar with the spike stitch, there is a quick visual reference HERE but basically, you just complete your hdc like usual only you insert your hook into the stitch below the next one, rather then into the top of it. Simples? Of course :)

This hat fits my hubby well, tho the back is slightly loose and I'll put that down to the fact that he shaves his head, and has no hair there to bulk it up. Of course you could make it smaller by using a smaller hook or not having as many increases.

You will need:
Yarn in 4 colours. I used cream (A), a greyish green (B), a brown/cream variegated (C) (camo works well) and a brown (D).
5mm crochet hook
needle to sew in ends.

I carry the cream throughout, but the stripe colours I drop and cut at the end of each round, just so the inside is neater, but you can leave them all attached if that doesn't bother you.

With colour A
1: ch3, dc in the 1st chain 10 times, join.
2: ch3, 2dc in each stitch around, join.
3: ch3, *2dc in the first stitch, dc in the next stitch* repeat around, join.
4: With colour B - ch2, *2hdc in the first stitch, hdc in the next stitch, spike in the next stitch* repeat around, join.
5: With colour C - ch2, *2hdc in the first stitch, hdc in the next 3 stitches* repeat around, join.
6: With colour D - ch2, *2hdc in the first stitch, hdc in the next 4 stitches* repeat around, join.
7: With colour A - ch3, *2dc in the first stitch, dc in the next 5 stitches* repeat around, join.
8-9: ch3, dc in each stitch around, join.
10: With colour B - ch2, hdc in the first 4 stitches, hdc spike in the next stitch* repeat around, join.
11: With colour C - ch2, hdc in each stitch around, join.
12: With colour D - ch2, hdc in each stitch around, join.
13: With colour A - ch3, dc in each stitch around, join.
14-18: Repeat rounds 8-13
19-21: With colour A - ch1, sc in each stitch around, join.

Weave in all loose ends and you are done! Happy hat making.

Saturday, April 26, 2014

Flowers and Stripes Nail Art Tutorial


Good morning!

So I had such great feedback from the last one I figured what the hey! Here is another nail art tutorial. Again, super basic, because hey Im only a beginner myself. Hope you enjoy! Remember to wait for the nail to completely dry before adding more parts or the top coat.


For this design I used Ulta3 base coat not pictured),  Seche Vite Fast dry top coat, MUD in baby blue, Diva in Cheeky, Colour Club in Antiquated and a black striper. I also used a thin brush, a thicker brush for mixing colours and a dotting tool. Put your base coat on first and wait for it to dry.


Start by painting your thumb and index finger in baby blue, and your remaining 3 fingers in cheeky.


On all pink fingers, using your striping brush and black polish create  wavy line that starts in the top corner of the nail and finishes down the side.


Fill in the top section with baby blue.


On the baby blue nails, start by painting a black arch in the bottom corner.


Add the first petal.


Add a second petal.


Add a third and/or fourth petal, depending on petal and nail size.


Using Antiquated fill in the centre of the flower.


Fill in the petals.
For this colour I mixed some cheeky with some antiquated to give me a pinker shimmer.


Using a dotting tool, place dots along the top of the nail and working down the side, let the dots get smaller as you go.


On the blue section of the pink and blue nails, use antiquated to make some stripes.

Clean up your edges and apply top coat once everything is dry.


Friday, April 25, 2014

Sally Booties - Free Crochet Pattern


Good morning everyone!

Today's preemie pattern is for a sweet little pair of booties. They feature a frilly top and a little splash of colour. Super fast to make and they look so very dainty. These booties will fit a baby of 28 weeks gestation. Yes, before you ask, I do indeed have plans to make these bigger at some stage :)


You will need:
3ply yarn (light fingering) in main and contrasting colours
3.5mm hook for the bootie
1.5mm hook for the tie

1: ch10, hdc in the 2nd chain from hook, hdc in the next 8 chains, hdc 4 times in the very last chain, working on the opposite side (into the same chains), hdc in all 8 chains, join. (20)

2:  ch1, 2hdc in the first stitch, hdc in the next 7 stitches, 2hdc's in each of the next 4 stitches, hdc in the next 7 stitches, 2hdc in the last stitch, join. (26)

3: ch1, sc into the first stitch, 2sc into the next stitch, sc into the next 10 stitches, 2sc into each of the next 4 stitches, sc into the last 10 stitches, join. (31)

4: ch1, sc2tg using the back loops only, sc in the back loops only for all remaining stitches, join. (30)

5: ch1, sc in each stitch around, join. (30)

6: ch1, sc into the first 10 stitches, hdc2tg 5 times, sc in the last 10 stitches, join. (25)

7: ch1, sc into the first 8 stitches, hdc2tg, hdc2tg, hdc, hdc2tg, hdc2tg, sc in the last 8 stitches, join. (21)

8: ch1, turn, slst into the first 6 stitches.

9: ch1, turn, sc into the first 14 stitches. (14)

10: ch1, turn, 2sc into the first stitch, sc in the next 12 stitches, 2sc into the last stitch. (16)

11: ch1, turn, 2sc into the first stitch, sc into the next 14 stitches, 2sc into the last stitch. (18)

12: ch1, turn, 2sc into the first stitch, *ch5, skip one stitch, sc into the next stitch* Repeat across, 2sc into the last stitch. Finish off and weave in tails.

With the bootie in your hand, toe facing down and sole away from you, join your contrasting colour with a slst to any front loop from round 4. sl stitch in all remaining front loops around, join. End colour and weave in tails.

With contrasting colour and a 1.5mm hook, chain 65 for a tie. Weave in and out of every second sc on round 10.

Repeat all steps to make a second bootie.


Monday, April 21, 2014

Basic Guys Caps - Thin n Thick Stripes


Good morning lovlies,

Angels for the Forgotten's annual craft challenge has kicked off again this year. I've set myself some personal goals, including making 100 hats. I'm trying for a good range of male and female styles and some unisex too, but I'm really having a hard time finding guys hats I like the looks of. So I'm just winging it! Of course winging it means you guys get some more patterns woo!

Today's pattern is a basic enough hat for anyone to make, and it is a great stash buster too, especially if like me you hoard all the little balls that could make a few stripes! Id like to say sorry for the photo too, its been raining and overcast here all day and I can't seem to get a nicely lit pic. Ahh well, we're here for the pattern right, not the pics :D


This hat fits my 11yr old girl, and my partner, so I'm going to say preteen/teen/adult for the size, its got a bit of stretch to it.

You will need:
DK weight yarn in a main colour, and 2 contrasting colours for the stripes. For this pattern, Grey is colour A, brown is colour B and green is colour C
5mm hook.

With colour A
1: ch2, dc 10 times into the 1st chain, join to 1st dc.
2: ch3, 2dc in each stitch around, join
3: ch3, *2dc in the first stitch, dc in the next stitch* Repeat around, join.
4: ch3, *2dc in the first stitch, dc in the next 2 stitches* Repeat around, join.
5: ch3, *2dc in the first stitch, dc in the next 3 stitches* Repeat around, join.
6: ch3, *2dc in the first stitch, dc in the next 4 stitches* Repeat around, join.
7-8: ch3, dc in each stitch around, join.
9: With colour B, ch2, hdc in each stitch around, join.
10: With colour C, ch3, dc in each stitch around, join.
11: With colour B, ch2, hdc in each stitch around, join.
12: With colour A, ch3, dc in each stitch around, join.
13-16: Repeat rows 9-12 once more
17: ch1, sc in each stitch around, join.

End off here and weave in all tails.

If you are after a slightly slouchier hat, repeat rows 9-12 for a third time, and for a super slouchy hat repeat for a forth.

Friday, April 18, 2014

Ripples Preemie Blanket


Hello again beautiful people!

Today's pattern is nothing new. Like the small mitred blanket, its a familiar stitch, I'm just giving you instructions on how to make it prem sized (and colour ideas), as I've been asked by a lot of people if I can do just that.


This blanket is approx 26x28 inches in size, or 66x71cm, and will be a great size for prems between around 24 and 34 weeks gestation. The pattern itself is an easy one line repeat, and the striping combinations are endless.

This pattern is worked in multiples of 14+3

You will need:
DK weight yarn in 3 colours. For this pattern Purple will be colour A, White is colour B and Pink is colour C.
5mm hook

With colour A
1: Chain 73, dc in the 4th chain from hook, *dc in the next 4 stitches, dc2tg, dc2tg, dc in the next 4 stitches, 2dc in the next stitch, 2dc in the next stitch* Repeat this across all chains.

2: ch3, turn, dc in the same stitch, *dc in the next 4 stitches,  dc2tg, dc2tg, dc in the next 4 stitches, 2dc in the next stitch, 2dc in the next stitch* Repeat across

3: Repeat row 2

4: In colour B - repeat row 2

5 In colour C - Repeat row 2

6: In colour A - Repeat row 2

Repeat rows 2-6 six times

Repeat rows 2 and 3 once more.

End off your yarn and join the white to the same stitch and complete the boarder as follows:

hdc evenly down the side of the blanket. When you get to the next corner hdc into it and then across the bottom of the blanket do the following stitches :ch3, dc in the first 2 stitches, hdc in the next 3 stitches, scin the next 4 stitches *hdc in the next 3, dc in the next 4, hdc in the next 3, sc in the next 4* repeat 3 more times, hdc in the next 3 stitches, dc in the next 2, (ch3, slst and sc) into the last stitch, hdc evenly up the next side and into the corner stitch, ch1 and sc into the same stitch, *hdc in the next 3 stitches, dc in the next 4 stitches, hdc in the next 3 stitches, sc in the next 4 stitches* repeat 3 times, hdc in the next 3 stitches, dc in the next 4 stitches, hdc in the next 3 stitches, sc in last, join.

If you want to add another colour you could from here easily just hdc around the entire blanket as the tops and bottoms wont be so wavy now.


Sunday, April 13, 2014

Rattie Houses from Upcycled Bedsheets

 
Good afternoon everyone!

Boy do I have some cute overload for you today! I would like to introduce to you Ozzie and Kinza, my dove hooded ratties, who are sisters and a bit over a year old now.

Recently I've been on a quest to find new things for their cage, and also to use up old stuff in the house. Up-cycling AND crochet, does it get any better?

Aside from adding a rat right? SQUEE!

So! To make your "yarn" take a bed sheet and just start ripping. I ripped mine in one continual piece by cutting into the sheet about an inch thick, and ripping along the side until I had about an inch left, then turned the sheet, cut into it a little along the next side and ripped along that. Just keep going like that until the entire sheet is done. I wish Id thought to get a photo but it was late last night so here is a little.. visual I guess, of what I mean.


Yup, amazing visual there, but you get the jist :) Roll into a ball as you go or it'll get tangled. For those of you who are not inclined to rip up a sheet, some super chunky yarn will work just as well or you can buy t-shirt yarn precut which I would love to try but given its pricetag, probably not anytime soon. You could possibly even use fleece if the strips are thin enough.

You will need:
Fabric Yarn. I rolled up a double bed sized sheet and only used maybe 1/4 of it.
11.5mm hook
10mm hook
stitch marker

Starting with your 11.5mm hook
1: ch2, sc 8 times into the 1st ch, place marker

2: *2sc in the first st, sc in the next*, repeat around

3: *2sc in the first st, sc in the next 2 stitches*, repeat around

4: *2sc in the first stitch, sc in the next 3 stitches*, repeat around

change to the 10mm hook

5: sc back loop only in each stitch around

6: ch1, turn, sc in the first 15 stitches

7: repeat round 6

8: ch1, turn, 2sc in the 1st stitch, sc in the next 13 stitches, 2sc in the last stitch

9: ch1, turn, 2sc in the 1st stitch, sc in the next 15 stitches, 2sc in the last stitch

ch1, join to the other side

10: sc in each stitch around (20)

11: *sc2tg, sc in the next 3 stitches*, repeat around

12: *sc2tg, sc in the next 2 stitches*, repeat around

13: sc2tg the whole way around

14: sc in each stitch around

15: sc2tg twice, chain 8, sk one sc, sl st to the next. End off and tuck in end.

The best part about this is when it gets smelly, and we all know eventually it will, you can just chuck it in the washing machine, heck you could even pop it in a clothes dryer if you wanted to!
The loop at the end is to hook the bed to the cage, otherwise it might topple over, not that my girls seemed to mind too much!


Saturday, April 12, 2014

Ladybugs - A nail art tutorial


Good morning everyone!

Recently I discovered the wonderful fun of nail art! I've always loved painting my nails, but to date even tho my polish collection was impressive, the most outrageous thing Id ever done is paint them all differing colours.
One of my good friends posted me a box of bits to play with and I have to say, I am totally hooked. A lot of people on my facebook page have said they wish they knew how, have no idea how or cant do fun things because they are new to it all. Im here to say Nuh huh! Nail art for the most part, is EASY! It just requires a little practice. I had overwhelming requests for a tutorial on the ladybirds I had on last week, and so well, here it is.

The original image isnt the greatest, its the only one I took and by the time I decided to go ahead with the tutorial Id already worn them for a week and they were looking less then perfect. I really wanted to have this up earlier, but I've been out all week with a cold and haven't managed to blog a thing!

If this is something people would like to see regularly, please let me know. I'm more then happy to add up my designs when I do them. They won't be anything amazingly awesome, because hello, beginner here, but you know me, firm believer in sharing knowledge regardless of skill level. Everyone can learn from someone else!


So lets get started. These are the supplies I used. Polish remover, a base and top coat, black, white, red and green, a thin brush, a dotting tool and my handy dandy remover pen (best invention ever!!)


Start with a base coat. I used Ulta3 for this.


Do one coat of white, this will help your green pop if it isnt quite opaque enough. I used BYS white from the white/red duo, which I picked up in Kmart for 50 cents! Bargain!


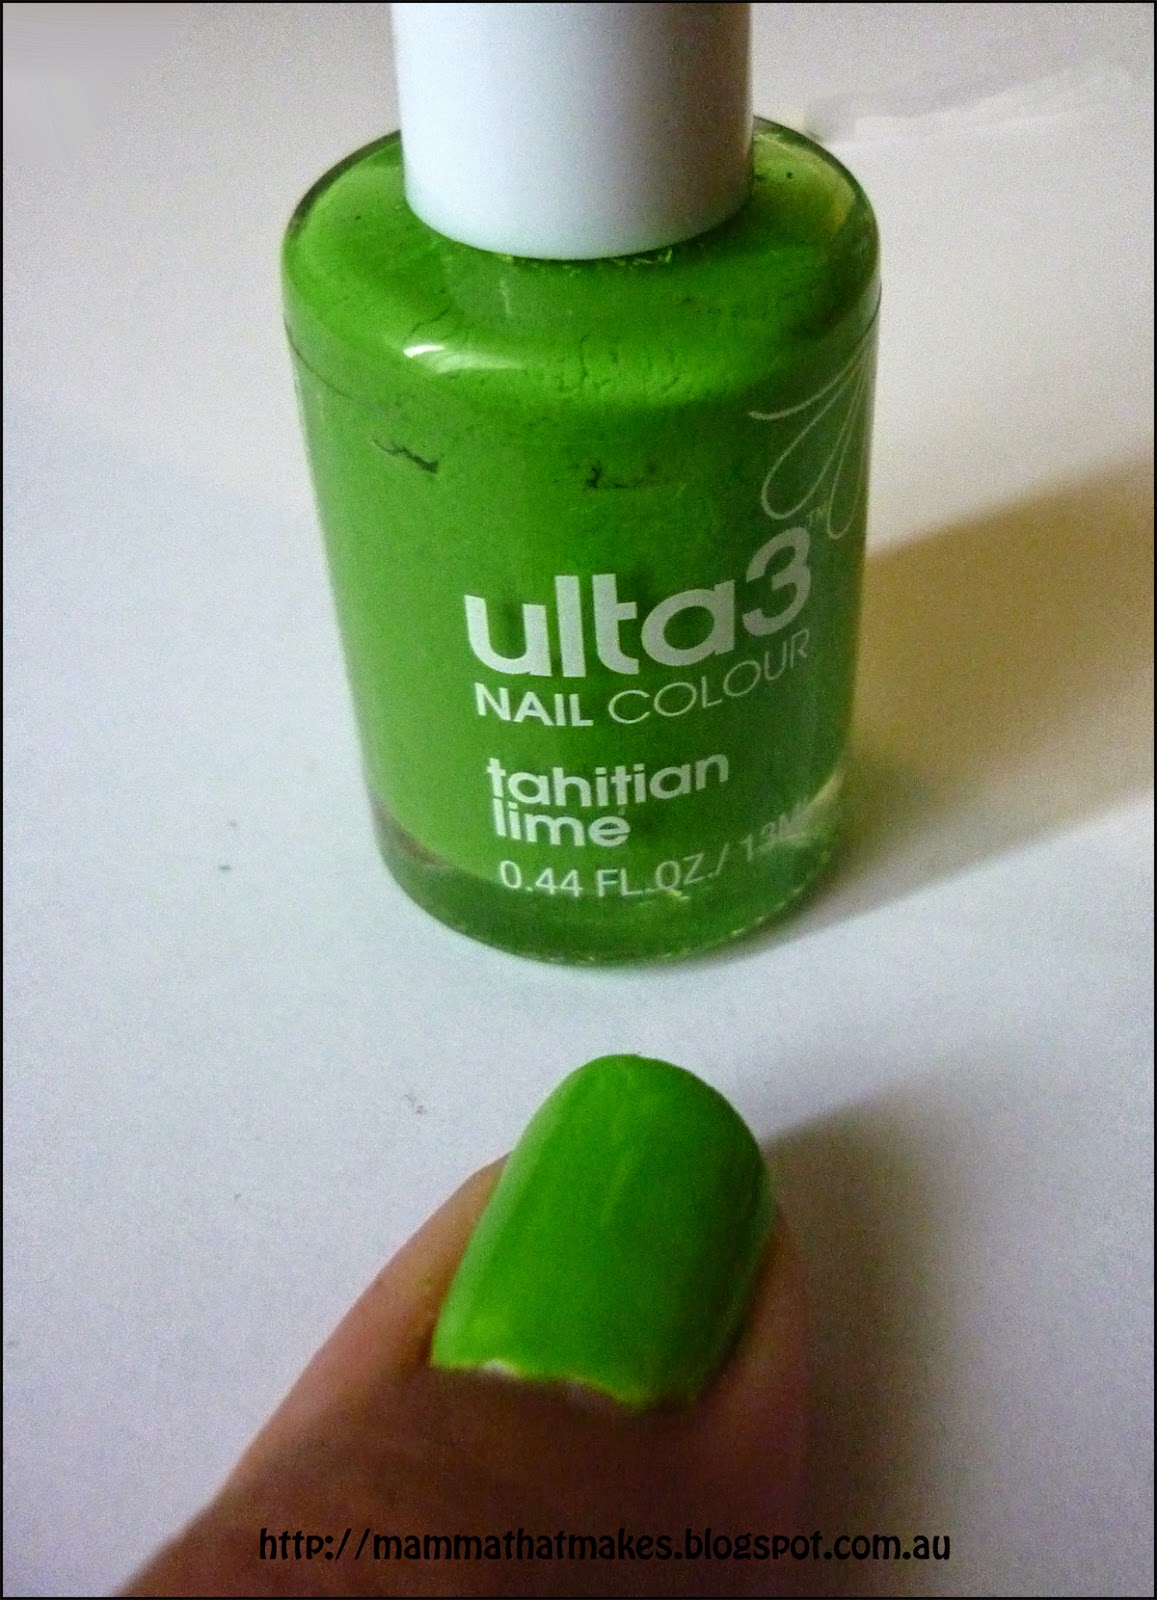
One coat of green. I used Ulta3's Tahitian lime.


I didn't have a pastel green colour, so I mixed some of the Tahitian lime with a little white to make one. We'll be using this for the leaf veins.


Using your brush and the green we just mixed paint on one stripe across your nail, for the leaves main vein. I used different directions on each nail.


Add the rest of the leaf veins using your brush, starting from the middle line and dragging the brush outwards.


Add a large red dot for the ladybugs body. I actually just dotted this on with the end of the brush. The red I used has a glittery look to it, and is a Revlon polish, but the bottle is so worn there are no other details. Its one Ive had since I was a teen.


Using the larger end of the dotting tool add the head with black. I did 2 dots super close to each other and used the end of the tool to join them.


Using the smaller end of the dotting tool put some little black spots on the ladybug. I did 4 on some, and 3 on others, depending on how big its body was.

Using white, dot on the eyes with the smaller end of the dotting tool. Now, rather then trying to re-dot again with an even smaller black, I found if I pushed the white dots on with a little force then when I lifted it up, the black from the layer below showed through in the very centre of the white dot. Of course you could also gently add black dots to the top if you have a small enough tool or toothpick.

Then just a top coat once its all dried. For that I used Seche Vite Fast dry top coat which I love! Then just give them a bit of a clean up with a cotton bud or remover pen, or even a brush in polish remover, whichever way you like to roll.

Thats it, repeat for the rest of your nails. Told you it was easy!

Sunday, April 6, 2014

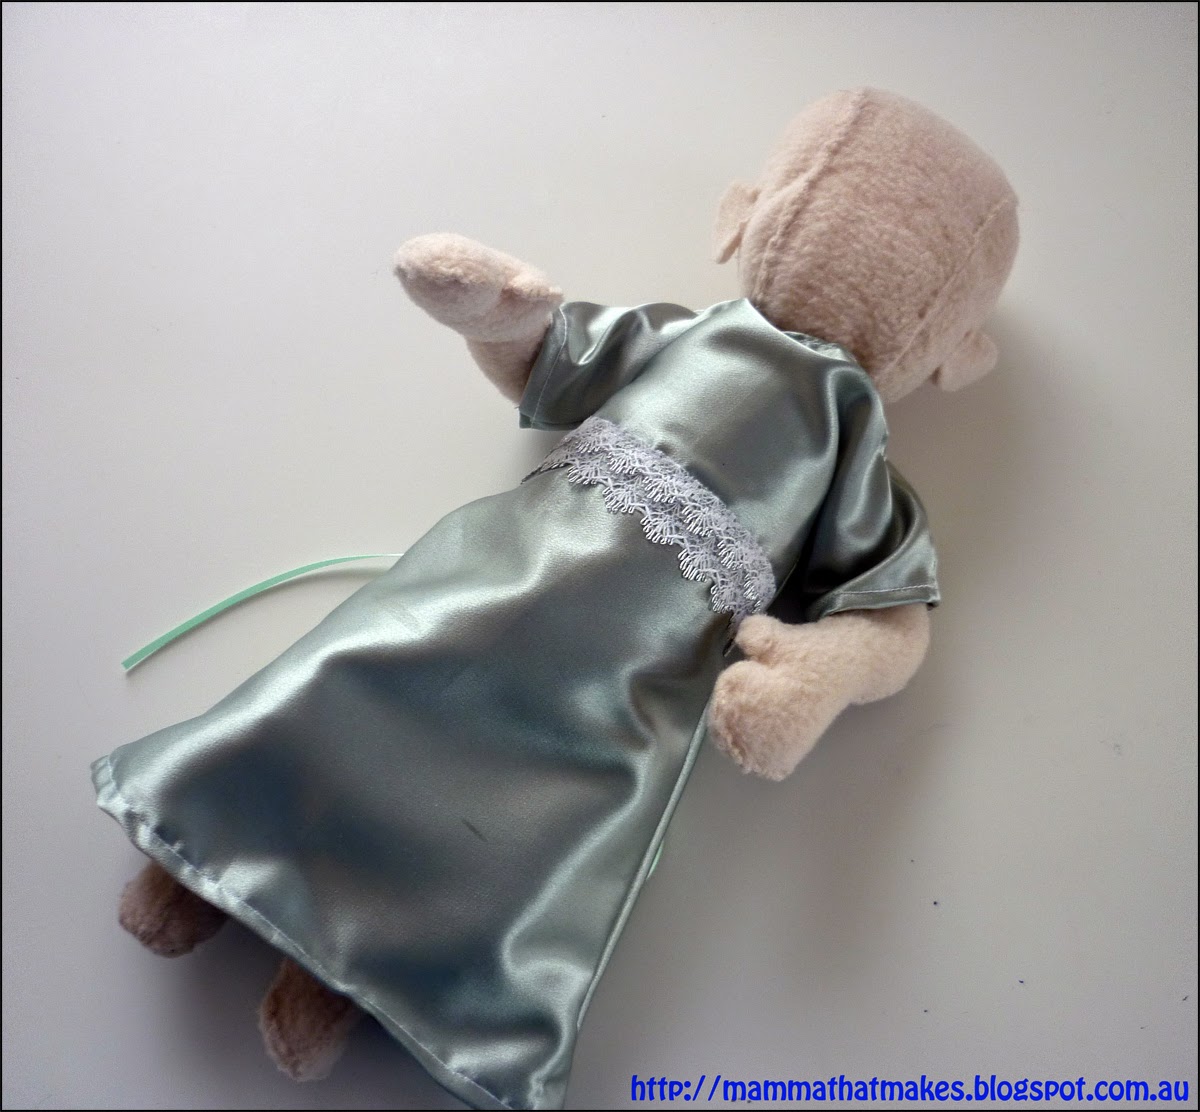
Burial Gown Free Sewing Pattern for Preemies - Harper Gown


Good afternoon all.

Today I have something a little different for you all. Lately Ive been browsing burial gowns trying to find a pattern that was simple and easy and free. One that opened at the back, didn't involve an overlocker and didn't have these tiny little arm holes which I am sure would be a pain to actually use.

So, I sat down and drafted my own up.

Like Ive said in previous sewing tutorials, I am in no way, shape or form amazing at sewing. I am self taught and my method is to throw some stuff around and hope for the best.

So, this pattern may not be outstanding, and it may not be as amazing as some I have seen recently, but it IS simple, easy, fast and lets face it, if I can put it together, anyone can! and most importantly its free! It is also very easy to customise. It features an open back, and has wide sleeves which will make putting on baby so much easier.
The doll I have it on is 24 weeks gestation, so Id say it will fit around 22-26 weeks give or take. Again, very simple to make it larger.

I also want to apologise in advance for the photos. Every time Ive had a spare minute to work on this has been either a rainy day or late at night. So excuse the cruddy images :)

You will need:
Some fabric. I have used cotttons, flannels and satins so far all with success.
Decorative ribbon/lace trim (about 15cm long)
Thin Satin Ribbon for back ties (15cm each)
Scissors, thread, pins and of course a sewing machine.

Grab the pattern here:


Cut out the 3 pieces of material you will need to make the gown, one on the fold for the front and 2 pieces (not on the fold) for the back, using the lines marked on the pattern. (back piece is slightly wider to allow for hems)


Pin the decorative ribbon or lace trim to the front of the gown and stitch it on. As you can see, I folded my piece in half first, as I thought it looked better then the single strand.


Next, with right sides facing, sew the back and front pieces together at the shoulder seams.


Hem the edge of the sleeves.


Hem the back opening.


And then do the neck opening


With the right sides together, pin the ribbon ties in place, with the majority of the ribbon facing inwards, then just sew up the sides of the gown.


The last step is to hem the bottom of the gown and that's it, your done! Told you it was simple.
I'll be adding photos of the ones I make on my FaceBook Page so if you want to see what materials/colours/trims ect I use by all means pop on over and have a look.

I hope this helps everyone that was looking for a free and easy sewing pattern. If you have any questions I'll try my best to answer them, but like I said before, Im not terribly great at sewing and if you have a better way of doing this by all means.

Also, if I had a pair of pinking shears Id have used them for all the edges to stop any fraying. Unfortunately I don't own a pair, nor do I have an overlocker (serger) but if you do, then I'd go with them to make the job a little neater and easier.