
So I had such great feedback from the last one I figured what the hey! Here is another nail art tutorial. Again, super basic, because hey Im only a beginner myself. Hope you enjoy! Remember to wait for the nail to completely dry before adding more parts or the top coat.

For this design I used Ulta3 base coat not pictured), Seche Vite Fast dry top coat, MUD in baby blue, Diva in Cheeky, Colour Club in Antiquated and a black striper. I also used a thin brush, a thicker brush for mixing colours and a dotting tool. Put your base coat on first and wait for it to dry.

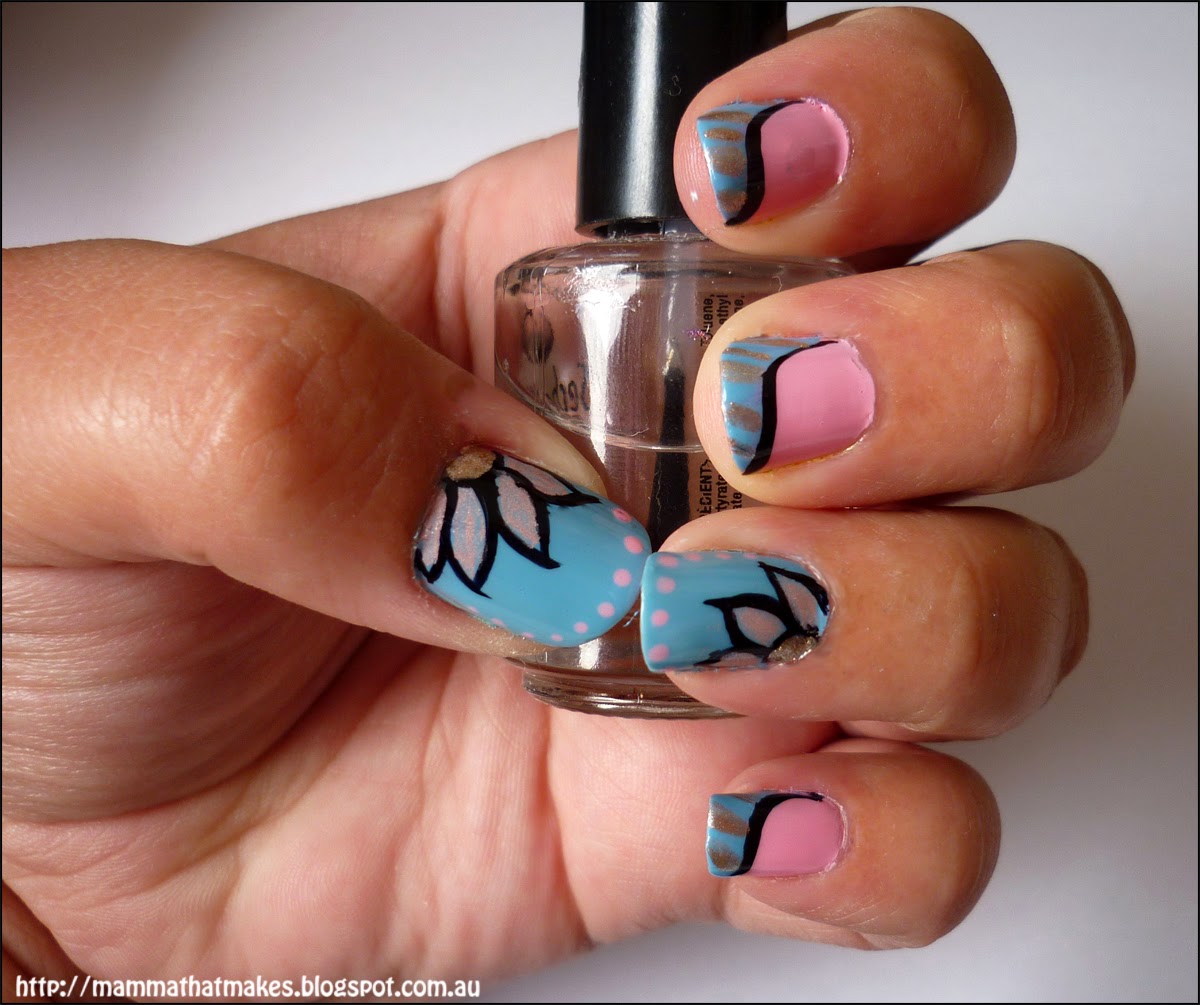
Start by painting your thumb and index finger in baby blue, and your remaining 3 fingers in cheeky.


On all pink fingers, using your striping brush and black polish create wavy line that starts in the top corner of the nail and finishes down the side.

Fill in the top section with baby blue.


On the baby blue nails, start by painting a black arch in the bottom corner.

Add the first petal.

Add a second petal.

Add a third and/or fourth petal, depending on petal and nail size.

Using Antiquated fill in the centre of the flower.

Fill in the petals.
For this colour I mixed some cheeky with some antiquated to give me a pinker shimmer.
For this colour I mixed some cheeky with some antiquated to give me a pinker shimmer.

Using a dotting tool, place dots along the top of the nail and working down the side, let the dots get smaller as you go.

On the blue section of the pink and blue nails, use antiquated to make some stripes.
Clean up your edges and apply top coat once everything is dry.
What a impressive talent you show in this site.. very cute these nail art.. i like it!! great job, keep it up!!
ReplyDelete